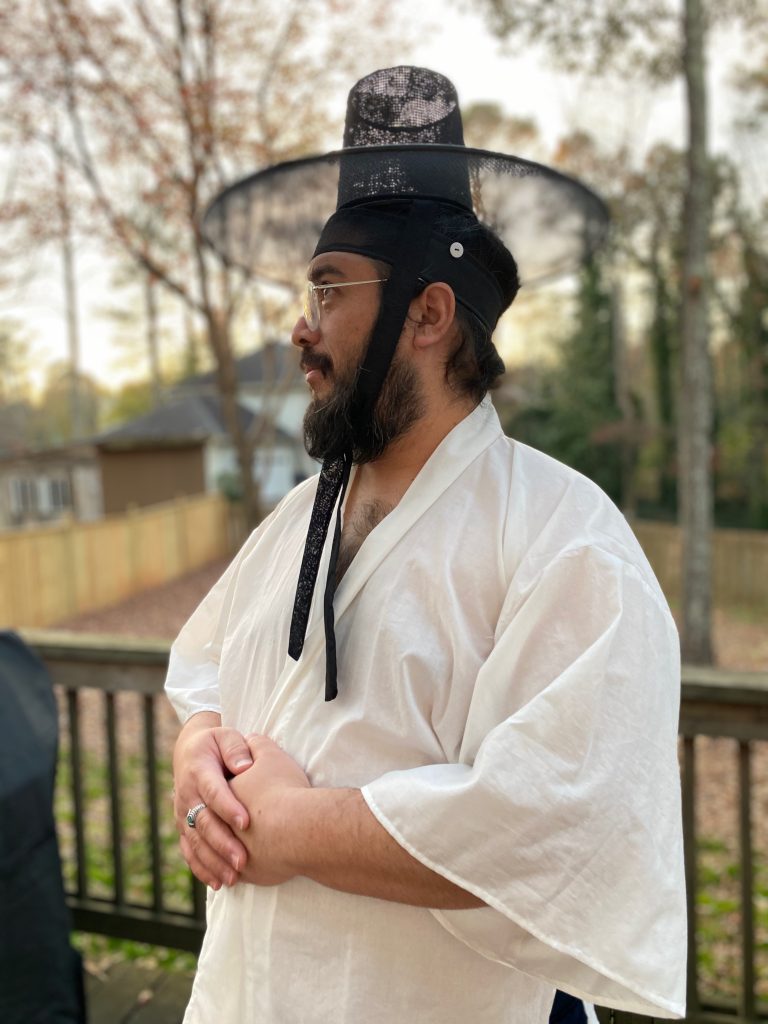
In my previous post about the gat, I noted that the reproductions you can buy are the later, cylindrical shape. I wanted to see if I could make the round crown shape myself.
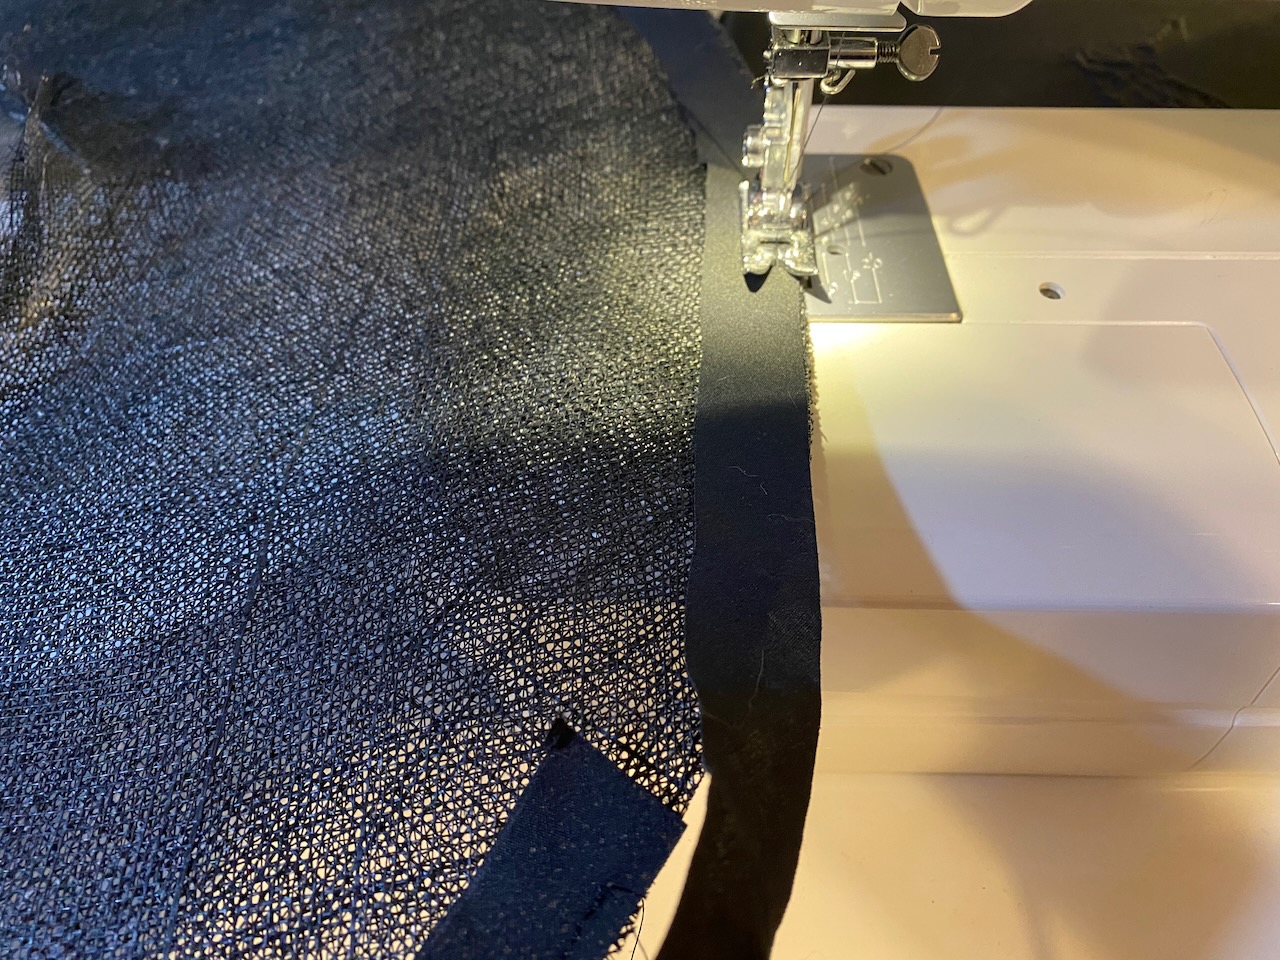
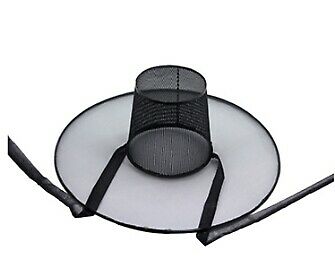
The traditional method of making a gat is far beyond my ability, so anything I did would have to be an approximation. The shape, color, and transparent mesh look were what I was primarily trying to achieve. After some searching and experimenting with materials, I settled on using sinamay, a woven fiber material used for modern millinery. I built the crown on a wooden form and made the brim flat, then sewed them together and added a cloth binding over the join. I added hooks just like I did for my purchased gat to attach the gatkkeun.
I stiffened the fabric with Mod Podge and thinned wallpaper paste, which did a pretty good job but didn’t hold up well to humidity. I may try adding another type of stiffener to make it more water-resistant. I would also like to try making a more rounded brim next time to improve rigidity and get closer to some of the shapes seen in the portraits.
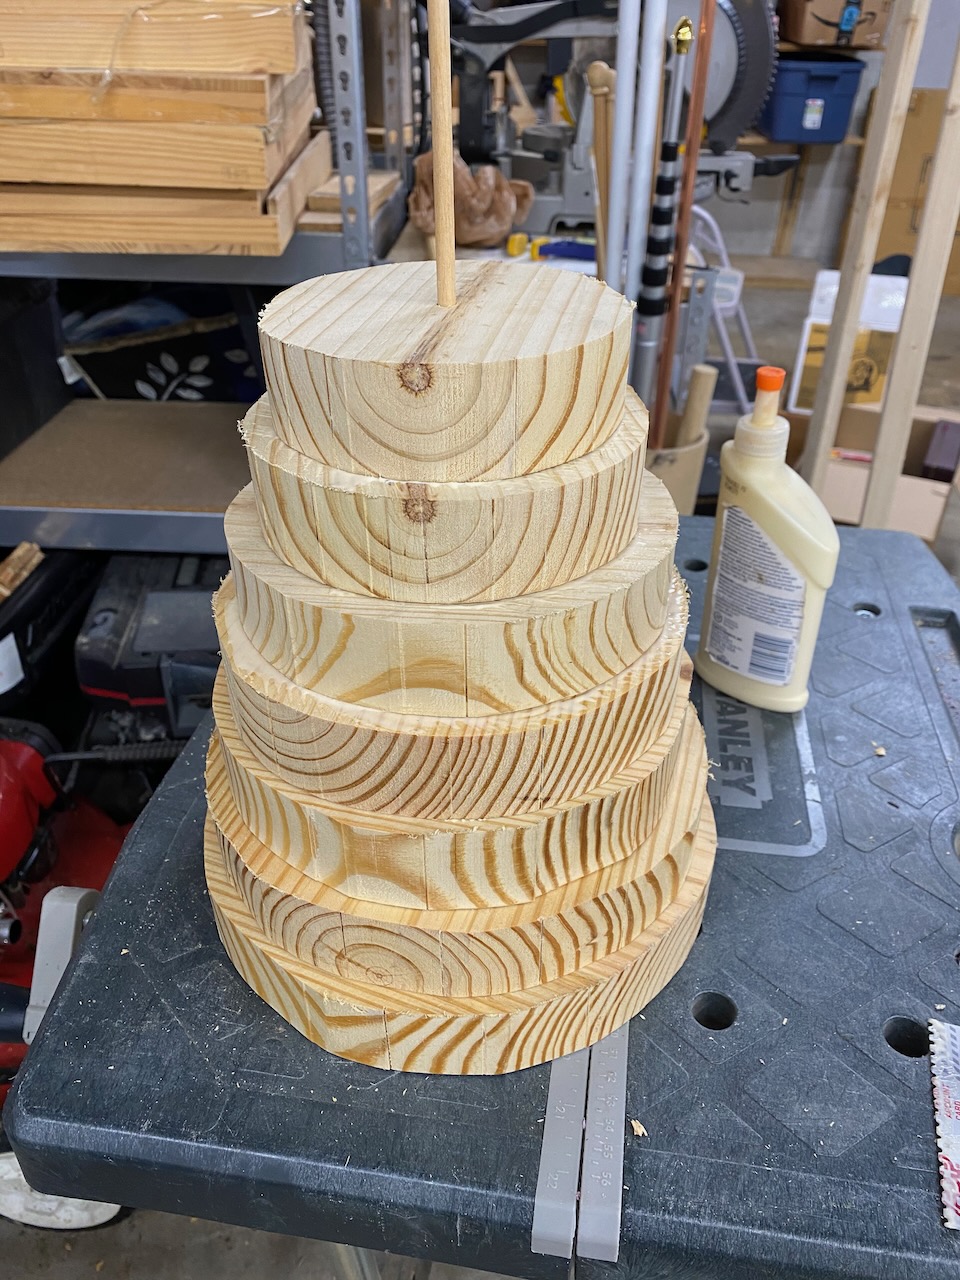
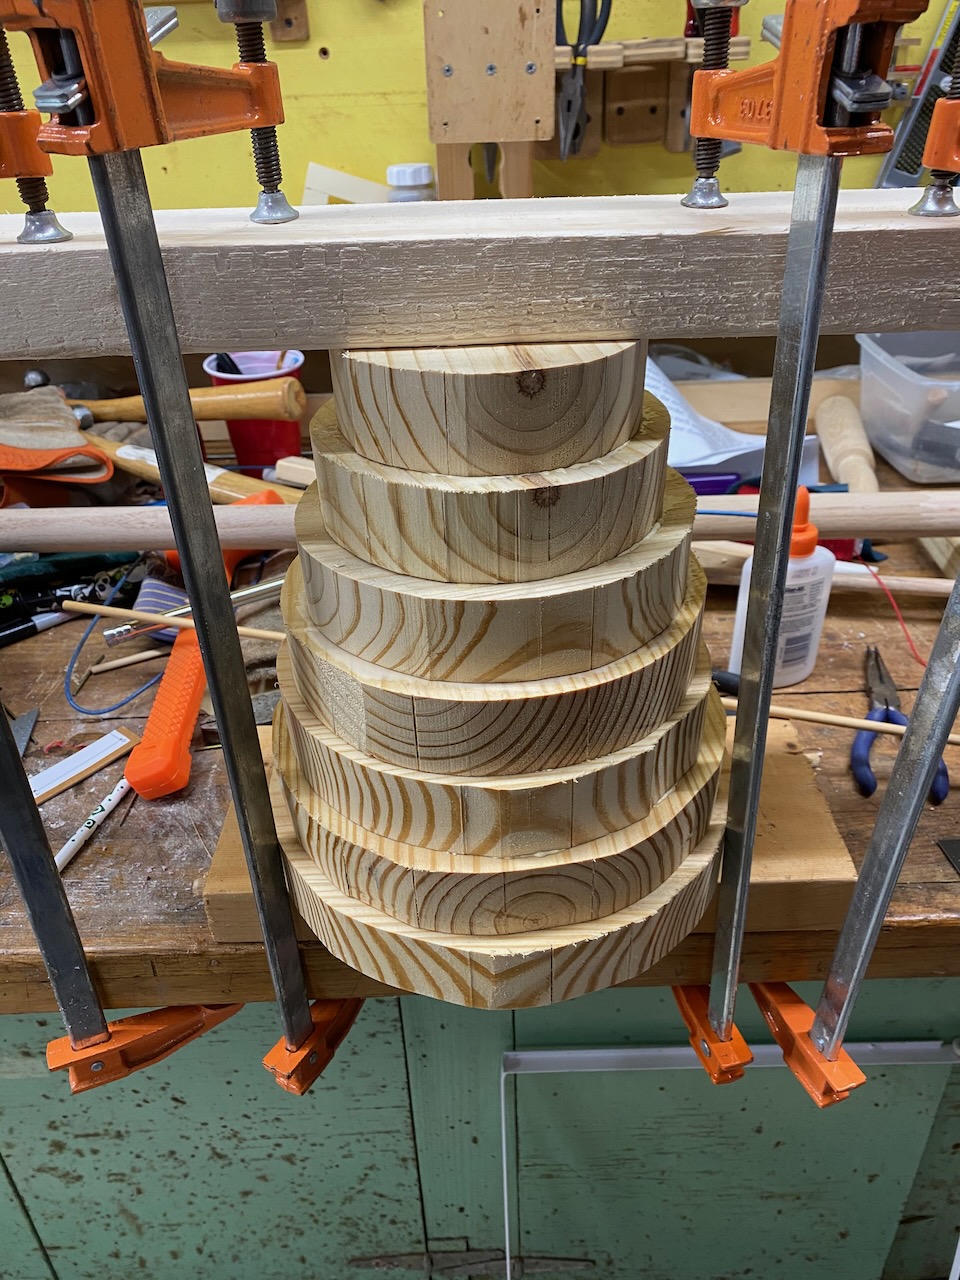
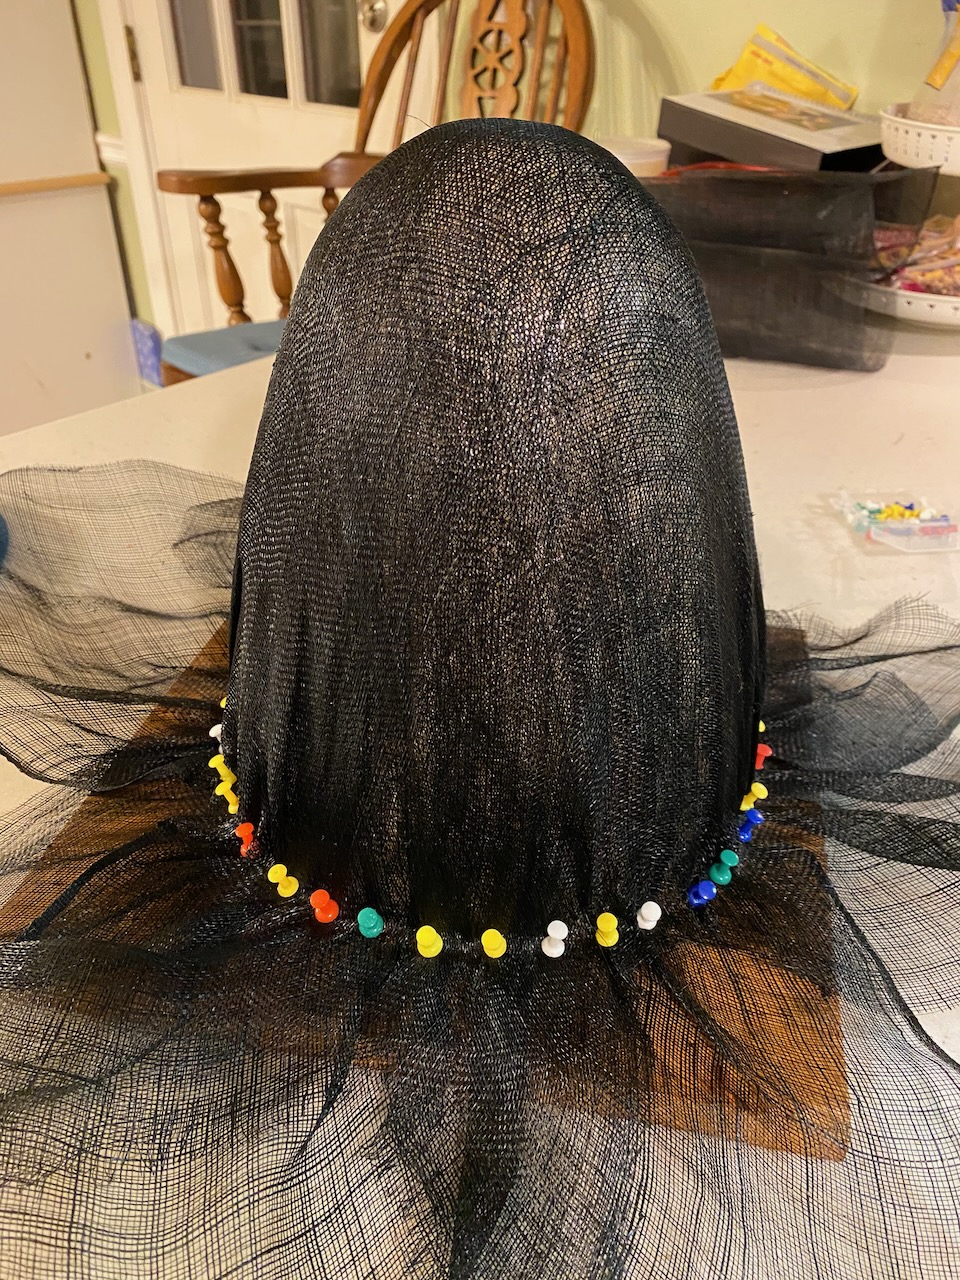
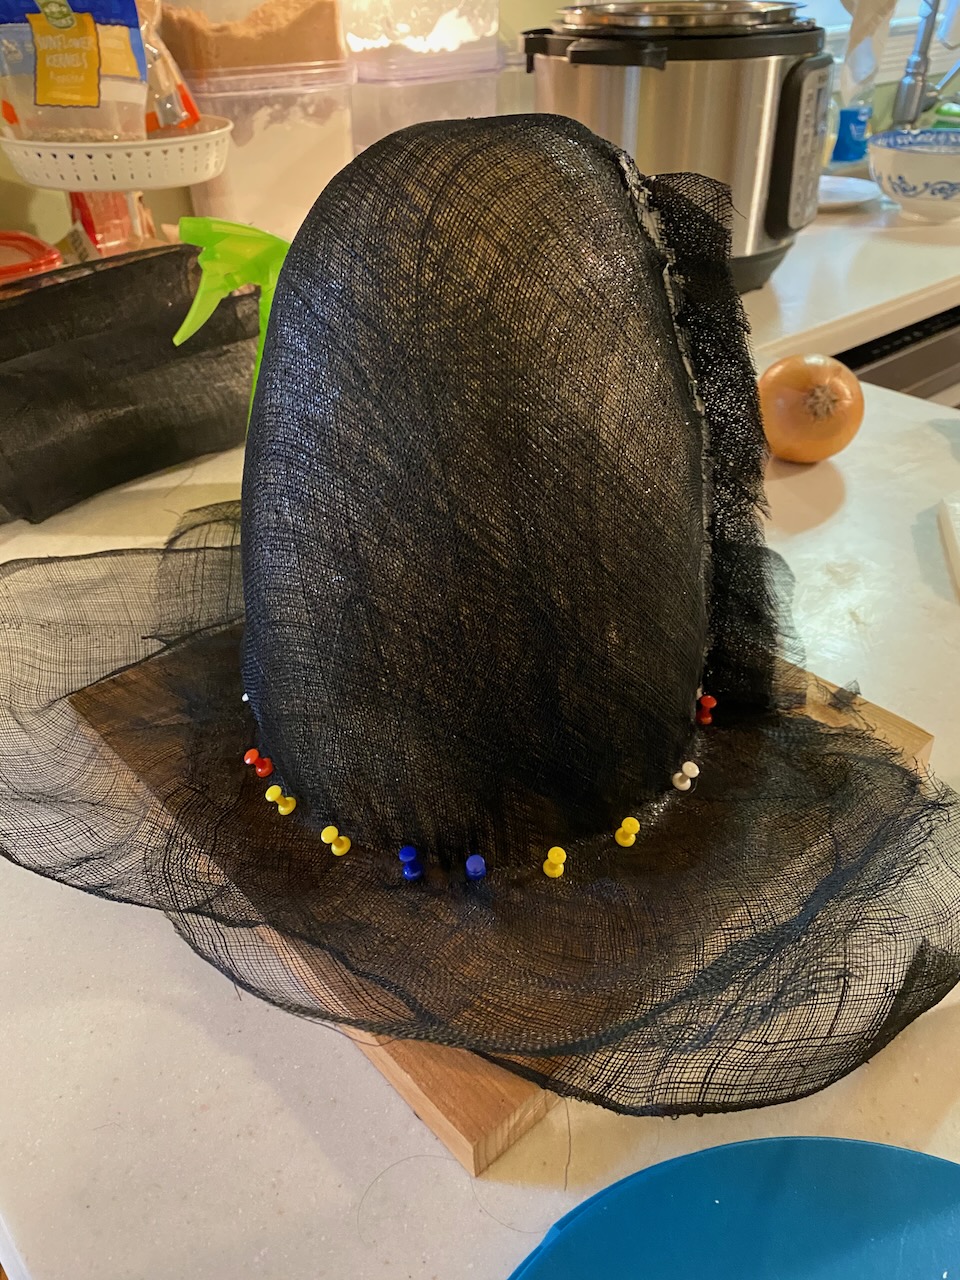
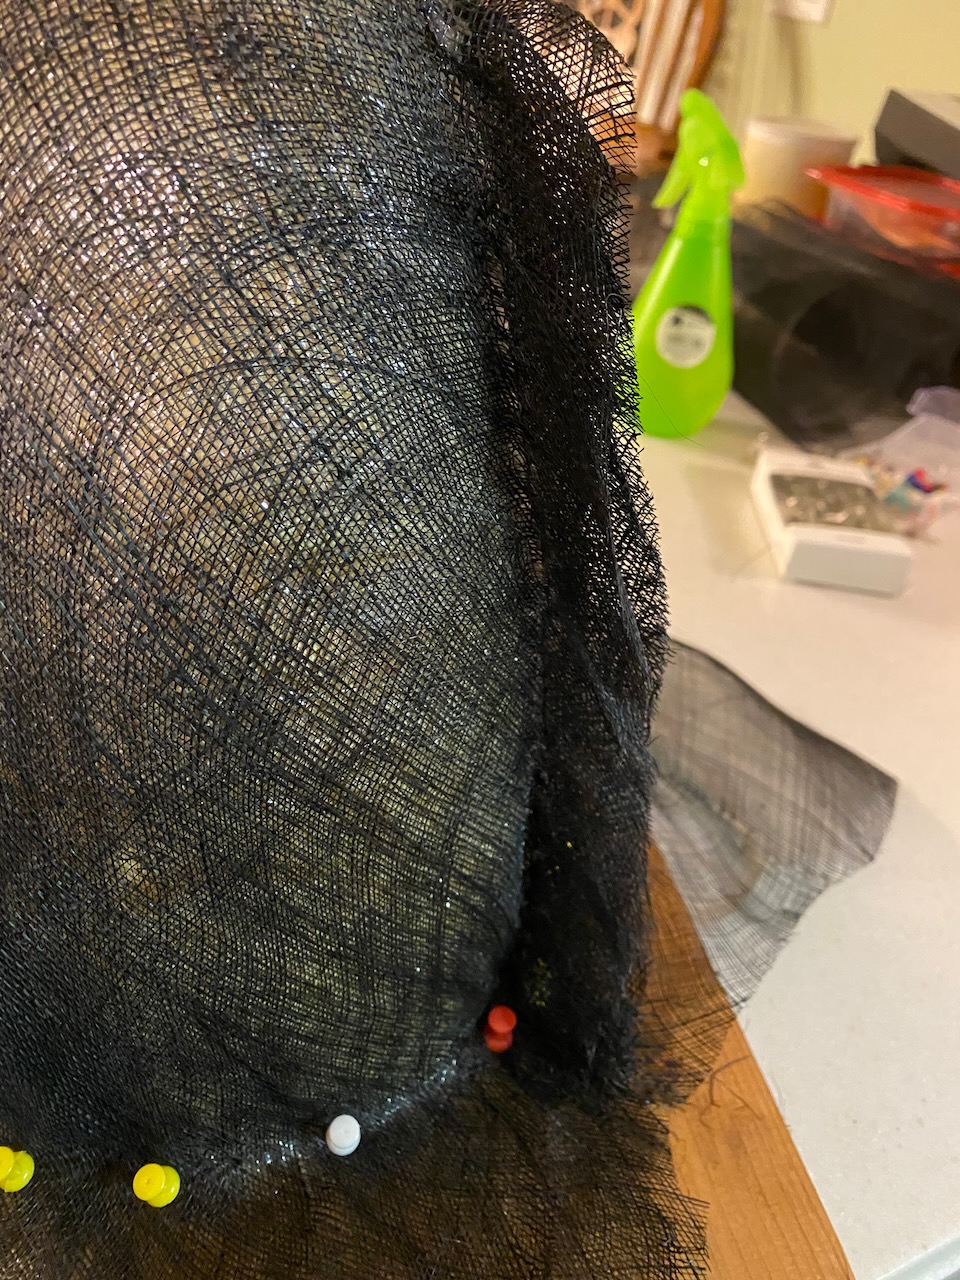
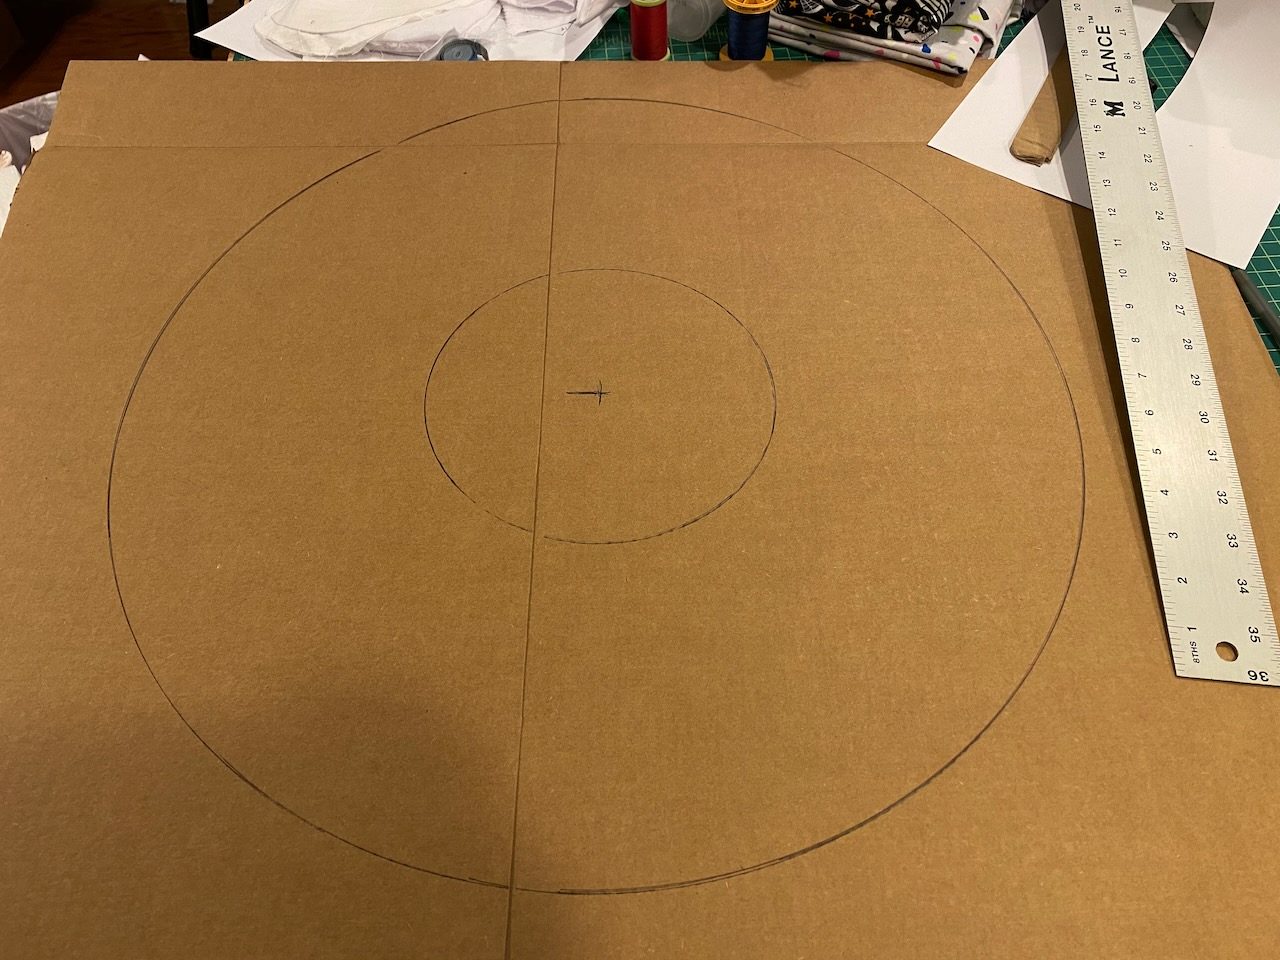
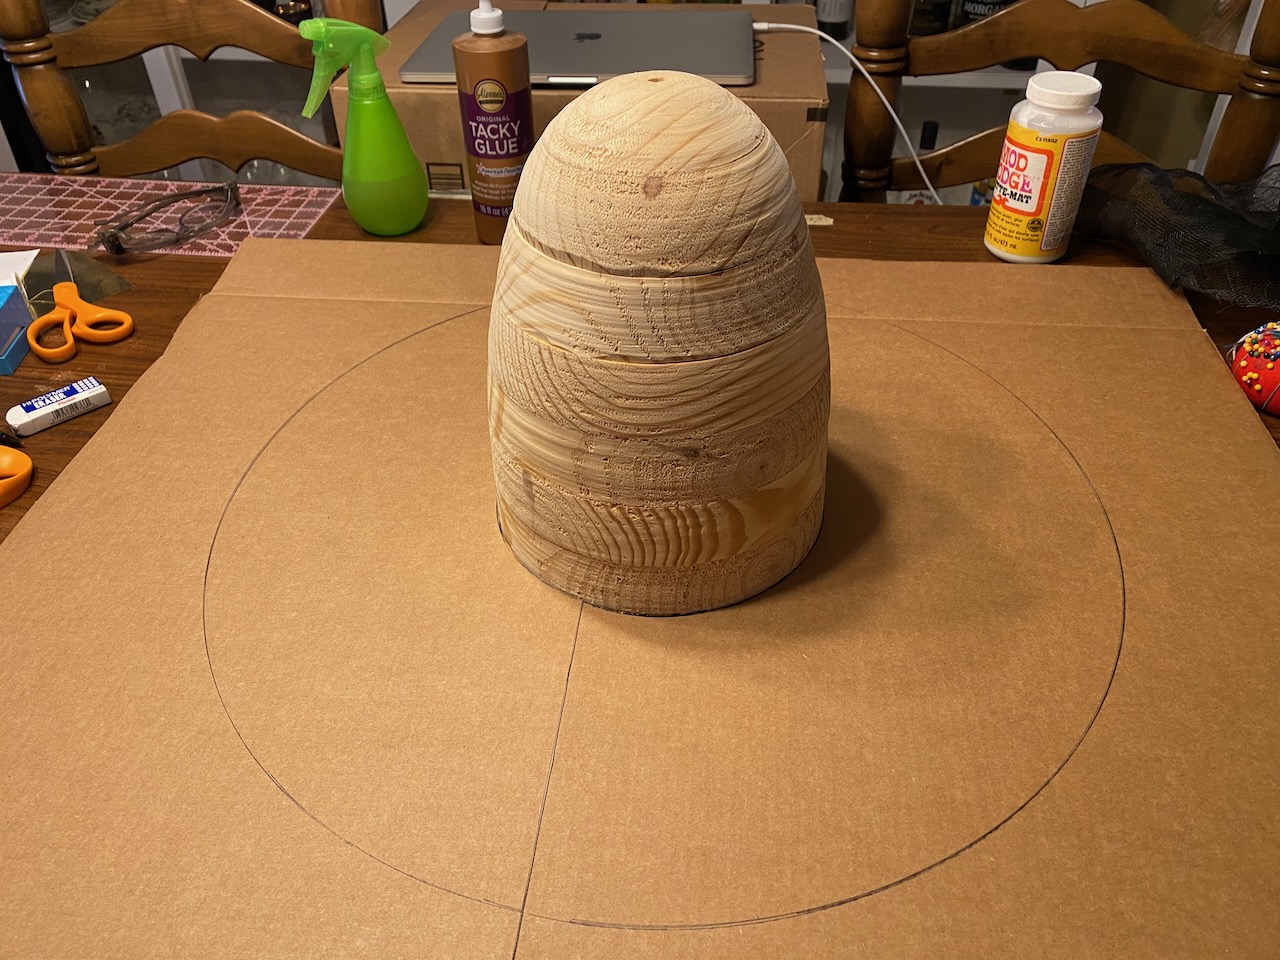
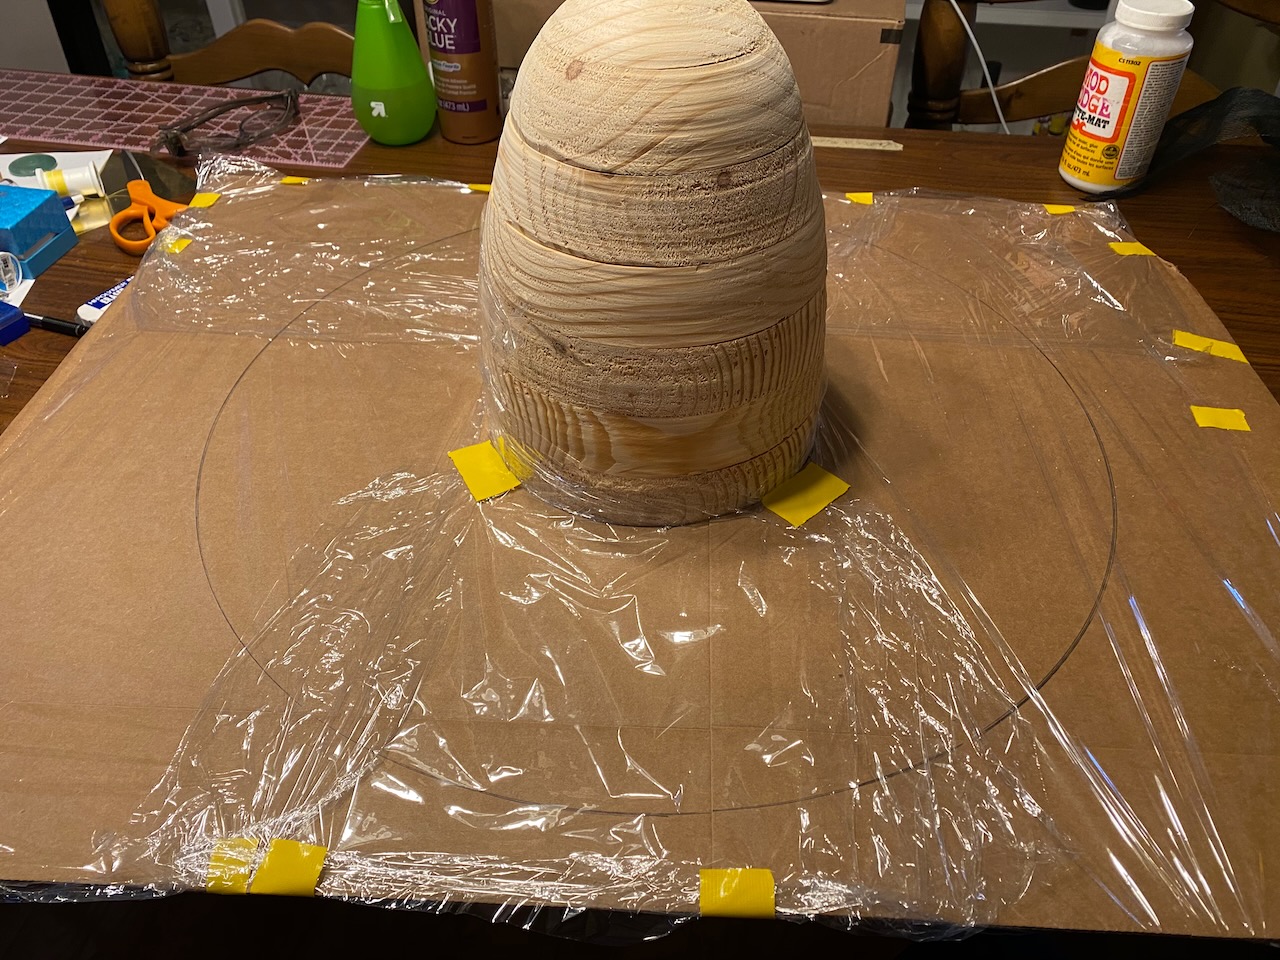
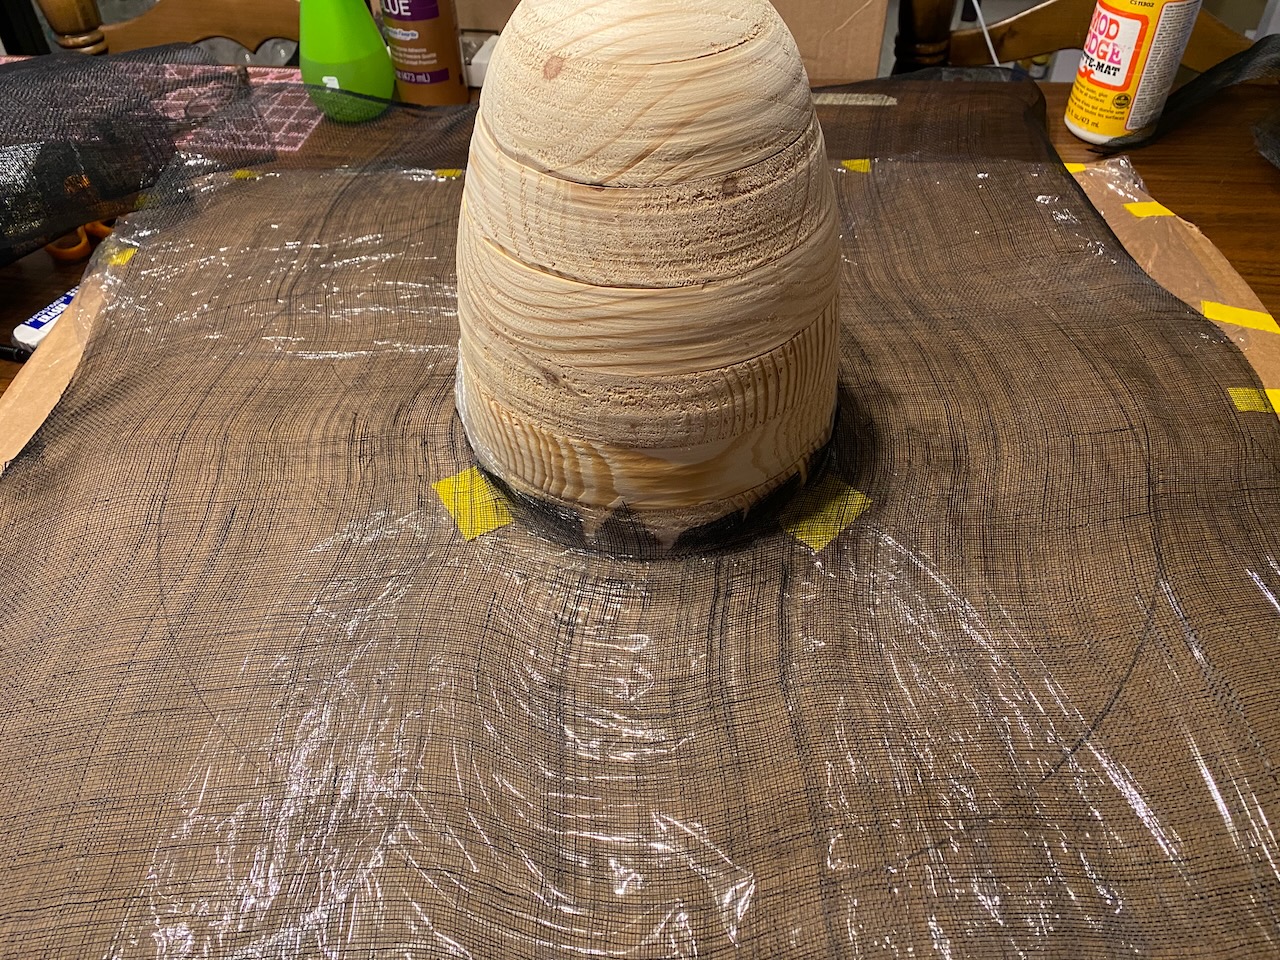
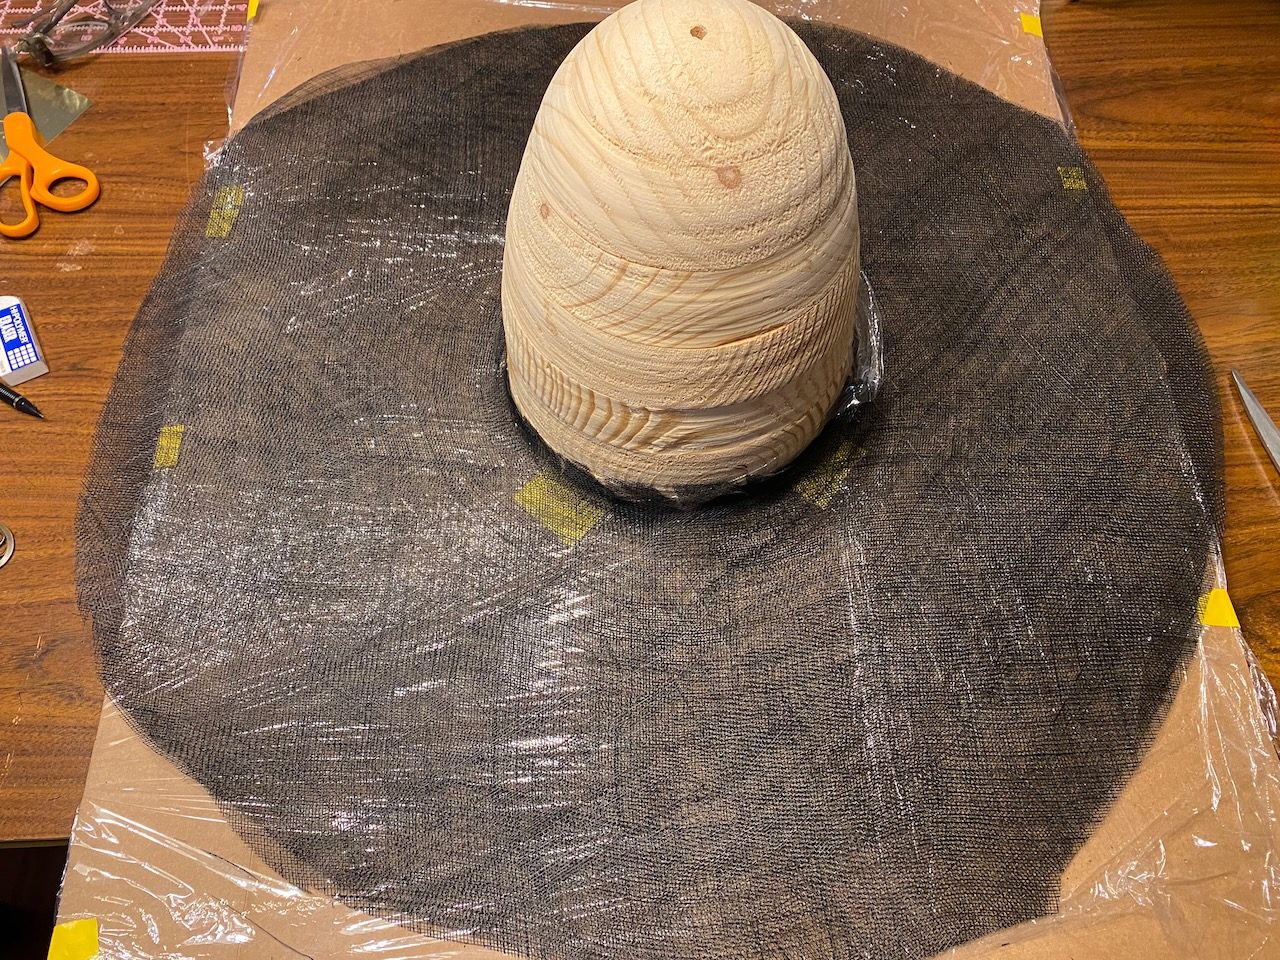
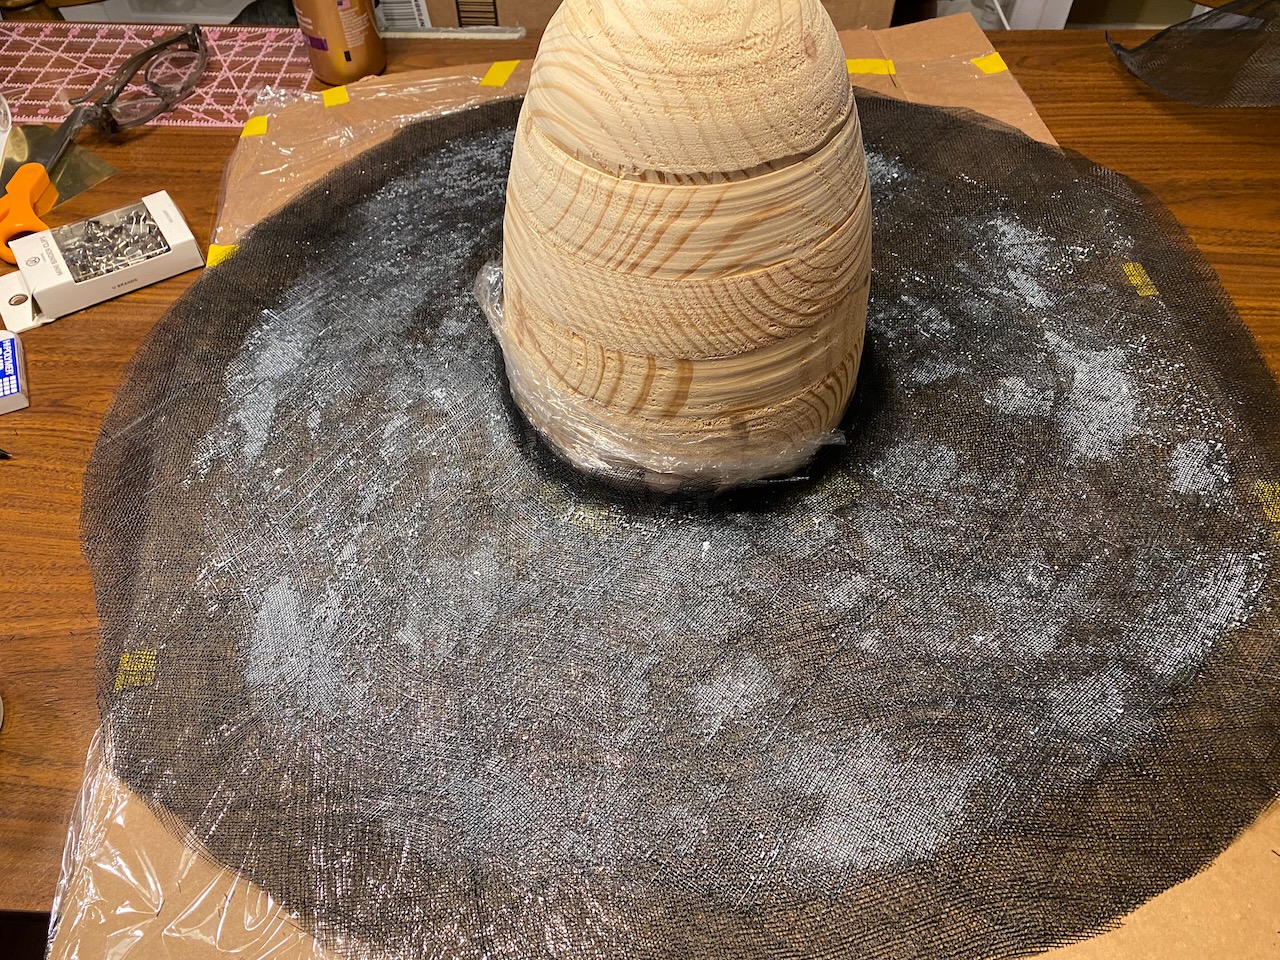
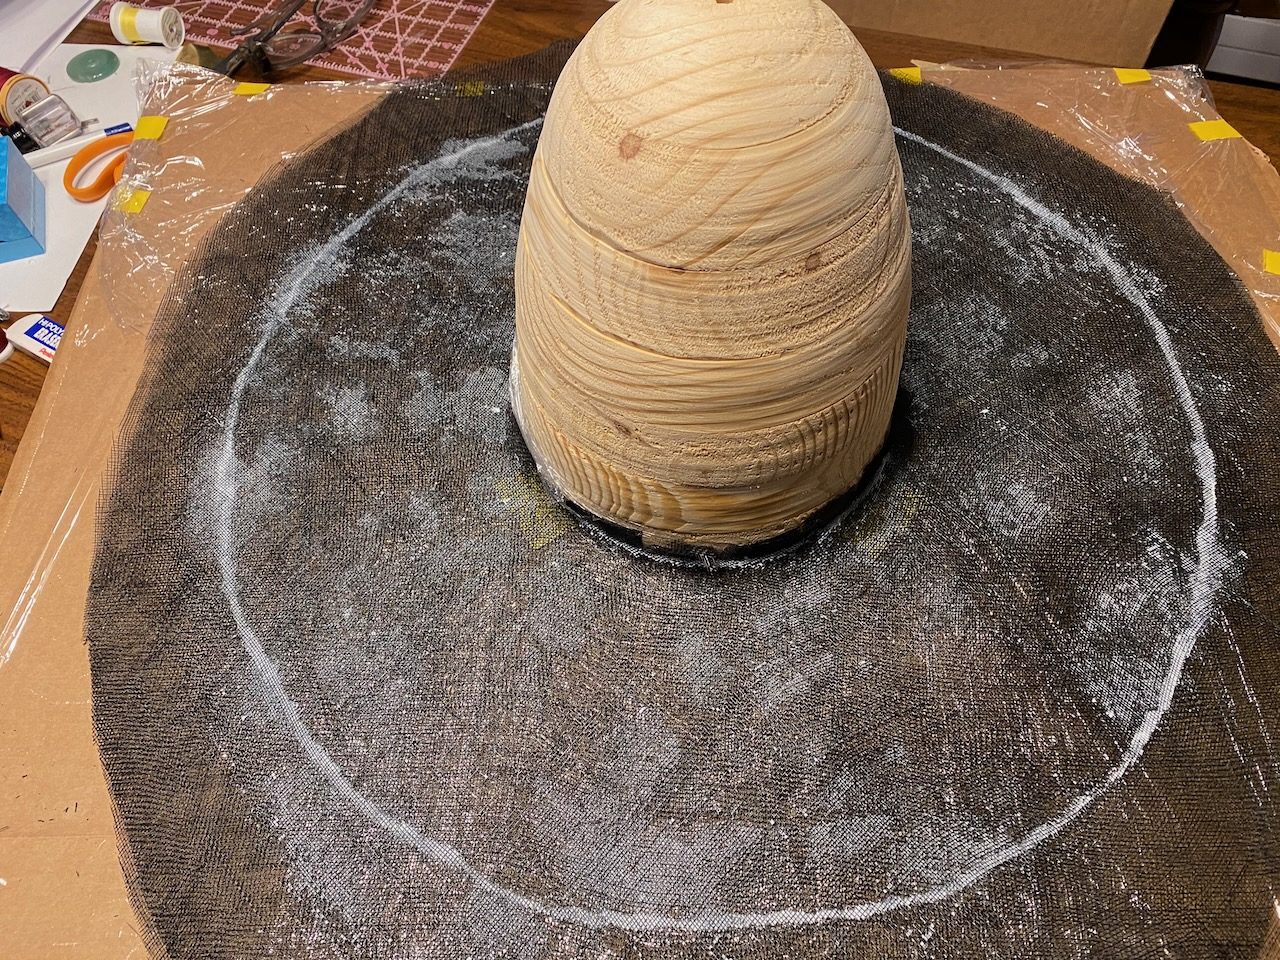
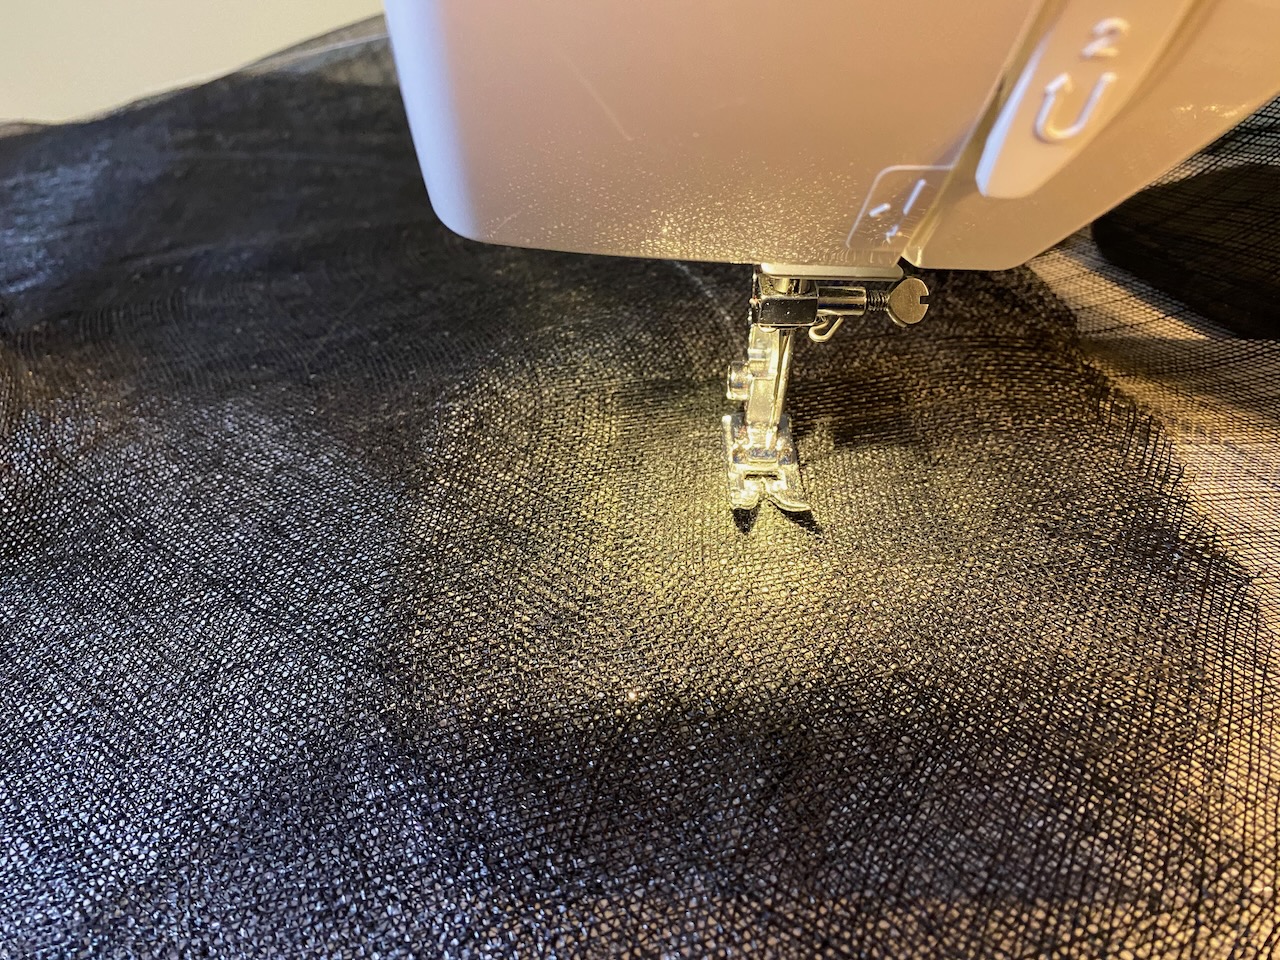
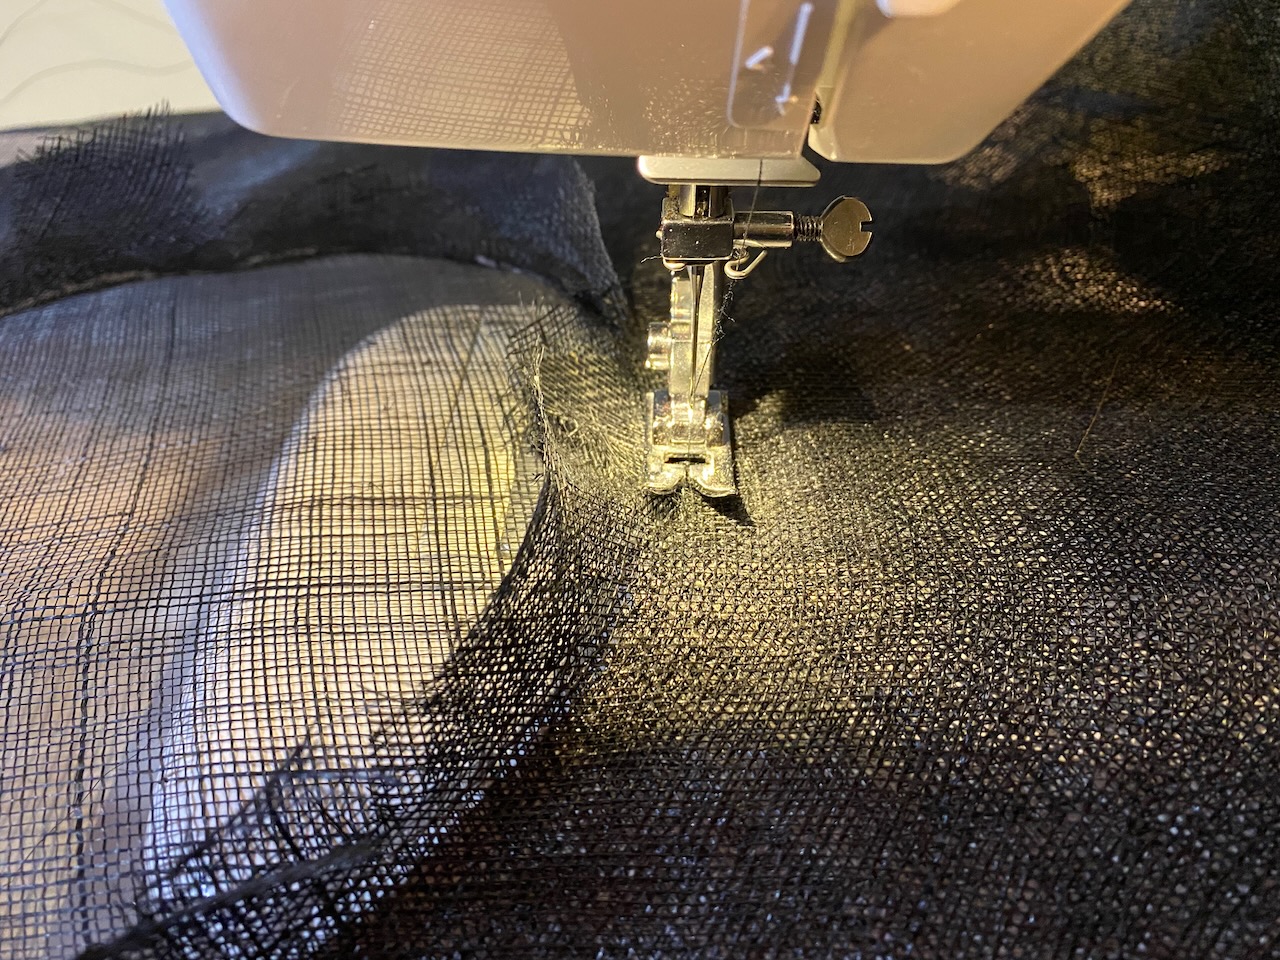
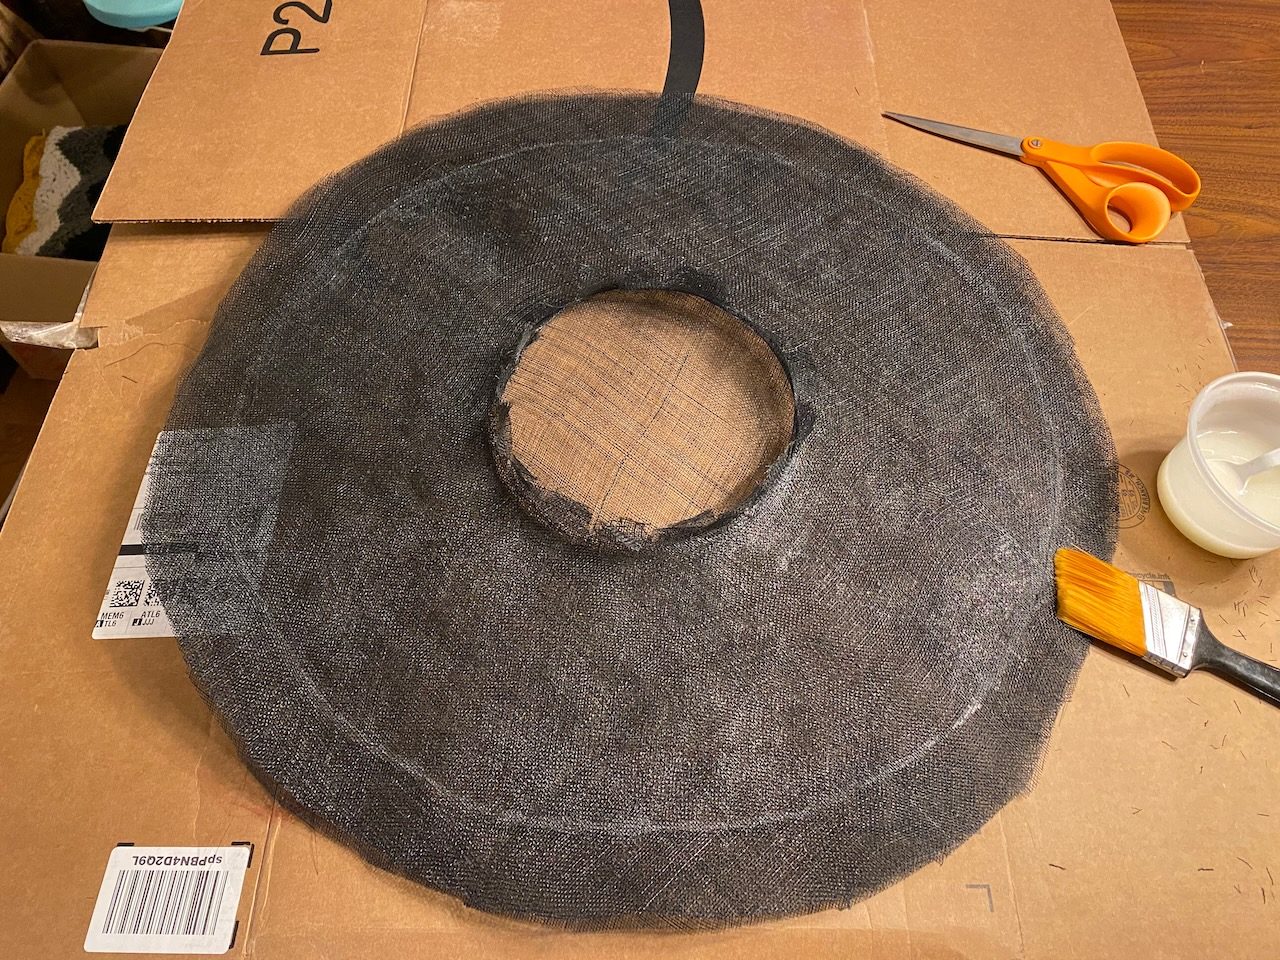
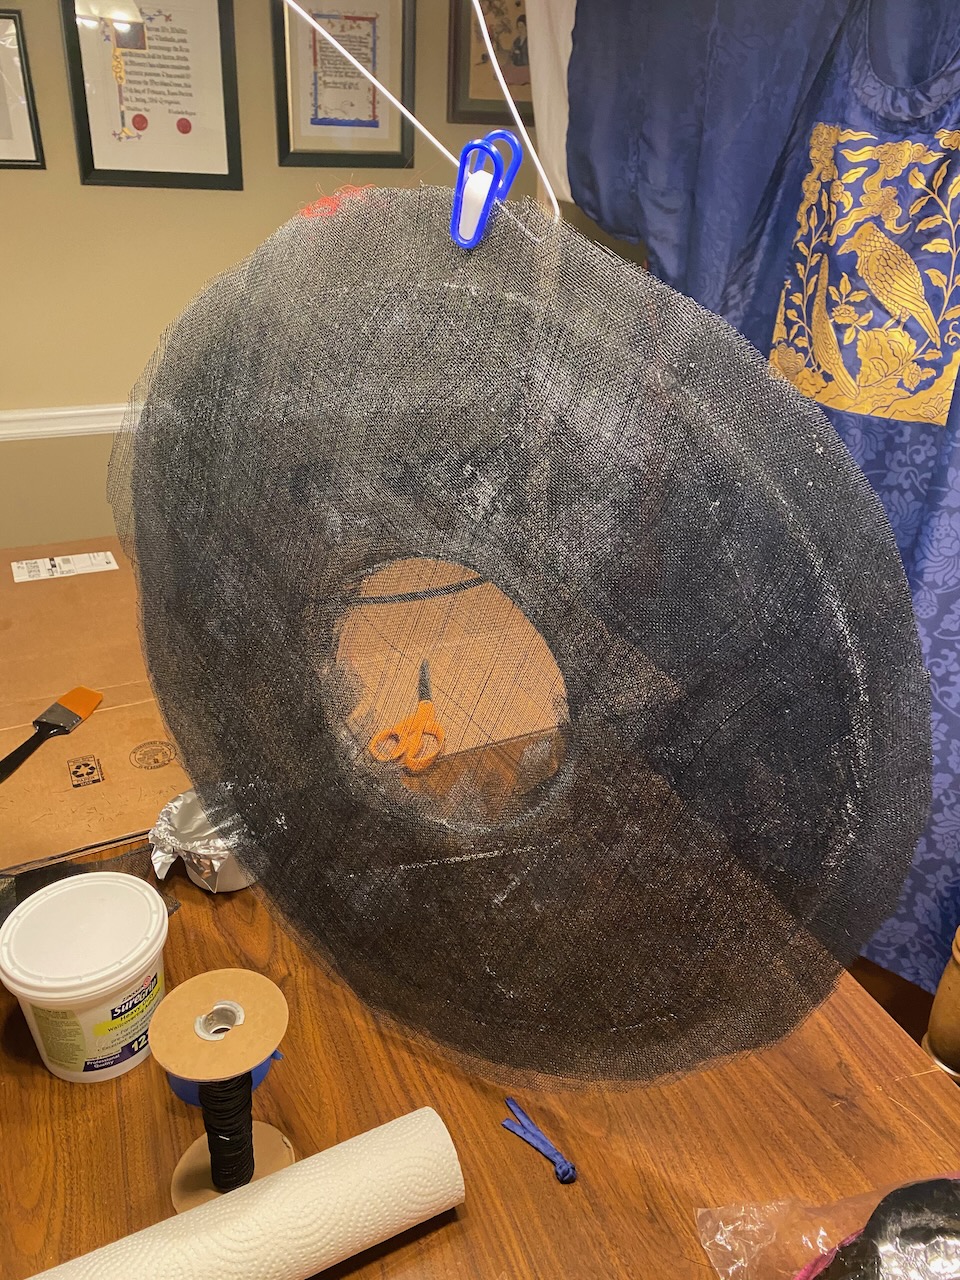
The form for the crown started as a serious of wooden discs.The discs were glued together and then turned on a lathe to get the right shape.At first I tried simply stretching the cloth over the form, but there was too much at the base to get it smooth.To take up the extra bulk, I added a seam at the back of the crown.I added more layers to get the right amount of opacity, then sewed all the layers together in the back and added the stiffener.The brim started with an oversized circle drawn on a piece of cardboard.The crown form was placed in the center of the circle.Plastic wrap on the cardboard to keep the stiffener from soaking into it.The first layer of sinamay laid out.Two more layers were added, stiffened, and trimmed to a (still oversized) circle.More stiffener was added.A line of glue around the edge to further stabilize it.Sewing through the glued edge to lock the layers together.Sewing through the layers at the inside edge.The nearly completed brim.Hanging to let the stiffener dry.Adding a fabric edge to the trimmed brim.After assembling the crown and brim, it looked a bit too tall.The final product, with a shortened crown.
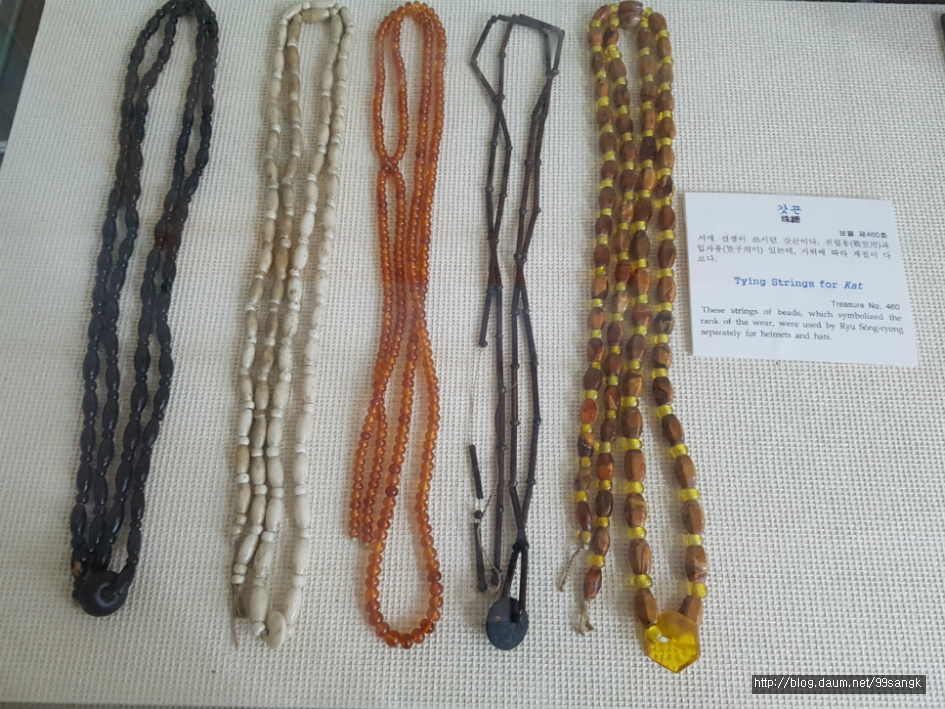
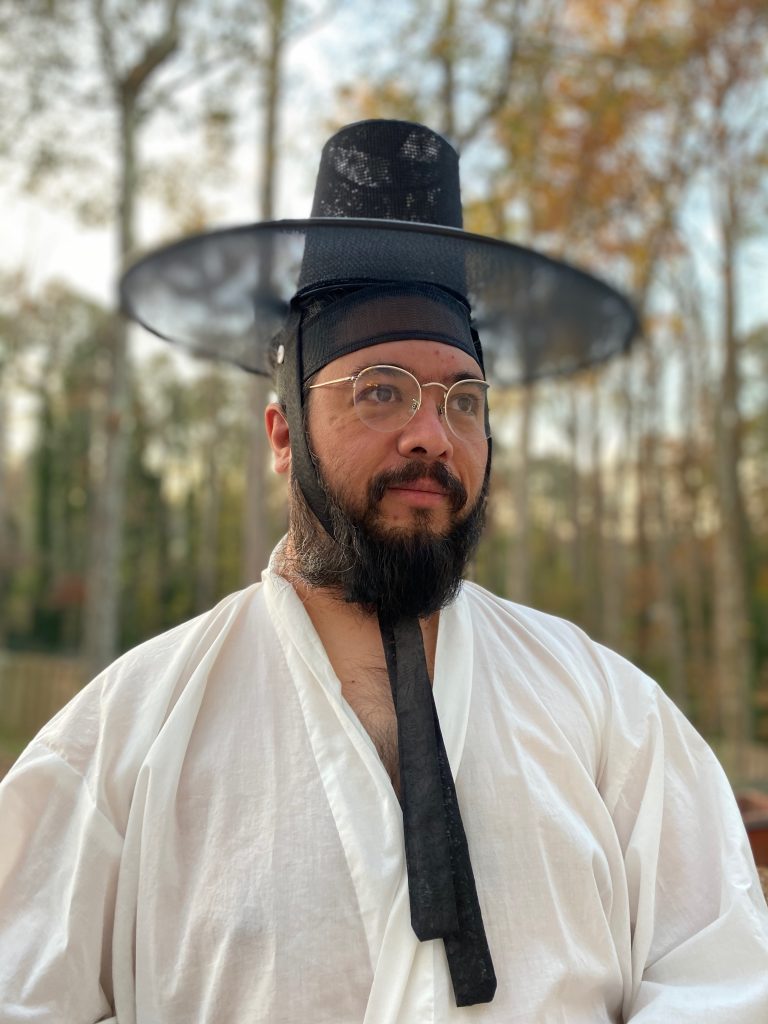
The tie holding the gat to the head is called gatkkeun (갓끈). These straps were sometimes decorated with beads to help weight the hat down, and these beaded strings eventually became a separate article. Materials mentioned as being used for these beads include gold, jade, agate, amber, coral, lapis lazuli, ivory, and bamboo.
The gatkkeun varied in length based on wealth and fashion, sometimes becoming quite long or being held together partway down by a connecting bead. A variety of forms can be seen in the examples owned by Ryu Seong-Ryong. A common form is alternating oblong and round beads with a larger central bead. The alternating long narrow bead (made from wood, bamboo, or other materials) and round bead form is also seen often throughout the Joseon period. The form of small beads all the same size seems less common, though there are paintings that seem to be alternating large and small round beads .
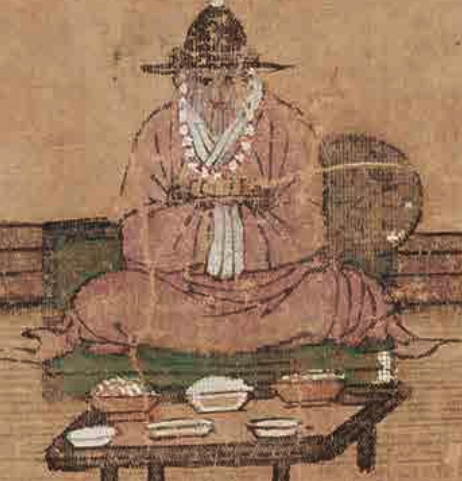
Hojonanggwangyehodo “Fraternity Meeting of Mid-level Officials of the Ministry of Revenue” c. 1550 – National Museum of Korea
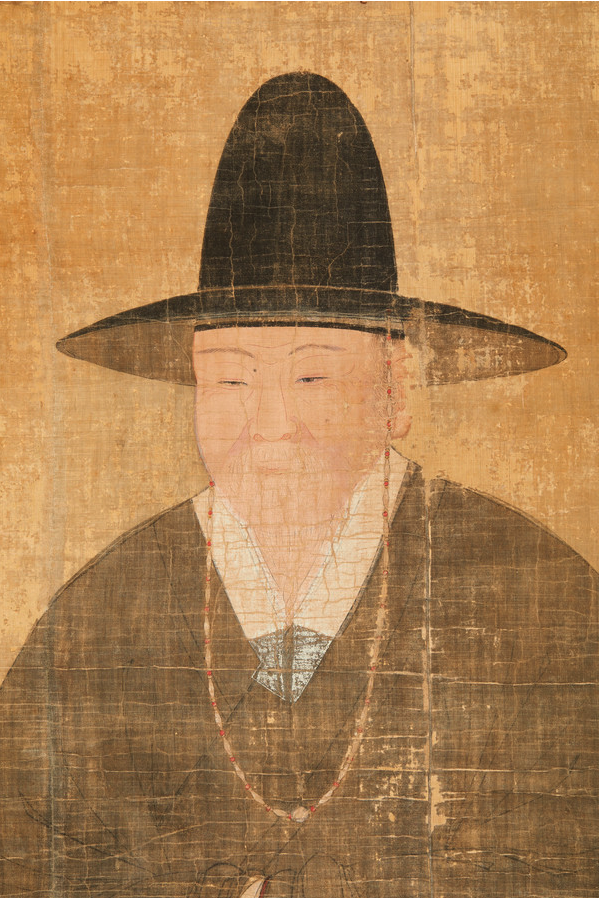
Portrait of Jin Kim (1500 – 1580) – Korea Institute for the Promotion of Korean Studies
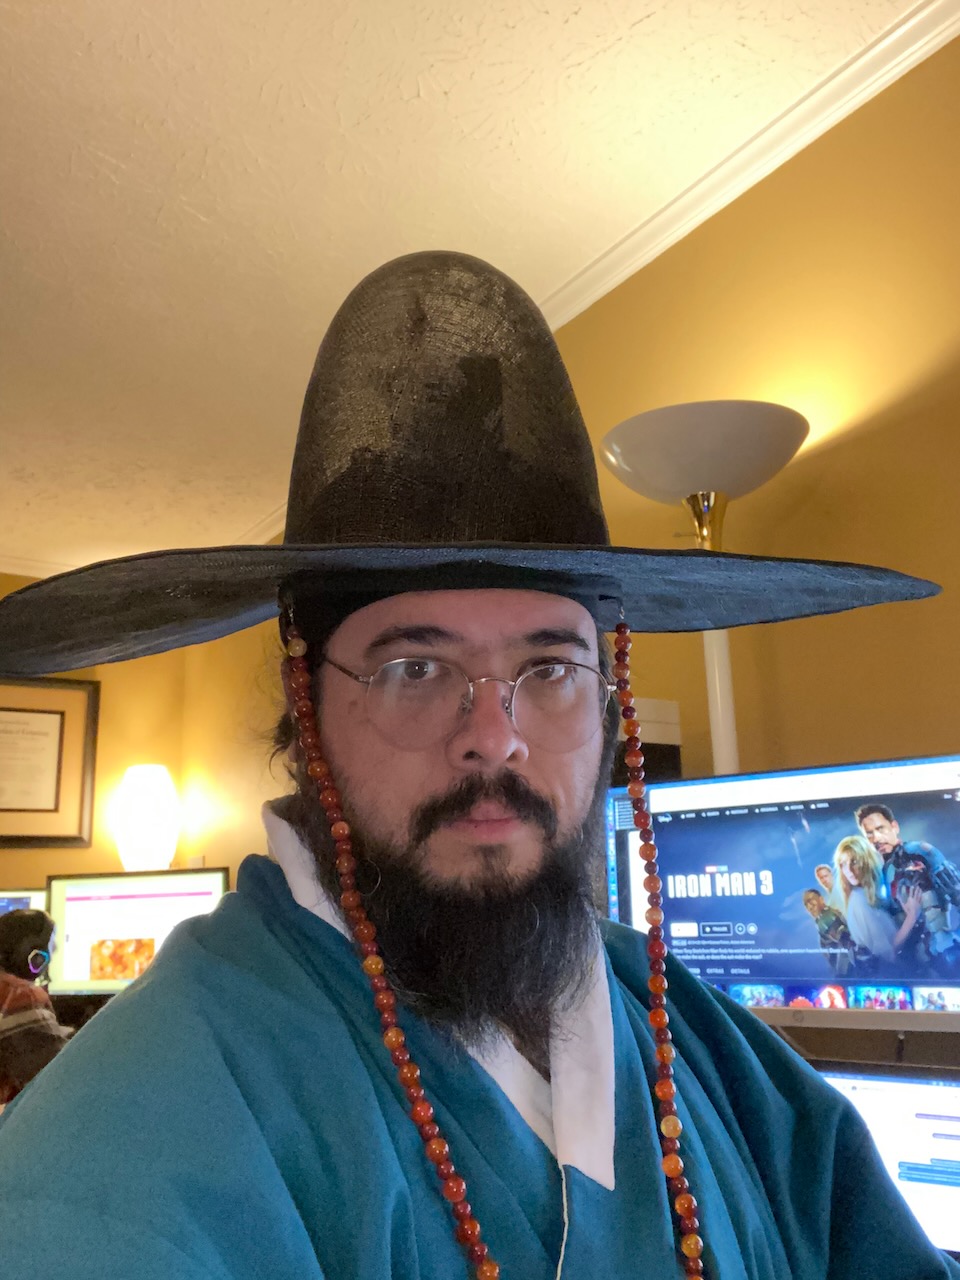
I was initially unable to find a suitable oblong bead, so I opted for alternating large and small beads for my gatkkeun. The beads I chose were of unidentified material, some of them probably colored glass. I strung them on metal beading wire, attaching jump rings on the ends with crimp beads.
I sewed loops of thread around the junction of the crown and brim of my gat, just in front of the straps. I fashioned S-hooks from wire and hooked one end through the thread loops, leaving the other end free to attach the beads.
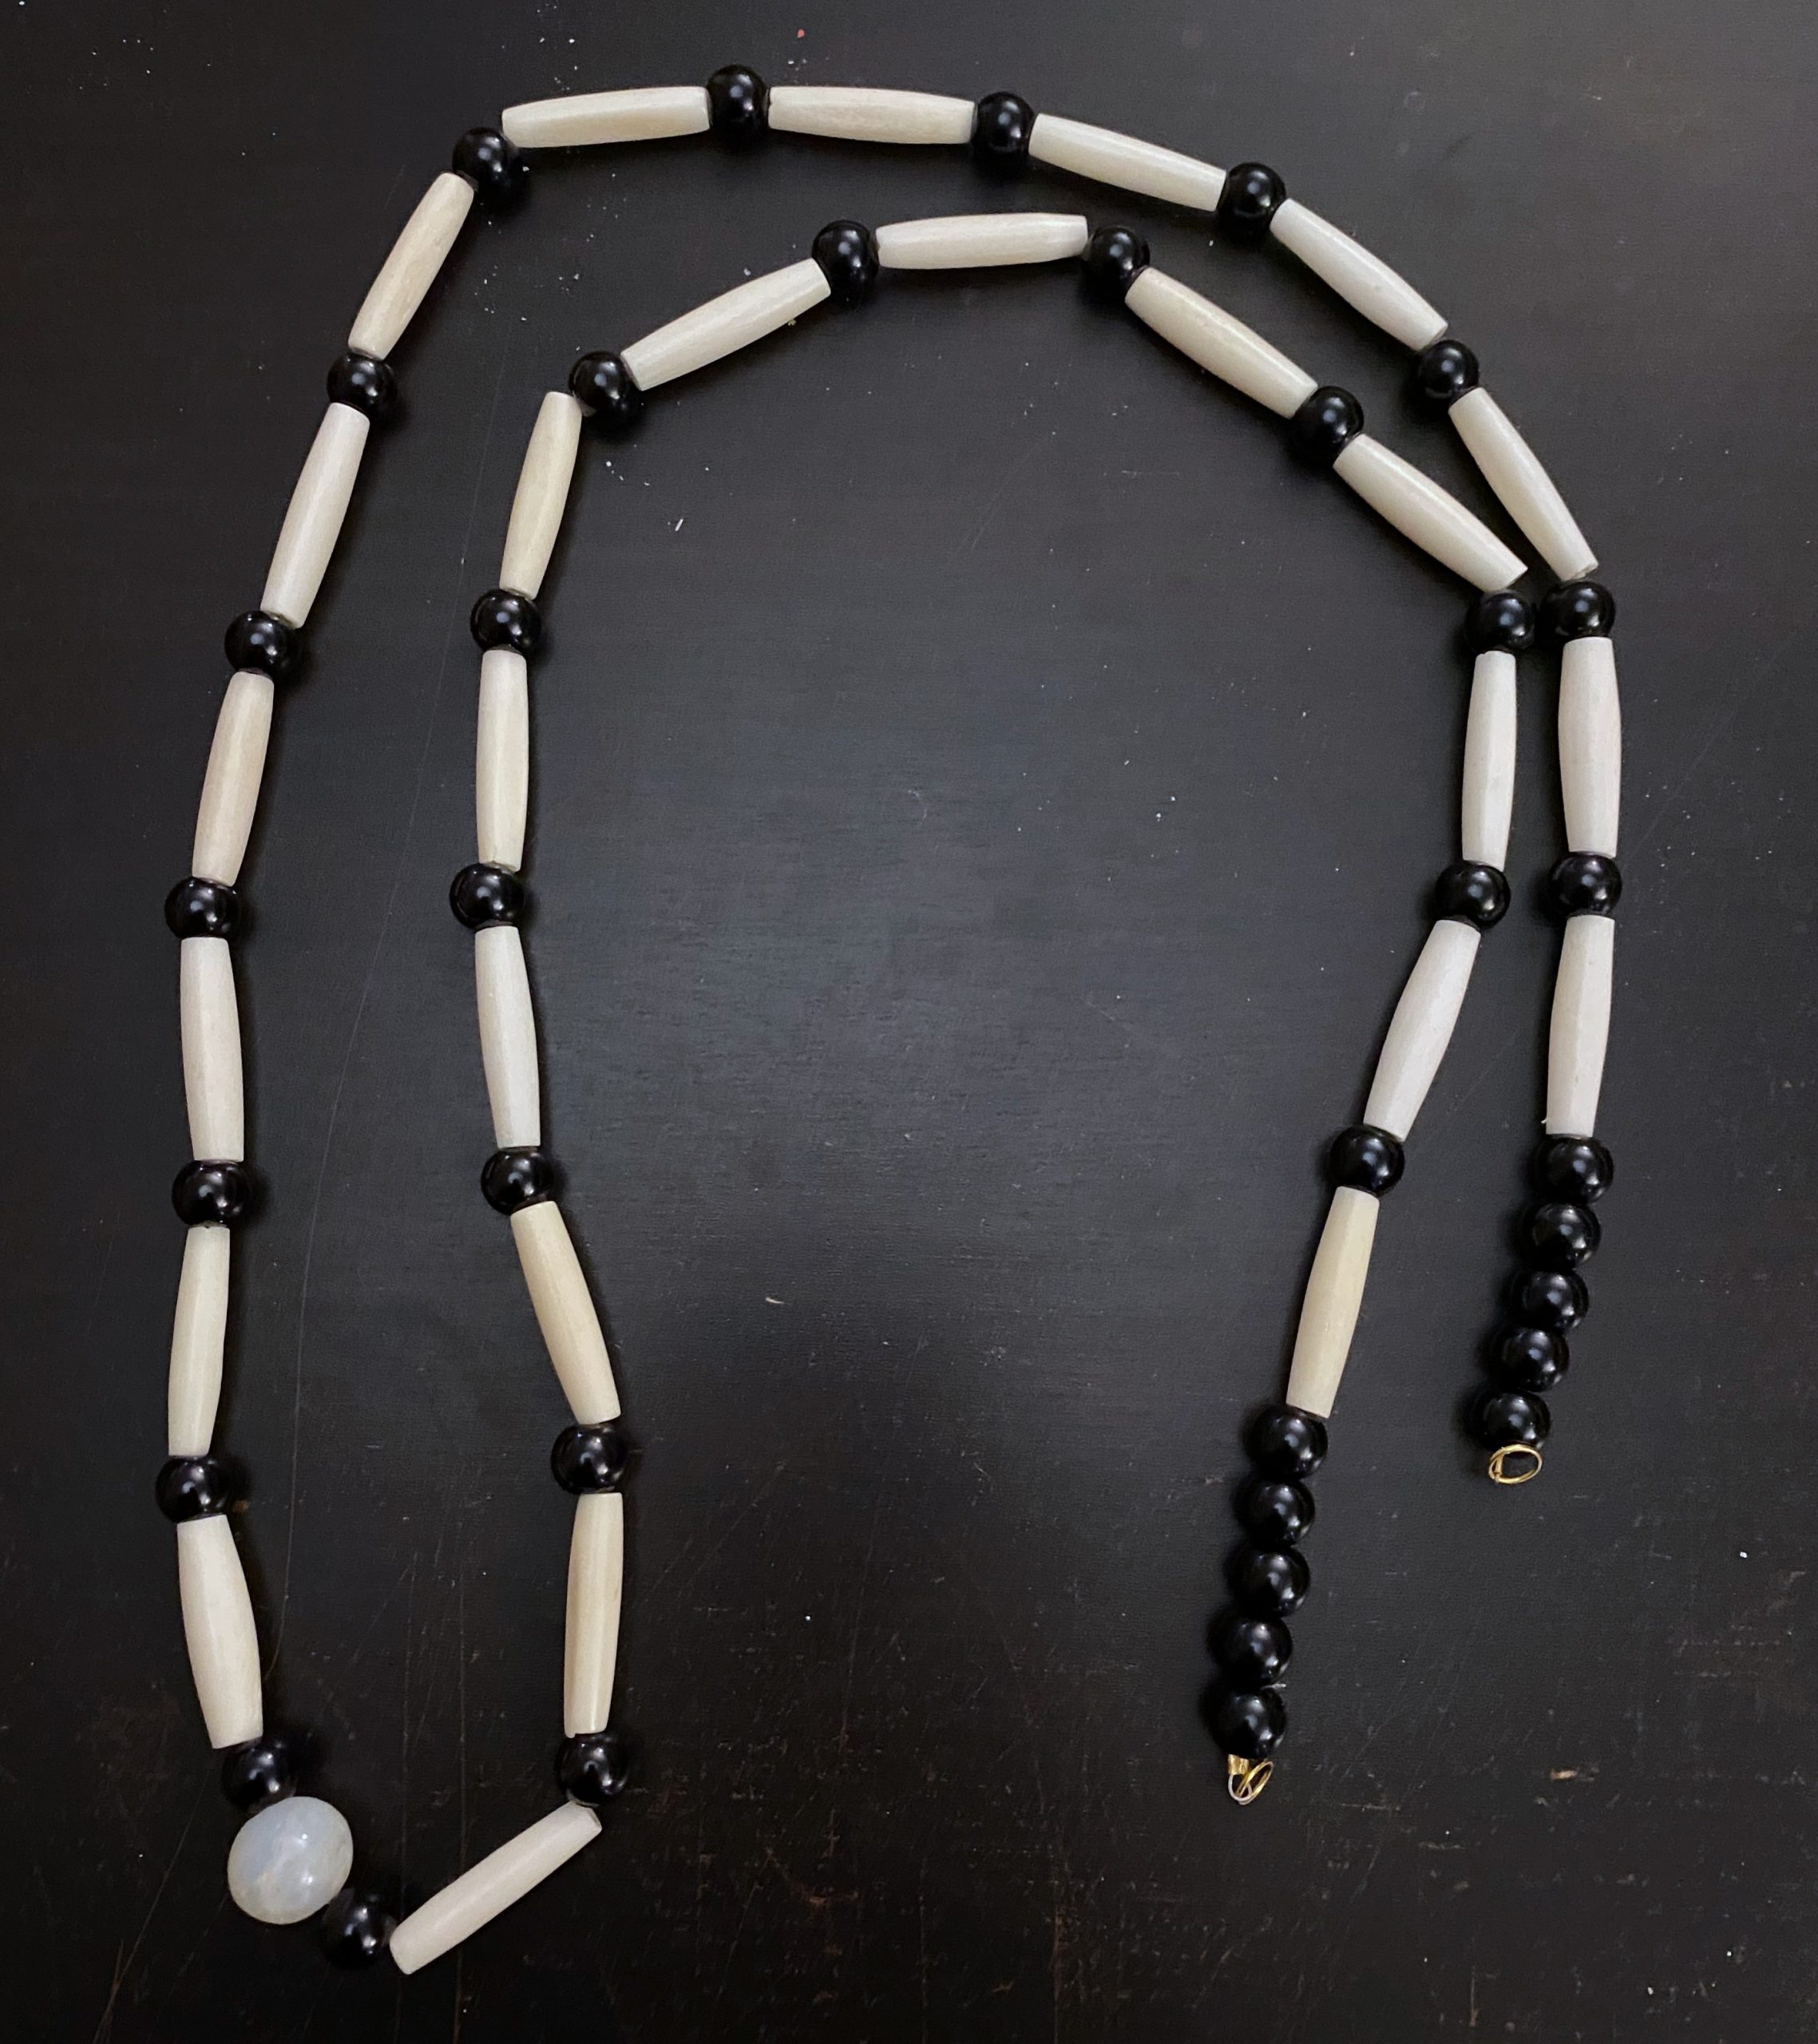
Later I made two more with oblong bone and round glass beads:
As mentioned previously, the gat (갓) is a very distinctive part of traditional Korean men’s clothing. A properly made gat is woven from thin strips of bamboo and horsehair, and costs several thousand dollars, but reproductions can be acquired fairly cheaply.
As usual, the familiar silhouette seen in dramas is not necessarily indicative of what was worn in SCA period. A good resource for the history and construction of the gat (and some other hats) is Gat, Traditional Headgear in Korea.
The most familiar type of gat is the heukrip, about which the aforementioned book says this:
Examples for the use of the term heukrip can be found from as early as the 16th year of King Gongmin’s reign [r. 1351 – 1374] during the Goryeo Dynasty, and can be said to originate from the production of heukrip decorated with jewelry befitting governmental status. The heukrip prevalent at this time, however, differed from those of the Joseon period, and the hat-top decorations on Goryeo-era heukrip allow the speculation that they may have been close in origin to the balip of the Yuan Dynasty. The shape of the heukrip was finalized during Joseon, and soon settled as the hat of choice for classes of prestige. … Although the precise form of early Joseon gat is indeterminable, records exist regarding the gat, heukrip, gojeonglip, jungnip, and chorip. The shape of the gat was first discussed during the reign of King Seongjong [r. 1469 – 1494], when it was named the ibche-wonjeong-icheomgwang, meaning that it had “a round top and broad brim”. It was decreed that all gat would be produced to follow this format. It would appear that following King Seongjong, the gat neared its stage of completion. From the hemispherical crown and broad brim of the balip, the gat was altered to have a more cylindrical crown with a narrow top and broader base, and was produced using a more diverse range of materials. Having undergone phases such as the pyeongnyangja and chorip, headgear in Korea culminated in the heukrip, which is representative of the Joseon period. … From the chronology of changes made to the gat, it is evident that the headgear was initially round at the crown with a broad rim, with the crown becoming gradually higher and the rim remaining broad. During the reign of King Myeongjong [r. 1545–1567], the crown was excessively low to the point of resembling a small plate atop a larger plate, while the brim resembled a small umbrella. This trend was mocked for its similarity to the hat worn by monks (seungnip); the variation created to compensate for this shape was, in turn, ridiculed for its disproportionately high crown and narrow brim. Alterations such as these show the effect of the cultural trends of the period upon the development of headwear. Indeed, the gat of the 16th century towards the end of Yeonsangun’s reign [r. 1494–1506] showed many changes regarding the height of the crown and width of the brim. Headgear policy during the reign of King Jungjong [r. 1506–1544] was variable to the point of frivolity. The gat of this period began with a tall crown and wide brim, to the end of this period, when the hat became even higher while the brim became narrower. King Myeongjong’s reign saw the crown lowered and brim broadened again.
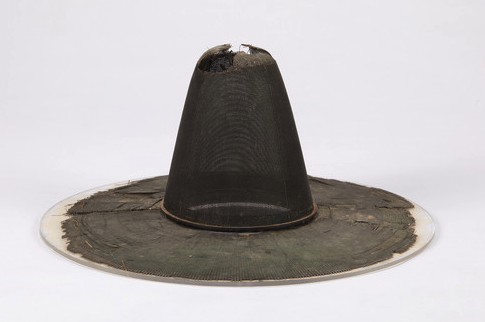
Suffice to say that there is a lot of variation in the size and shape of the gat even within the SCA period. I have not seen many extant 16c pieces, though there are a couple in an exhibit currently running at the Daegu National Museum:
A gat owned by Ryu Seong-ryong (1542 – 1607)
Portrait of Jin Kim (1500 – 1580)
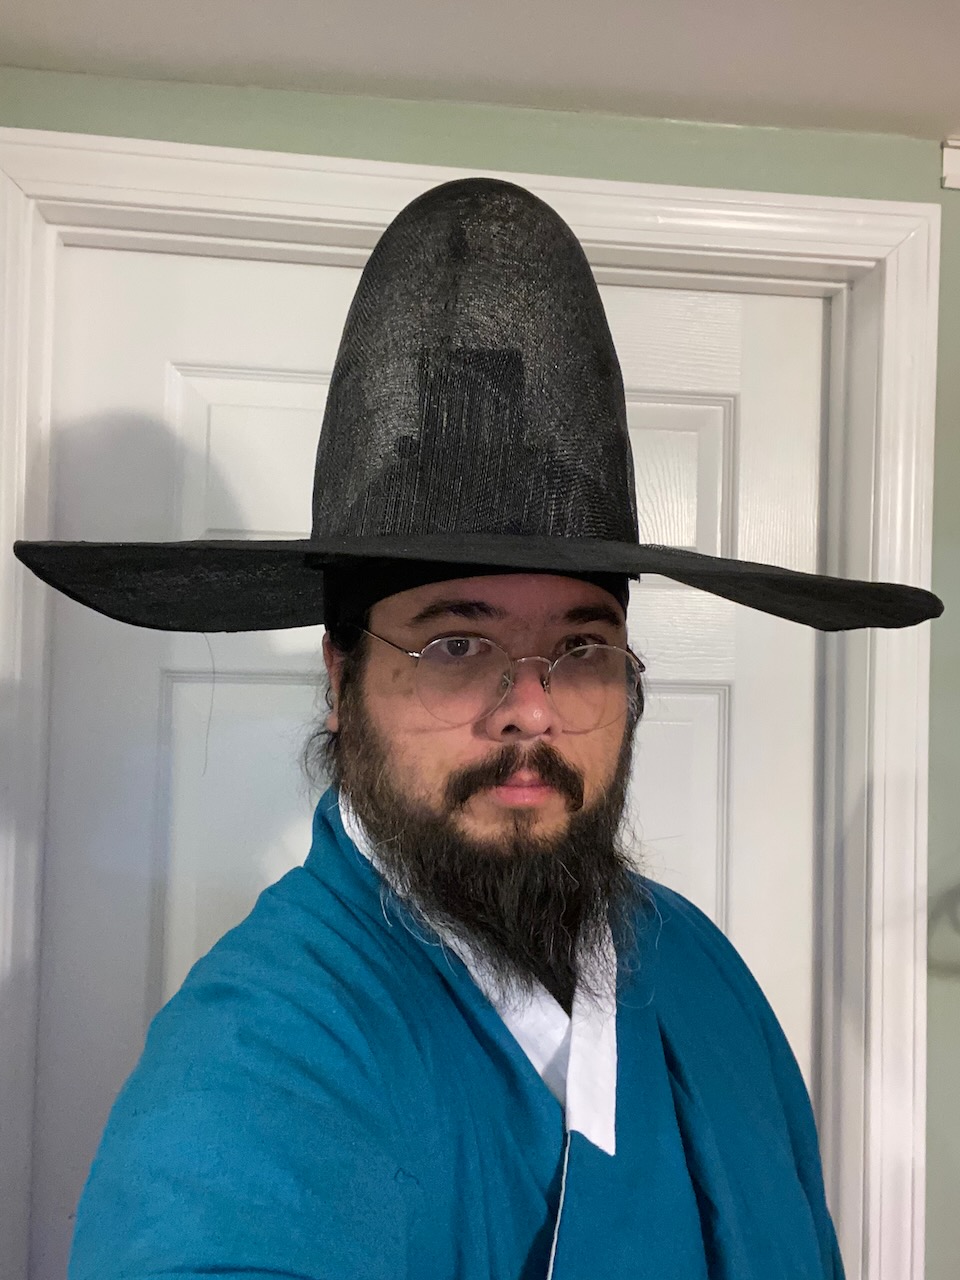
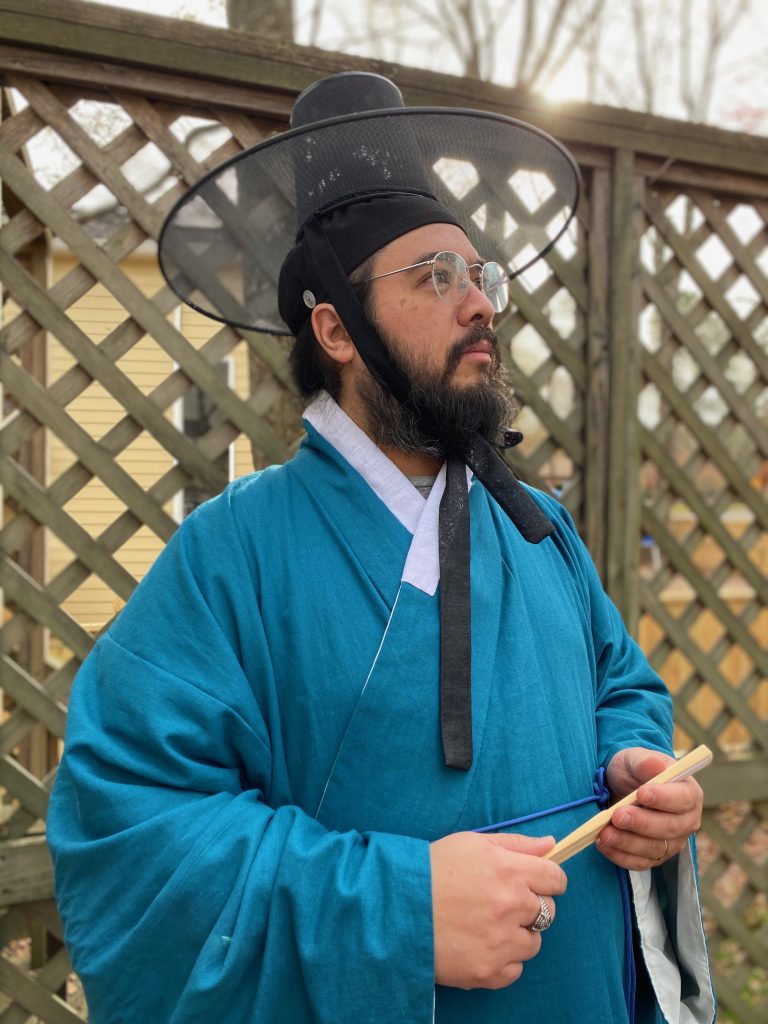
By the 17th century, the crown of the gat changes from rounded to cylindrical, though I have not yet found the smoking gun of a 16th century cylindrical-crowned gat. However, given the difficulty in acquiring a round topped gat and the documented variation in hat styles within SCA period, I feel cautiously justified in wearing the hat I am able to get my hands on.
17th – 20th century gats
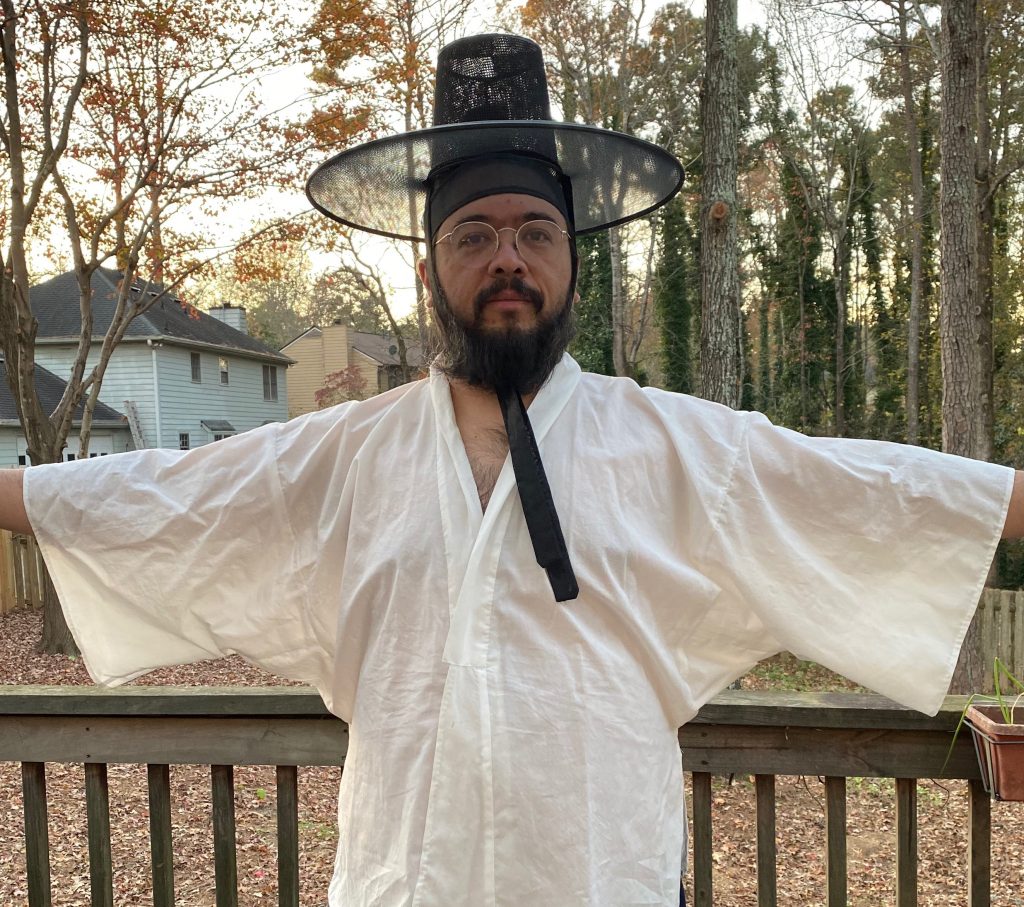
I would really prefer one that sits lower on my head like the portrait above. Later styles of gat are meant to perch high on the head, but my head is quite large and makes it sit even higher. There is still more to do to finish dressing up my gat, including a beaded string (gatkkeun: 갓끈) and possibly an ornament on the top.
Seong Myeong Su Daegam provided a large amount of research and translation help with this outfit.
One of the most distinctive parts of traditional Korean clothing is hats. There is a wide variety of hats for different classes and situations, but the most widely recognized Korean hat is probably the gat (갓).
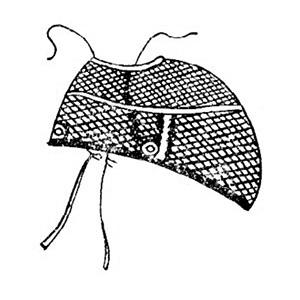
Before getting into the gat, however, we must look at what is worn underneath it, which is a headband-like article called a manggeon (망건). It helps keep the hair in place when wearing it in the traditional topknot style. The manggeon is commonly seen in dramas as a narrow band made of woven horsehair, with a more see-through window in the center front:
Here you can see the upper and lower ties used to secure the manggeon to the head, as well as the button-like ornaments (gwanja – 관자) on the sides that help secure the ties. As is often the case with Joseon clothing, however, it is important to look at specific dates when determining if the style you’re looking at falls within SCA period.
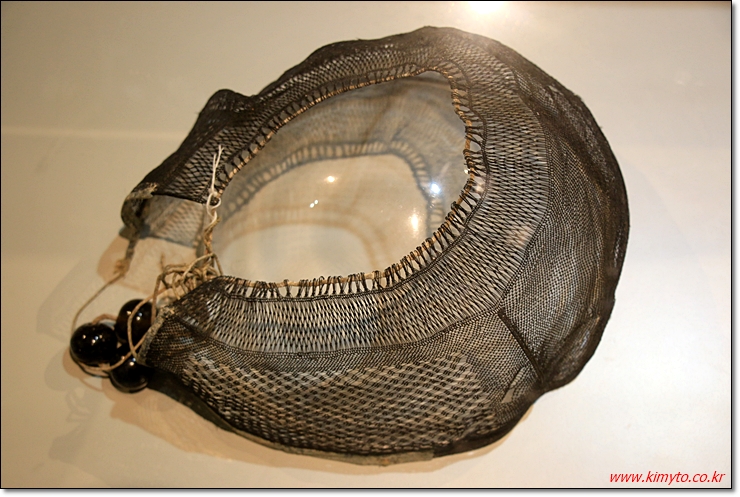
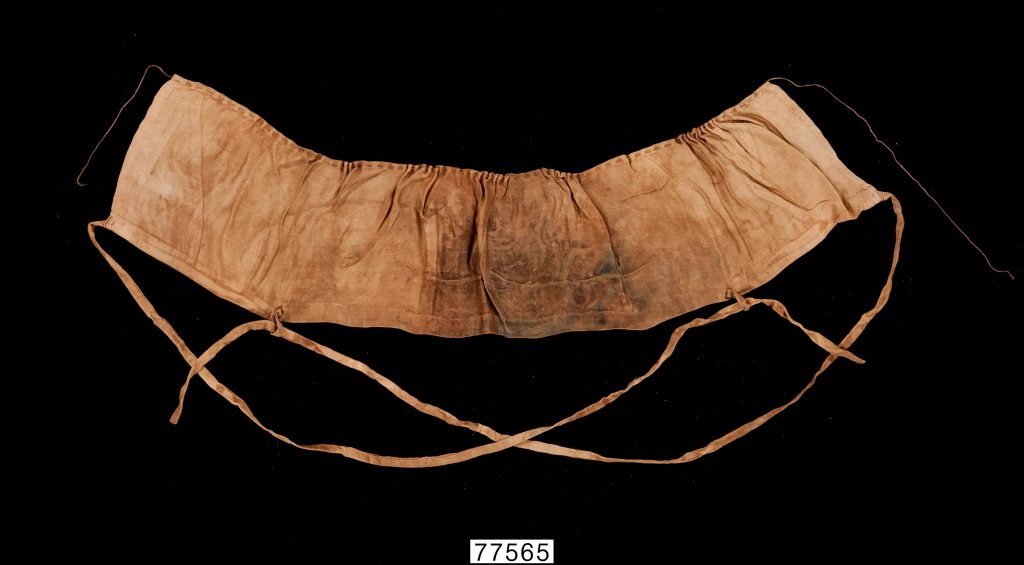
Manggeon from the tomb of Yi Jeon (1599-1615)
This tomb find dates to 1615, which is within a short distance of the time period we’re interested in. You can see many of the same features in this example: woven horsehair, upper and lower strings, and temple ornaments. The major difference is the overall shape and height. Yi Jeon was a member of the royal family, so the elaborate weaving and red horsehair section are unusually extravagant.
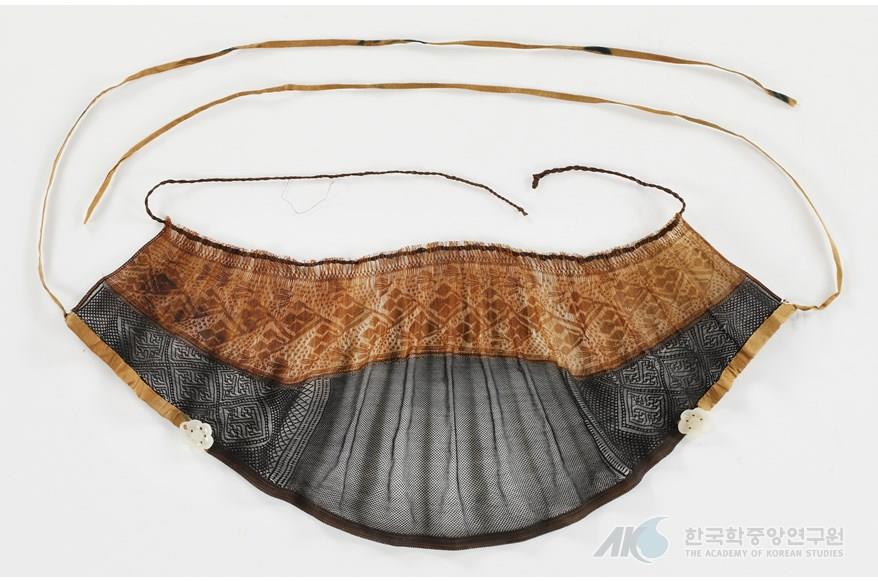
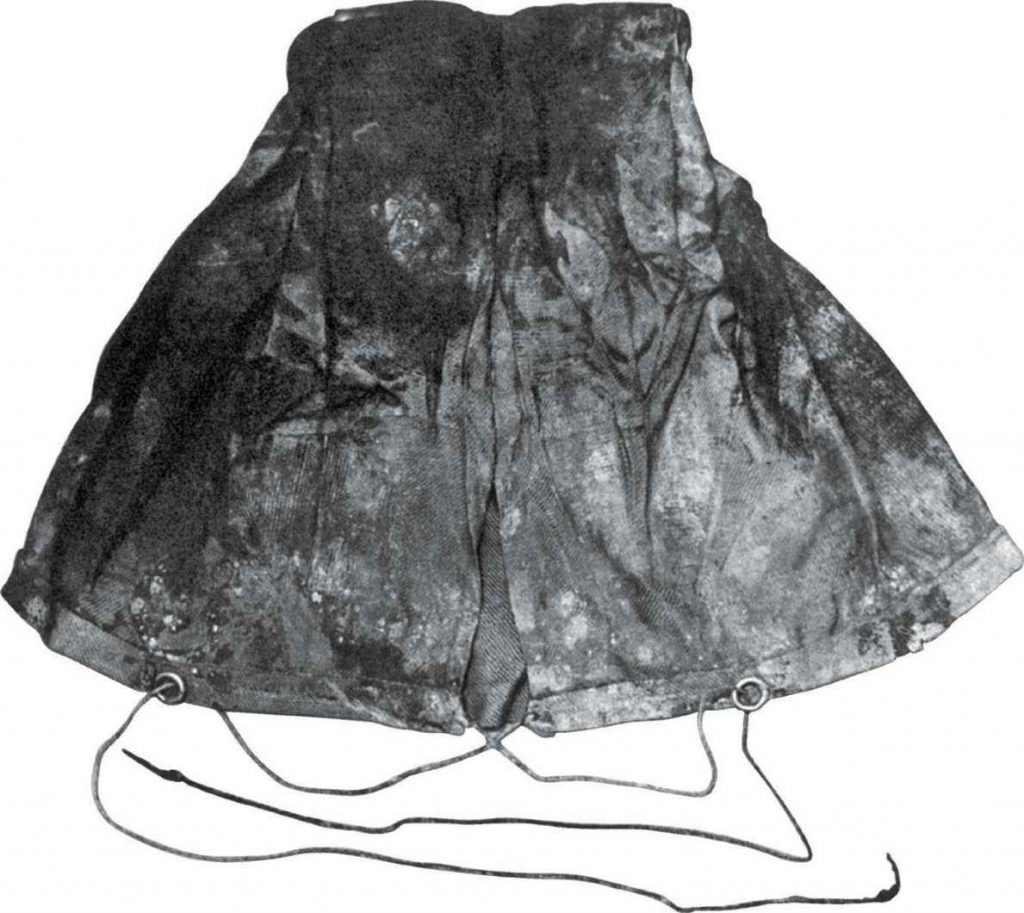
Manggeon of Choi Gyeong Seon (1561-1622)
A similarly shaped manggeon was found in the tomb of an official named Choi Gyeong Seon. Again, it covers a larger amount of the head than the later headband style manggeon. It is less elaborate than Yi Jeon’s, but still displays impressive craftsmanship.
In a paper from Seoul Women’s University describing the tomb find, the authors provide this analysis of Choi Gyeong Seon’s manggeon (Google translation):
… it is a good resource to know the shape and shape of a man’s head in the early 17th century as he wears a manggun made of horsehair … In particular, this is the first case of wearing a horsehair [manggeon].
This seems to imply that the horsehair manggeon is either relatively new in the early 17th century, or that there are no previous extant examples. In either case, it may be useful to delve further back into the origin of the manggeon.
Manggun originally originated in the Ming Dynasty and was made of silk. However, as it entered the Joseon dynasty, the material was changed to horsehair instead of silk, and the shape was simplified and recreated in the Joseon style. In Joseon, horsehair, a material for mangeon, was collected from Jeju-do or Pyeongan-do, where there were many horse ranches. … Through the relics unearthed from the tomb of [Yi Jeon] (1599~1615) … the form of the Chinese mangan can be confirmed.
The Chinese ancestor of the manggeon is called wangjin. These are typically made as a net of silk thread, and share the same shape and features as the early manggeon.
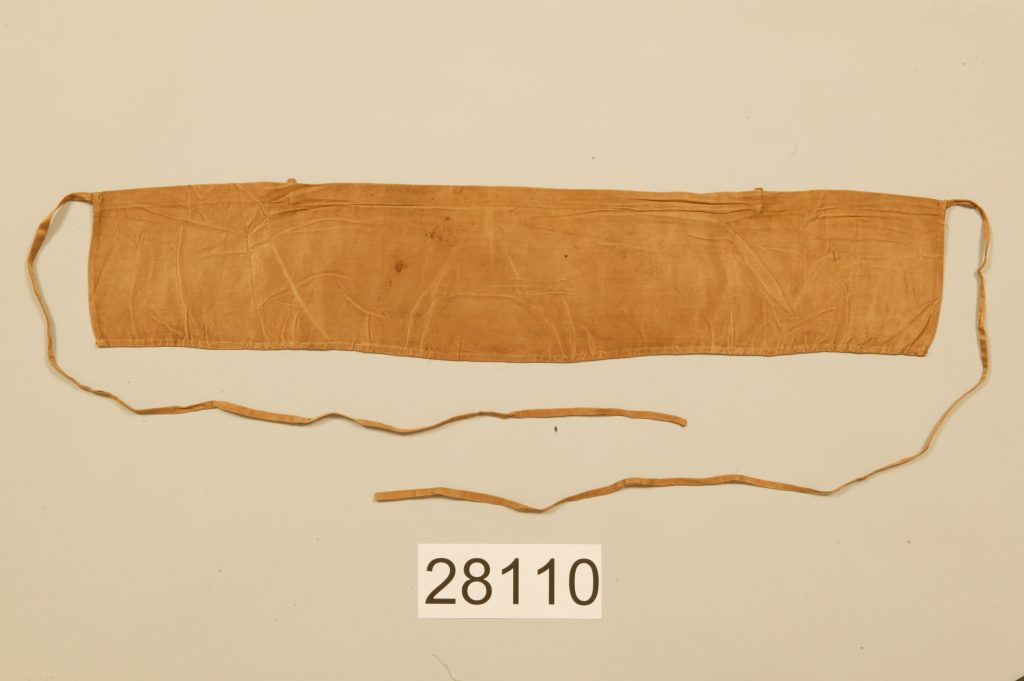
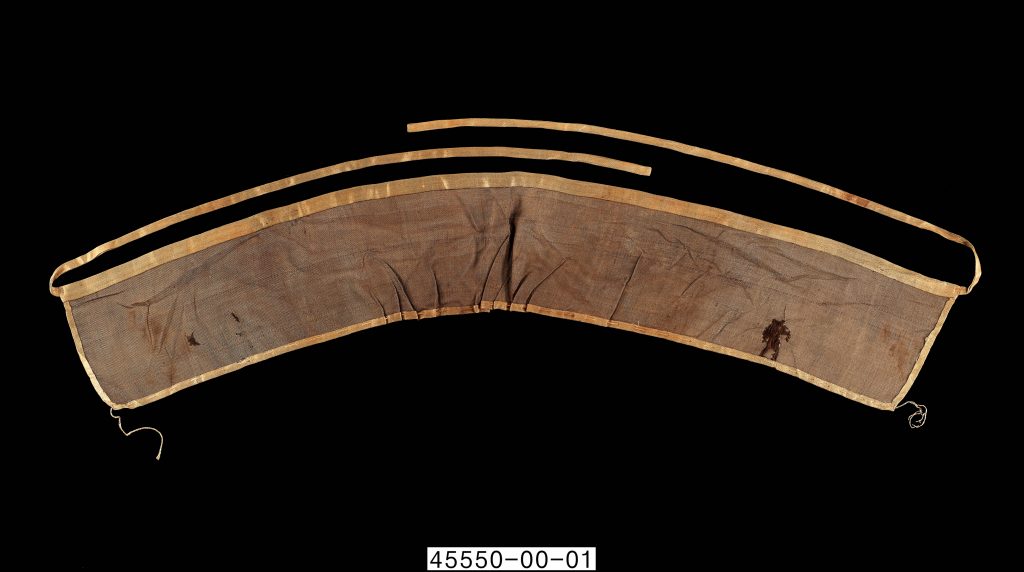
Some wangjin are made from silk cloth, though it doesn’t seem to be the most common form. People of all social classes are depicted wearing the net style wangjin. However, from a reconstruction standpoint cloth gives me an easier starting point. There are also extant 18th century manggeon that are made from straight strips of fabric:
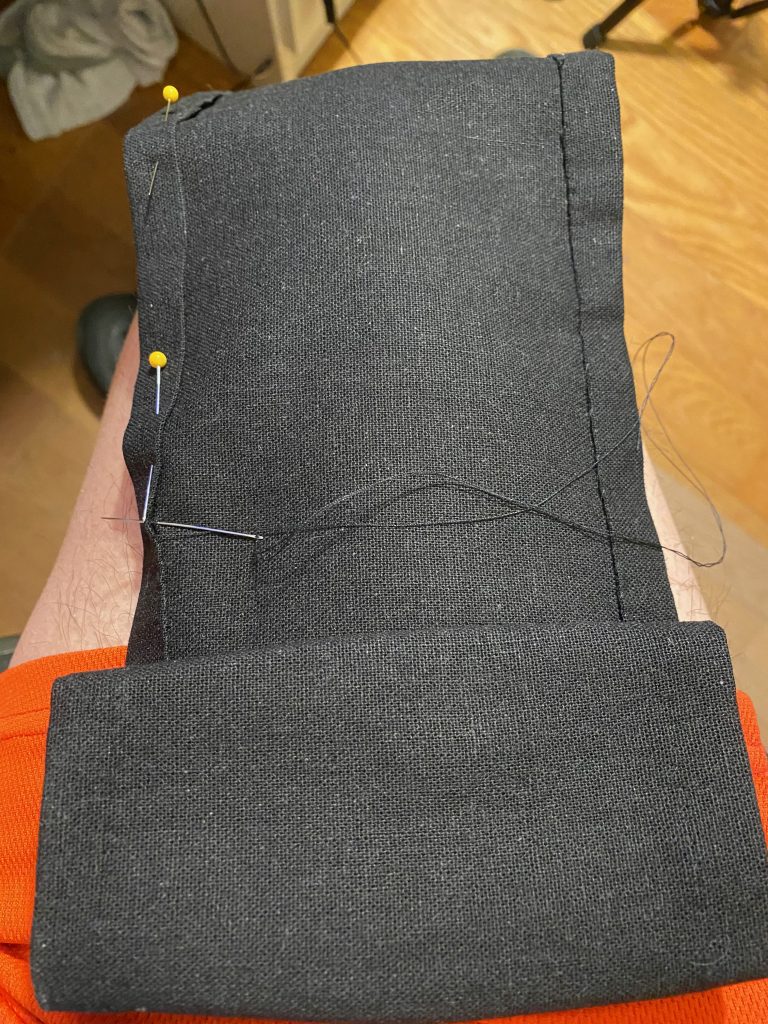
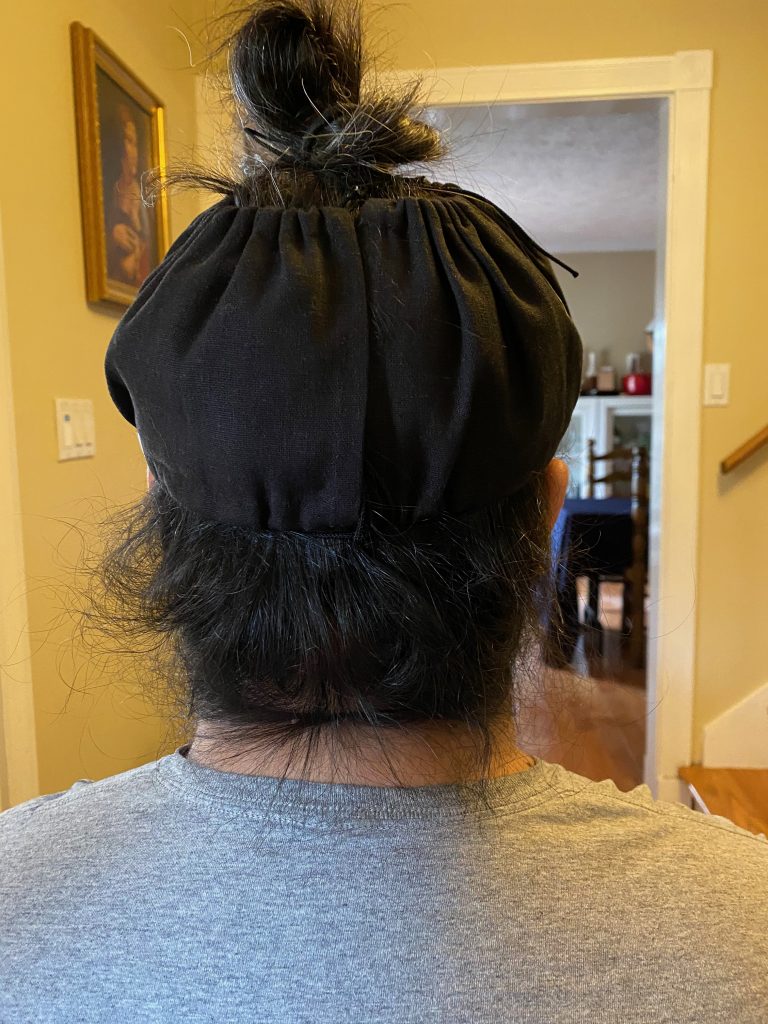
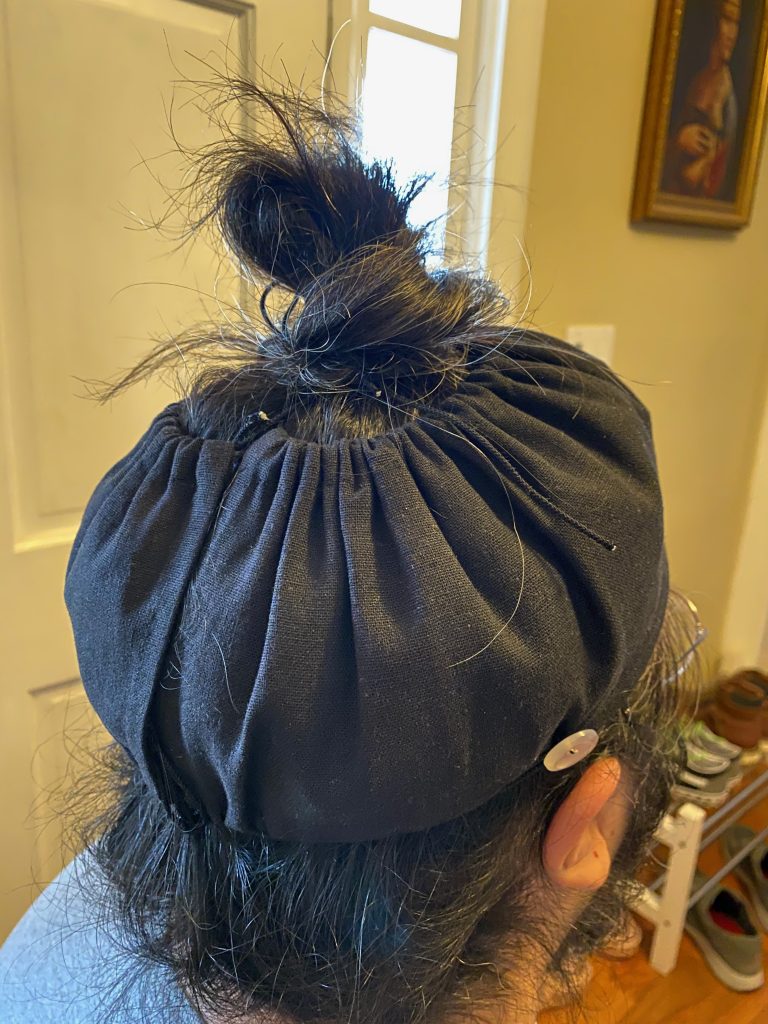
Given all of these examples, my first attempt at a passable manggeon is made from a linen rectangle with casings for drawstrings at the top and bottom:
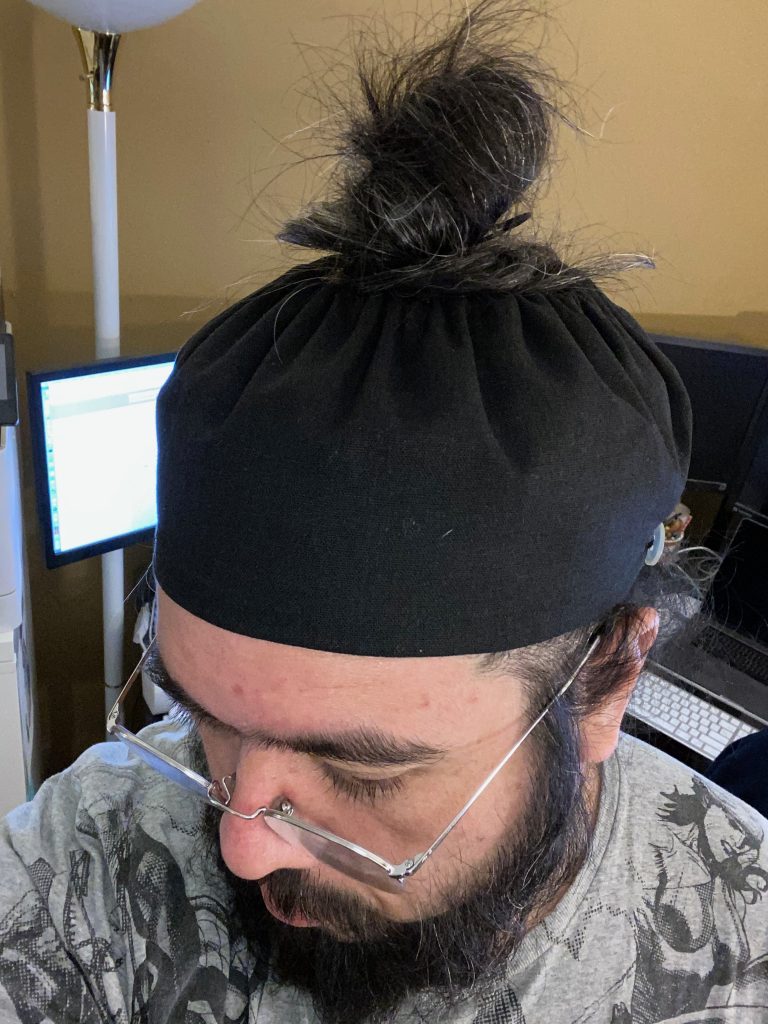
The lower strings are looped around the gwanja and then tied at the back of the head. This causes the edges of the manggeon to overlap and cover any gap. Some instructions say to then tie these strings around the topknot. I cinched up the top edge with the upper string and then tied those ends around my topknot, again causing the edges to overlap.
This is a usable first attempt, but I already have plans to change it based on looking at more examples. Rather than casings with drawstrings (which are not really seen in a Korean context), I would replace the lower string with narrow strips of fabric attached to the corners and run the upper string through the fabric at the top like a large running stitch as seen in the 18c examples. This method of running drawstrings is also seen in extant pouches.
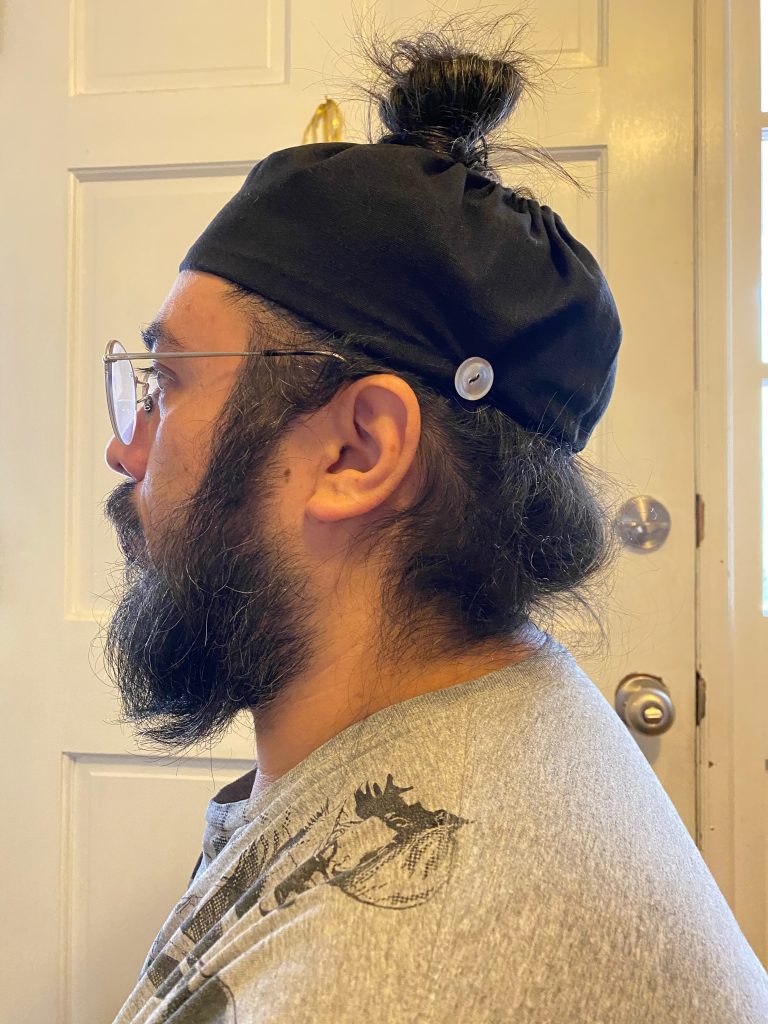
Rough as it is, this first try does the job of covering my hair and providing a comfortable surface to wear my hat:
Seong Myeong Su Daegam provided a large amount of research and translation help with this outfit.
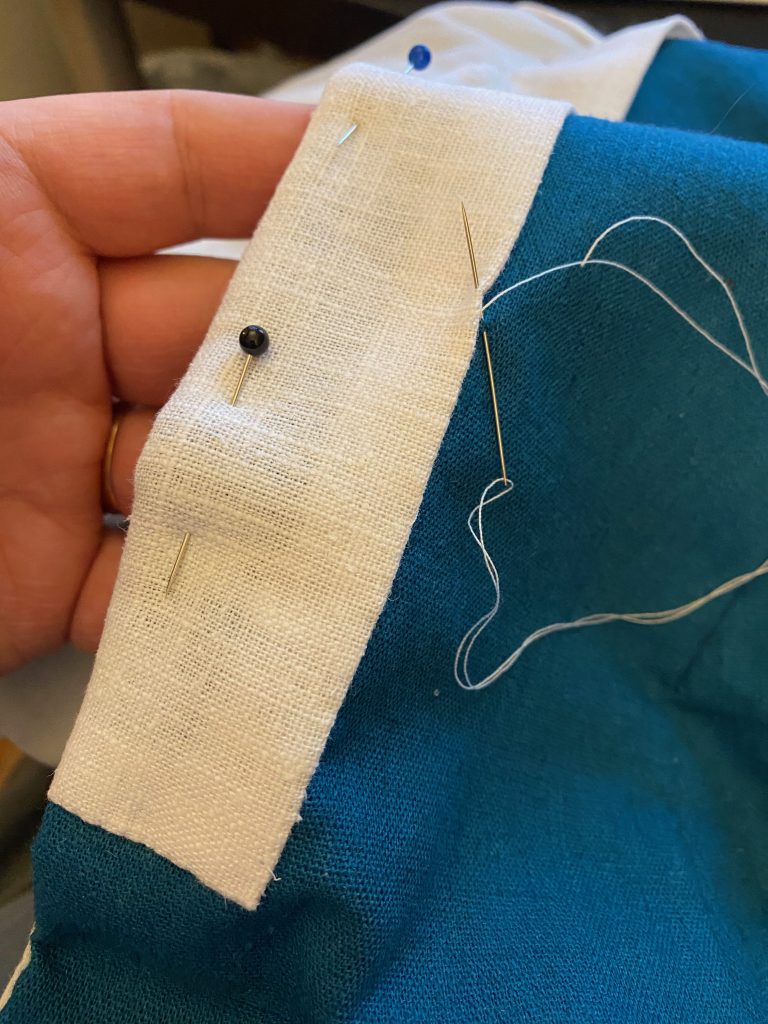
Once the collar was attached to the body of the jikryeong, I added a white band to the edge called a dongjeong (동정). This is a typical feature of Korean clothing, and is meant to be removable for laundering. I made this one from heavy ramie.
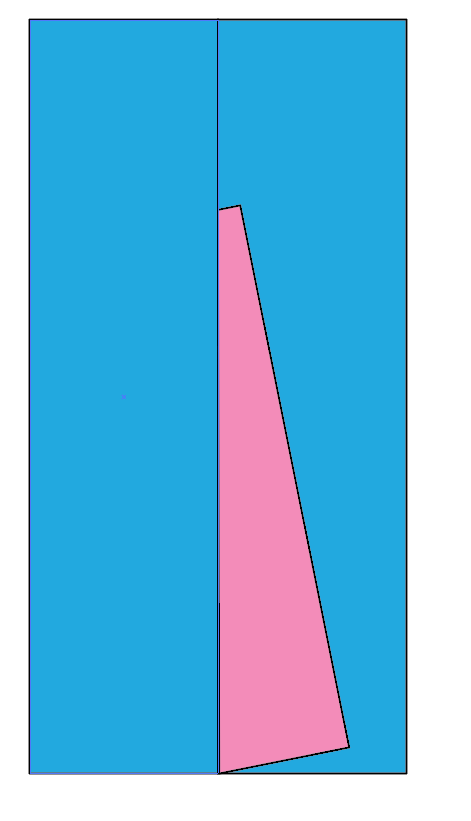
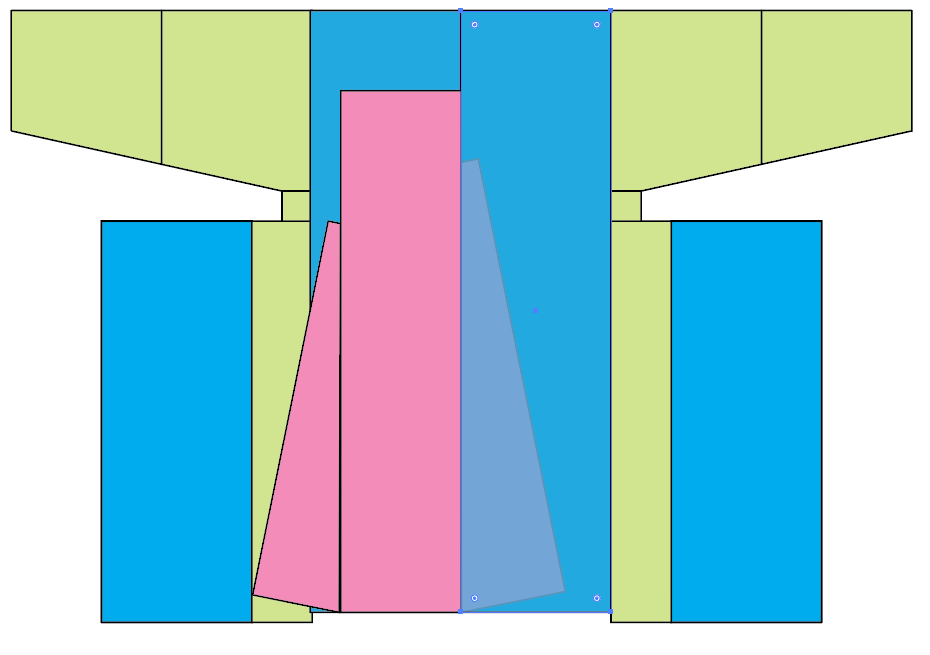
At this point I was ready to sew the hem. Looking at the extant piece I used as my inspiration, the hem of the front is straight, curving very slightly upward at the ends. The inner crossover panel rises slightly so it won’t peek out from underneath the top layer. Both diagonal panels of the crossover sections are angled upward. The rear hem is longer than the front and has a consistent curve throughout. The edges are about 1.5″ longer than the front, while the center is about 4″ longer.
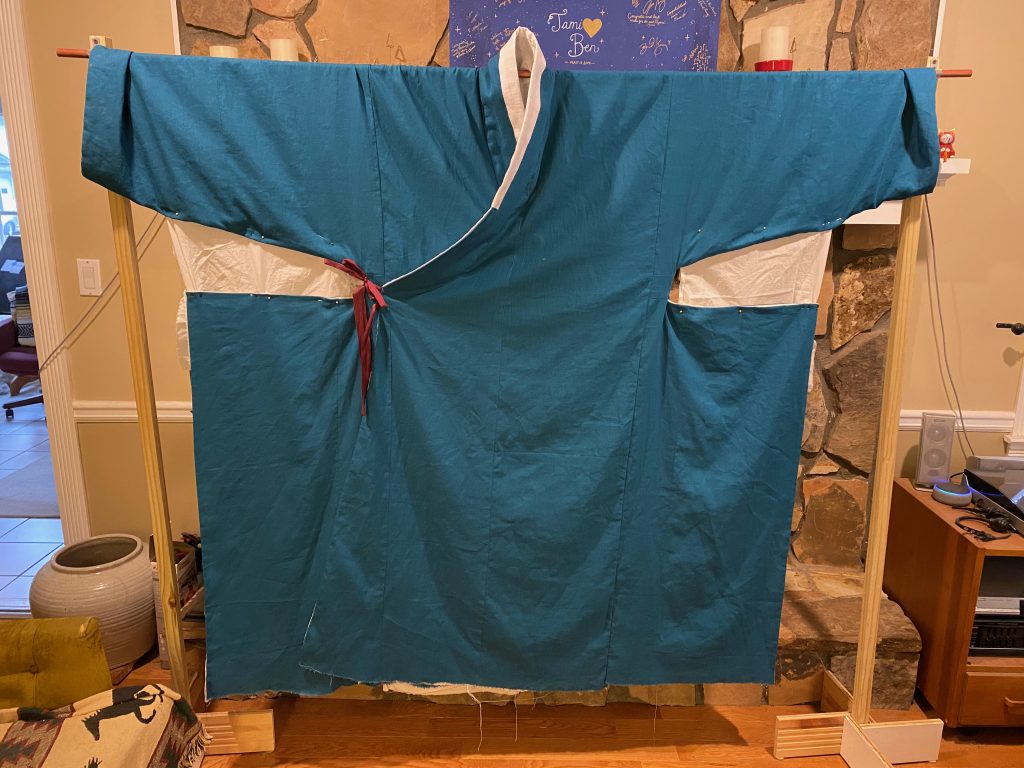
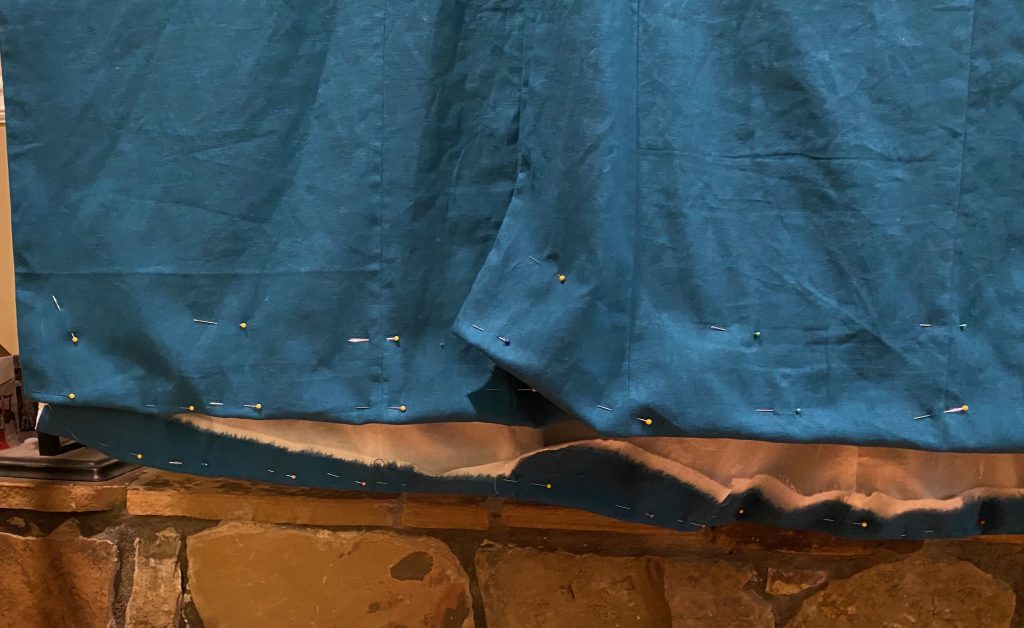
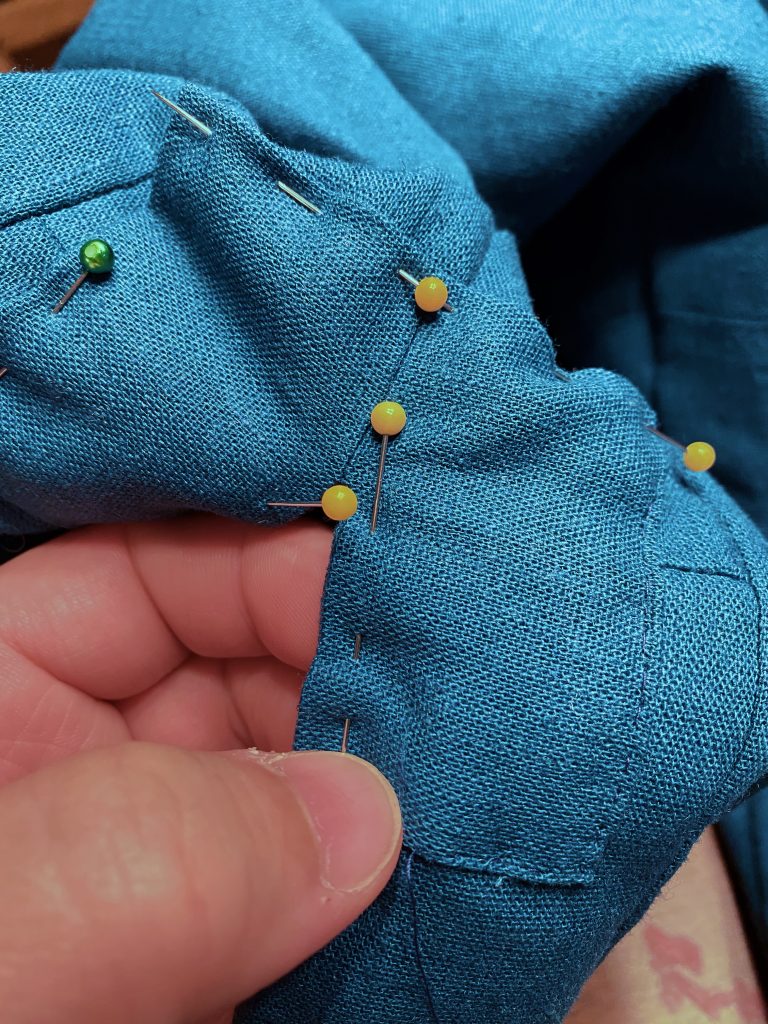
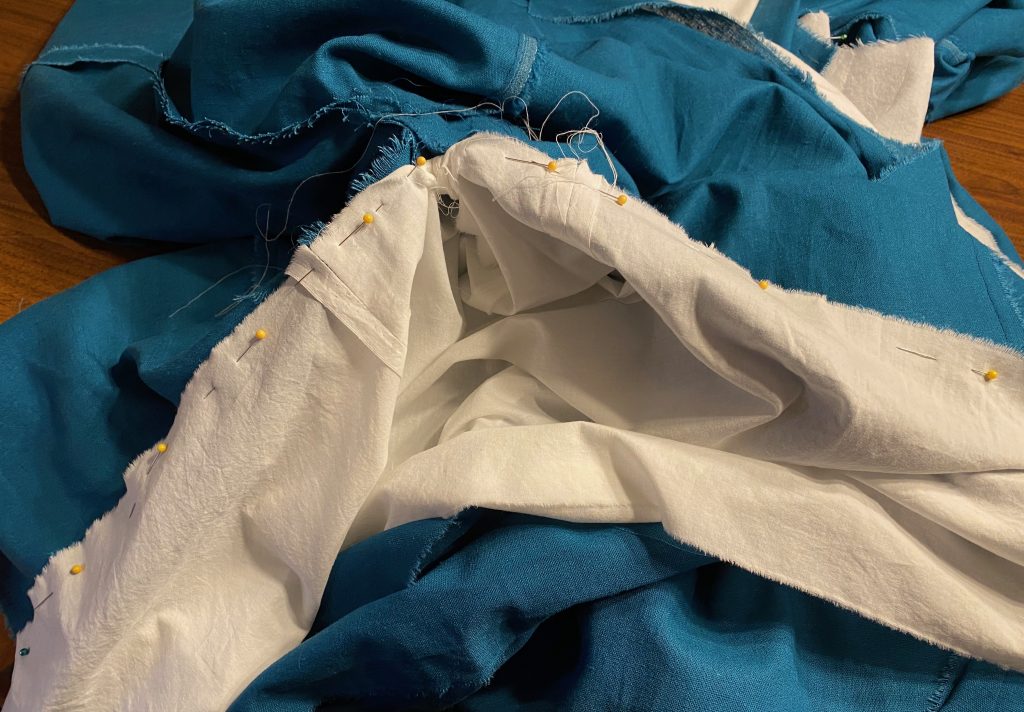
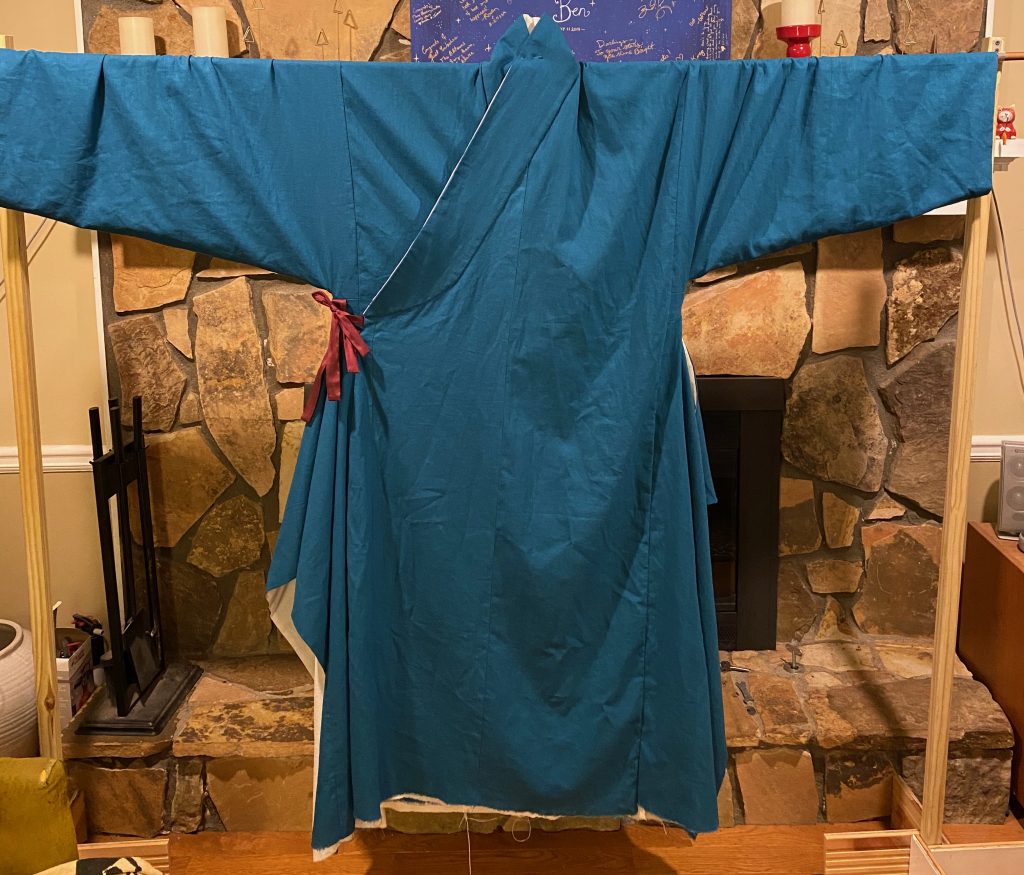
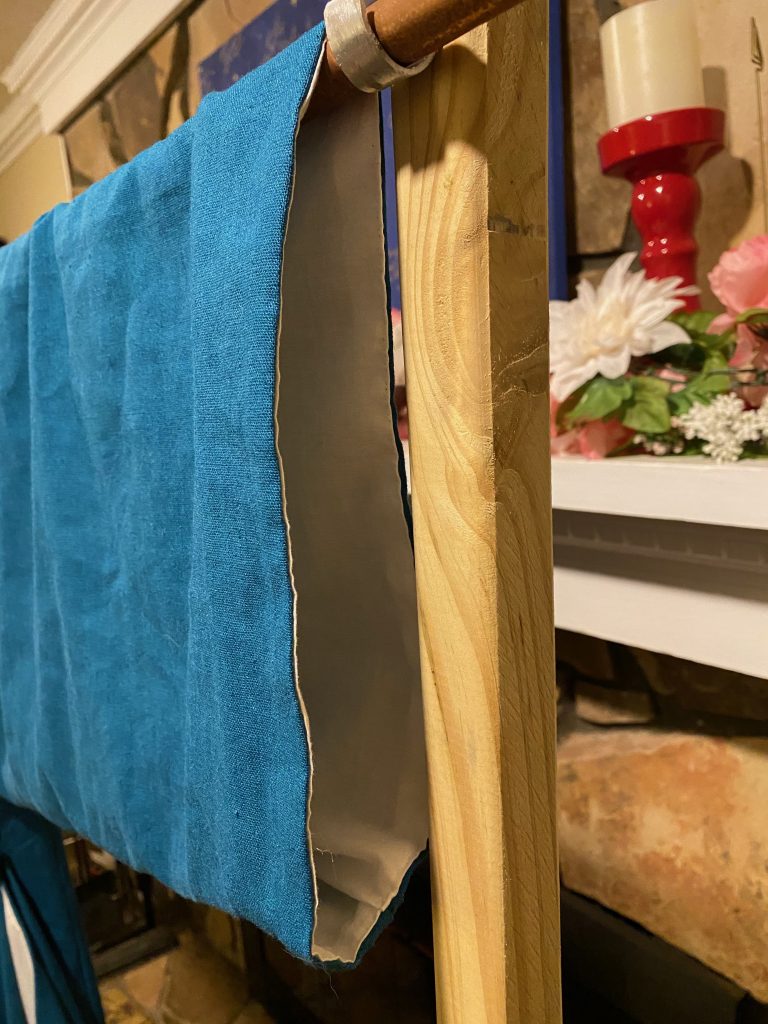
As this garment is lined, marking and sewing the hem is challenging if a sagging lining is to be avoided. First I hung the whole garment on the rack and used some scrap fabric to pin the side panels out straight:
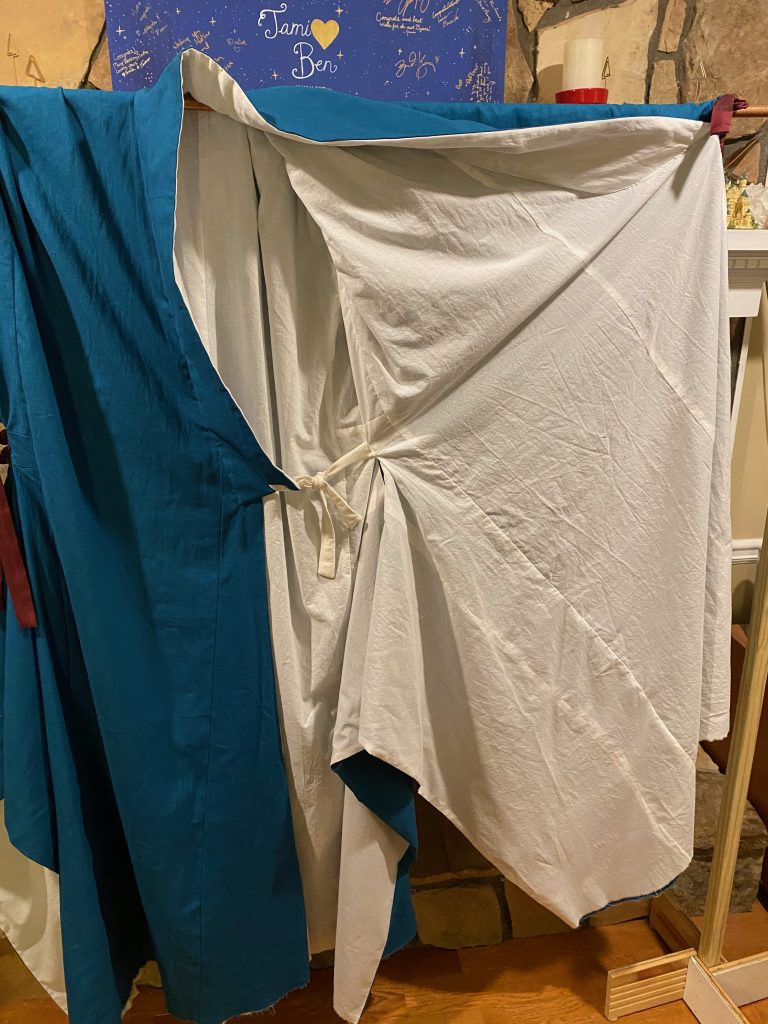
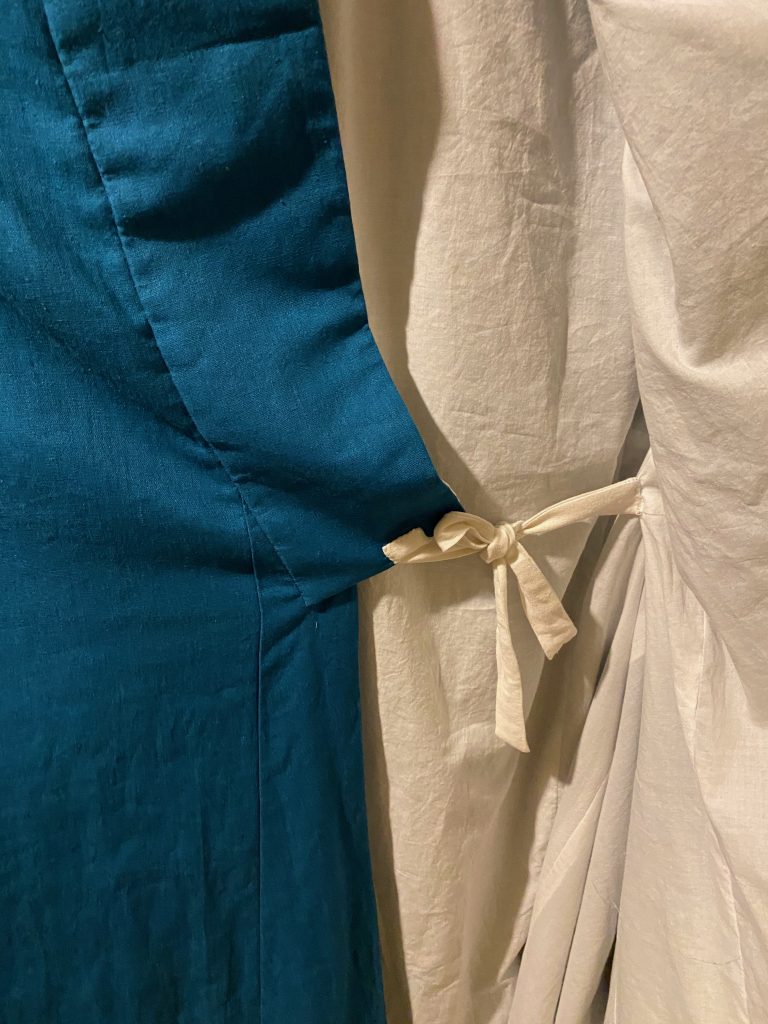
I folded the hem up to where I wanted it and pinned it along each section:
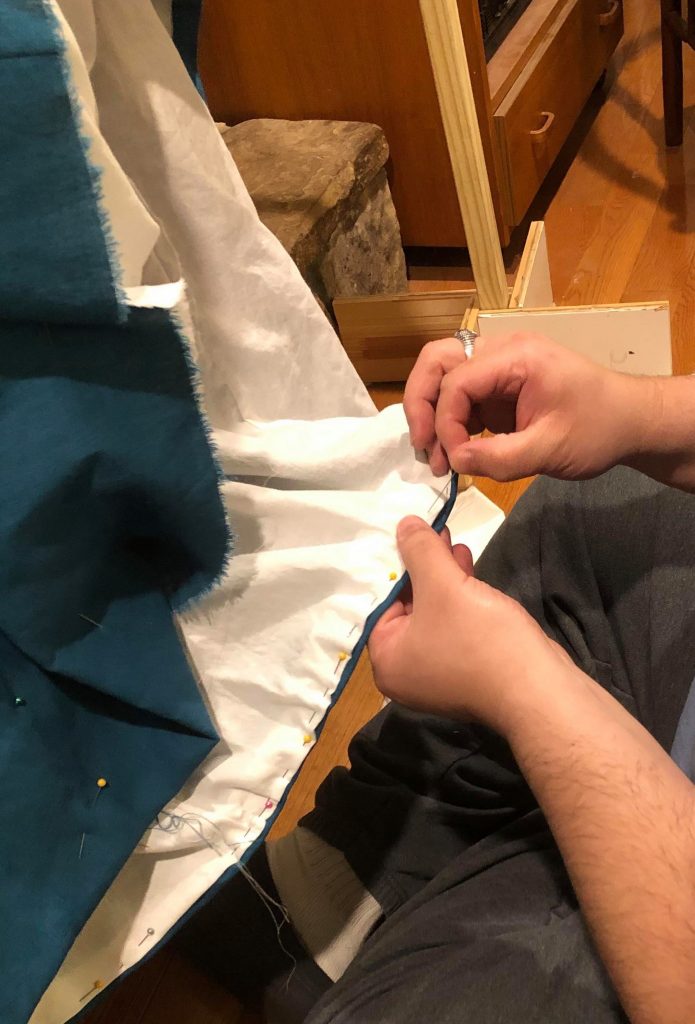
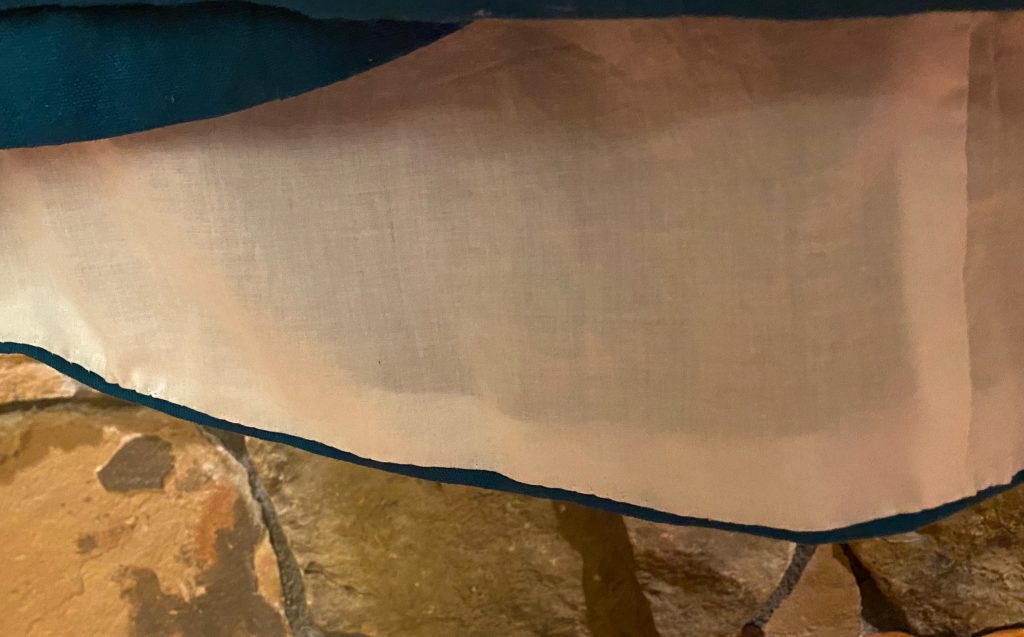
I trimmed the seam allowances, then hung it back up to even up the lining and pin it in place for sewing:
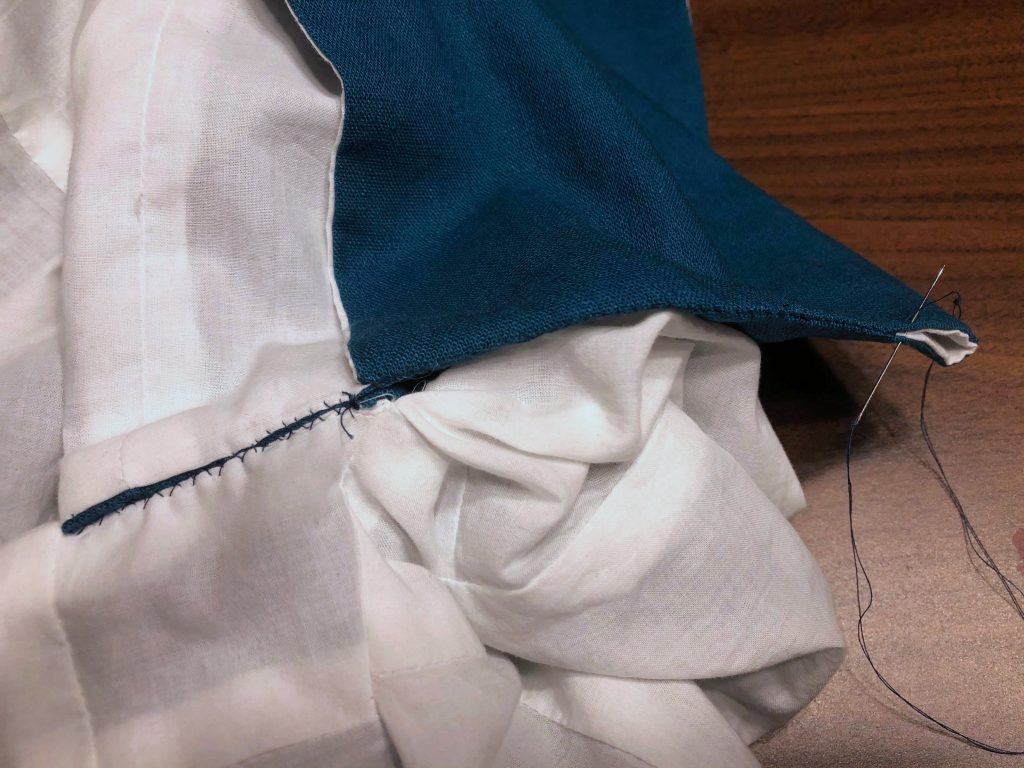
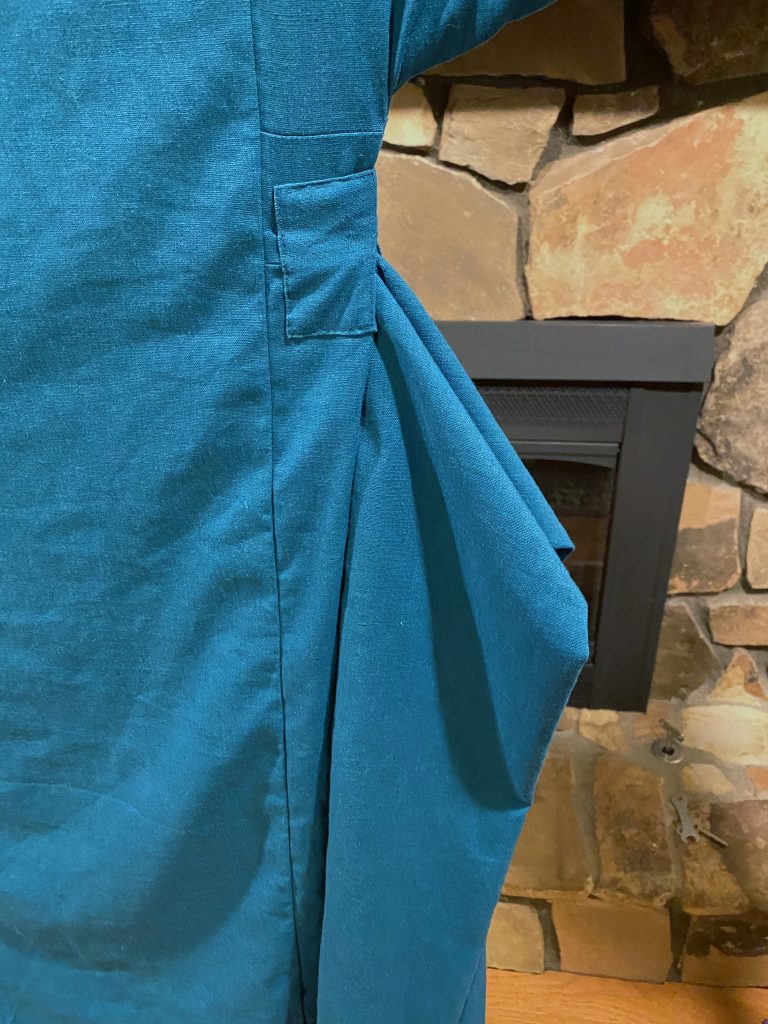
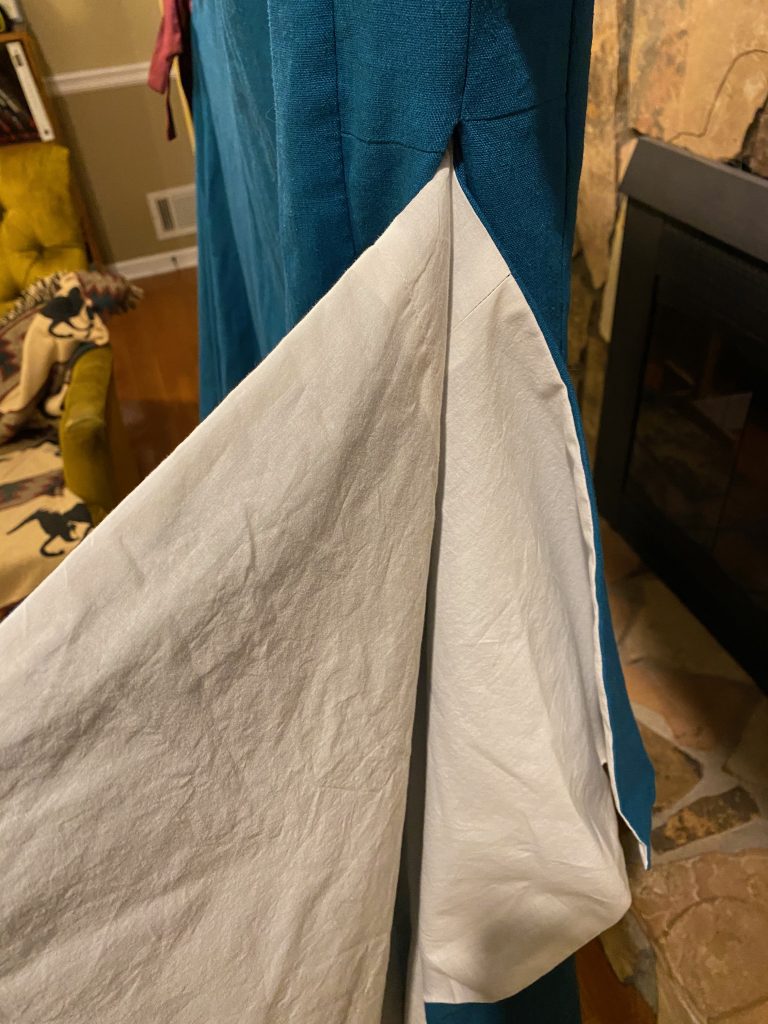
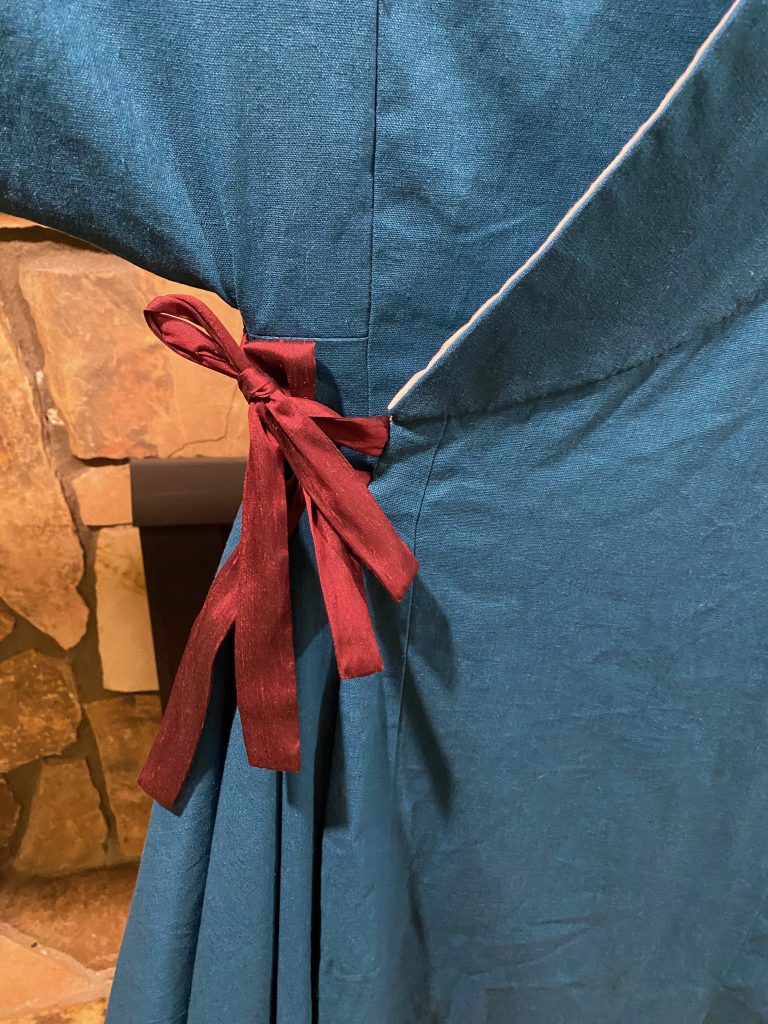
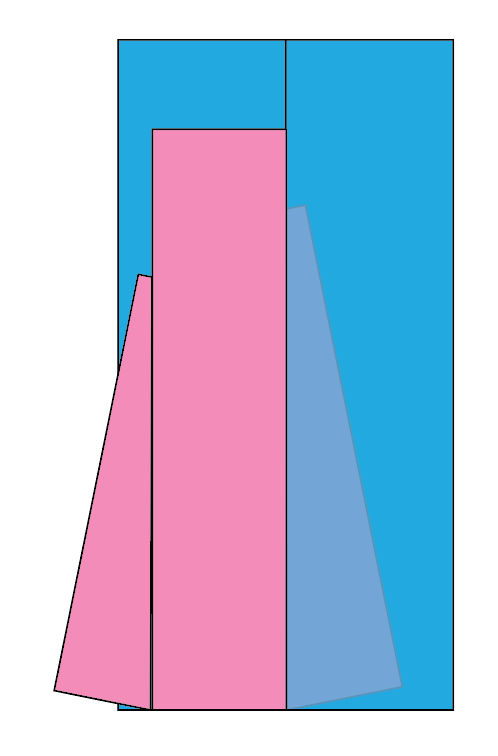
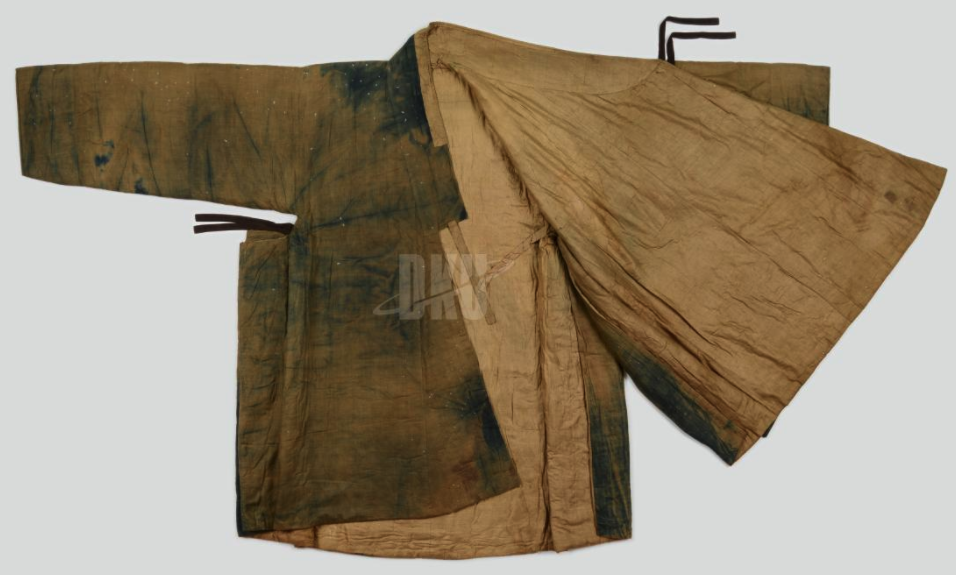
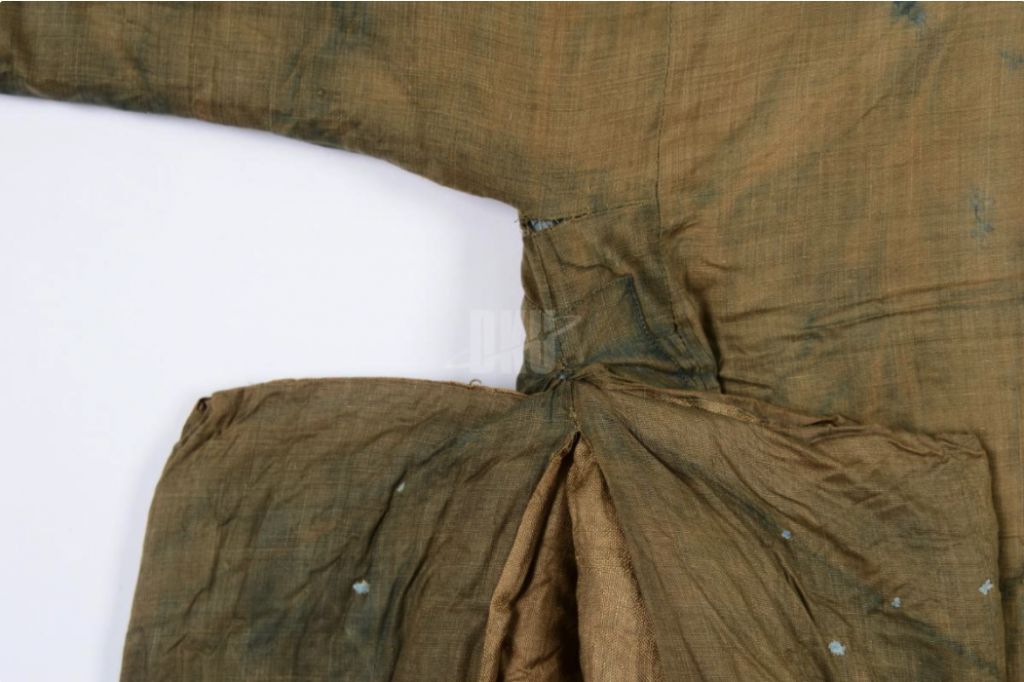
The next step was to pleat the side panels in. First each panel was pleated to the inside where it met the body, then the remainder of the panel was folded in half and sewn at the top. When worn, the corners of the panel tend to fold down to show a diagonal silhouette:
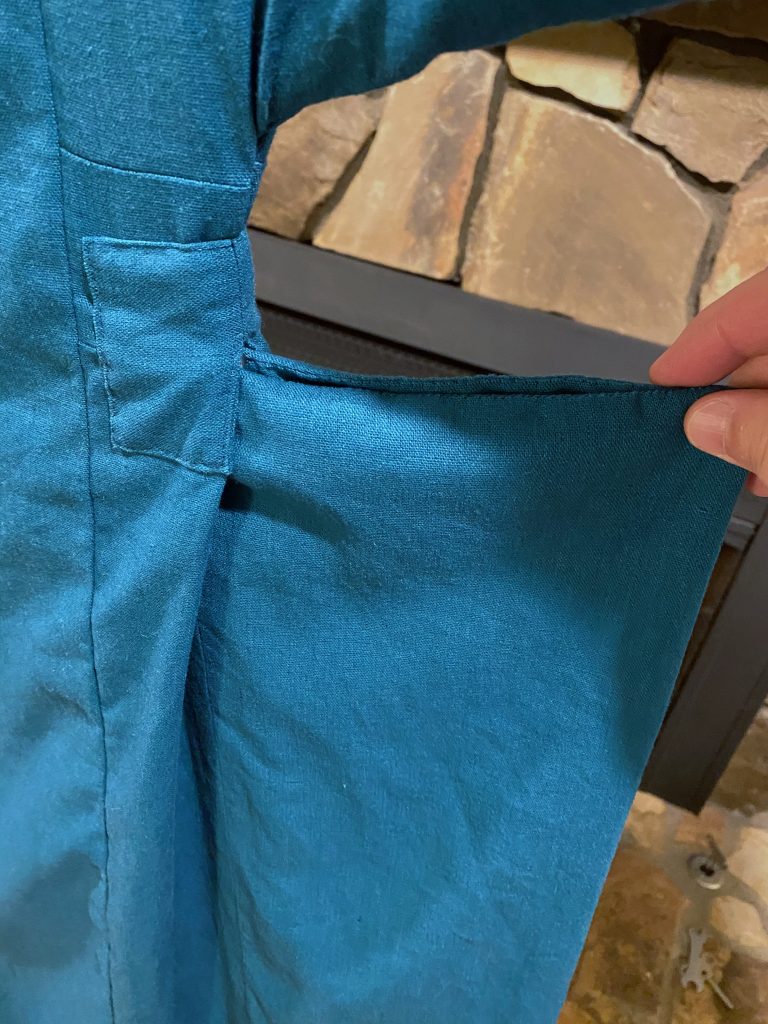
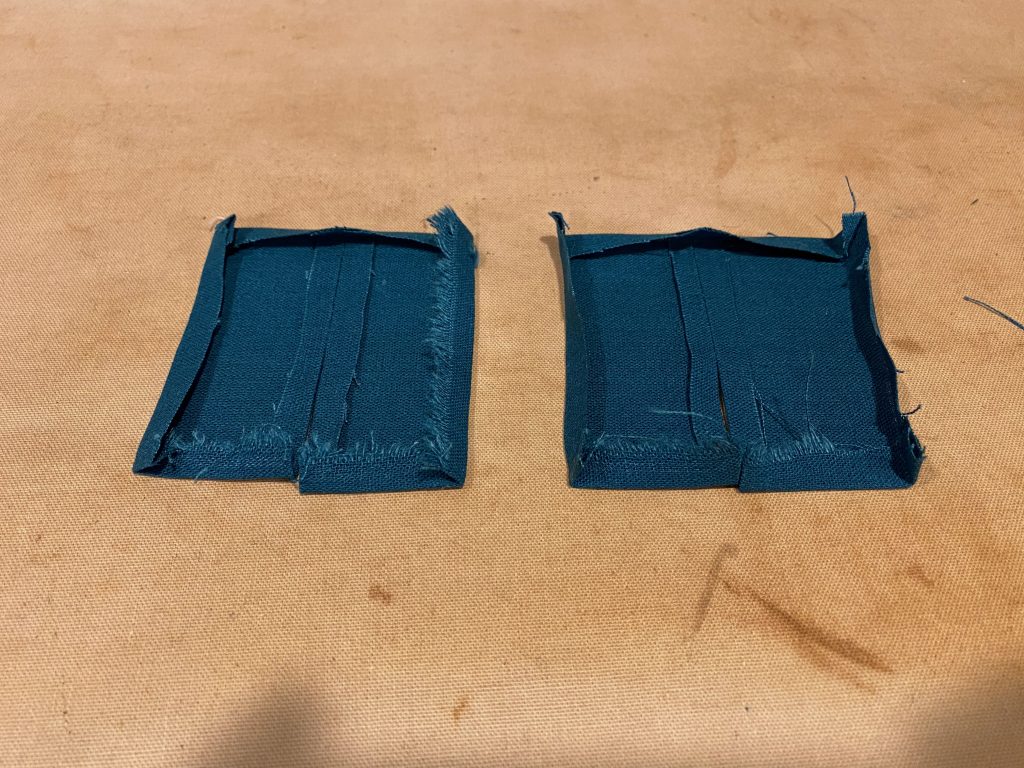
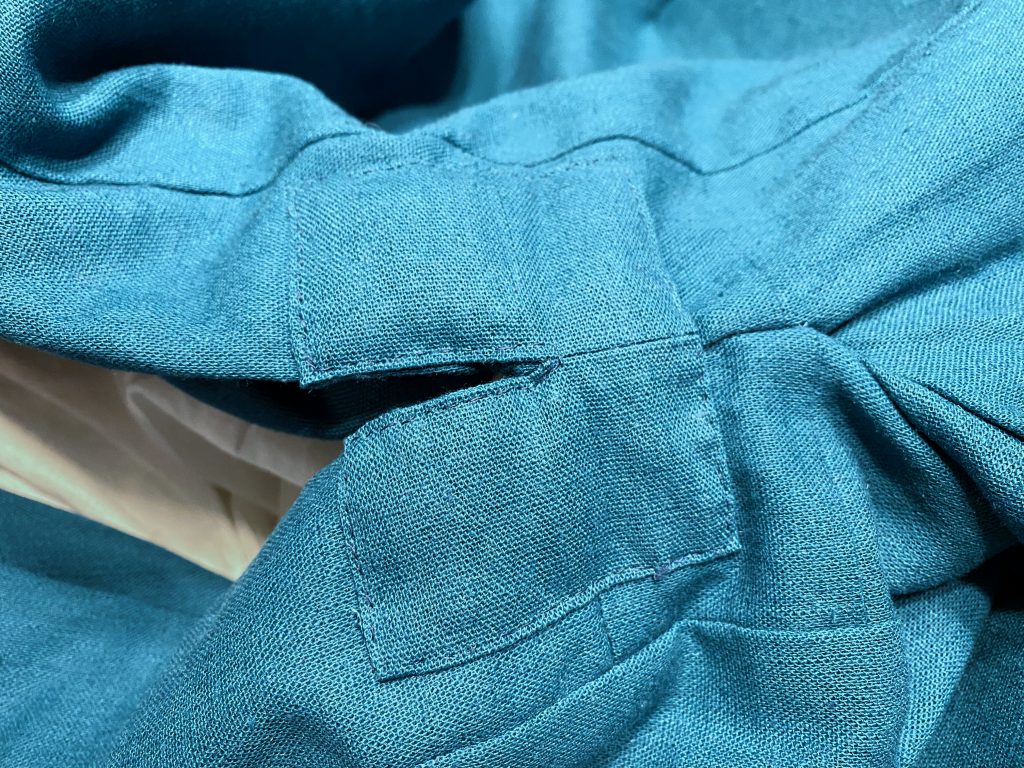
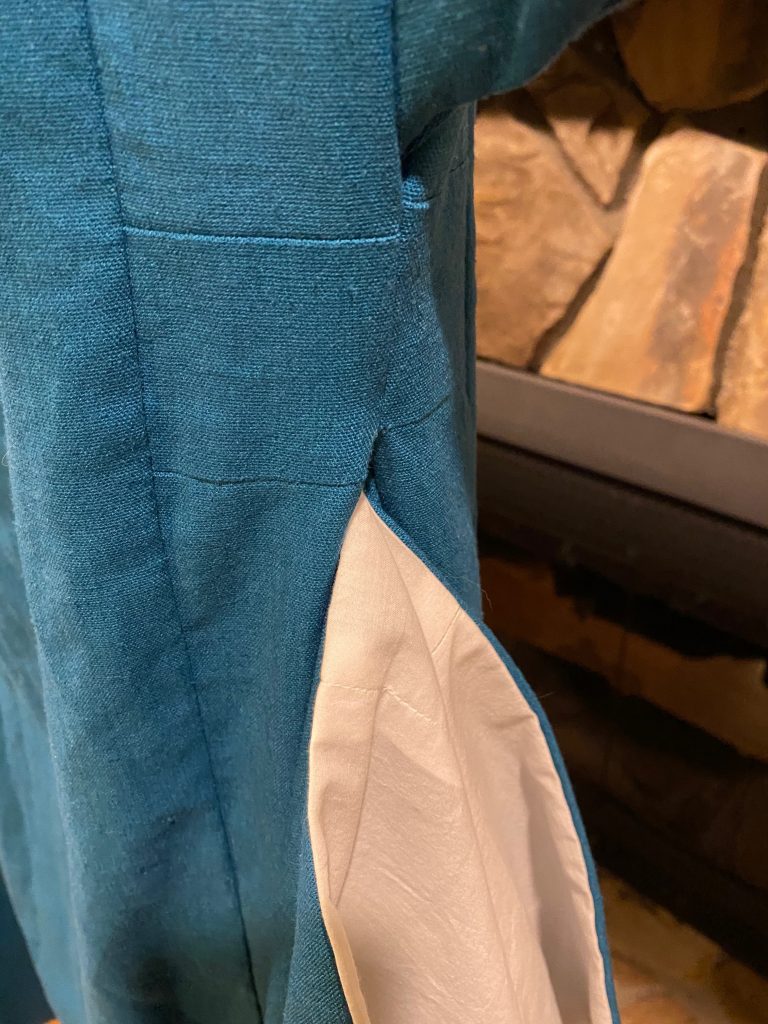
The final element was the reinforcing patches at the top of the side panels. Looking at the original, I could see a seam in the middle of the patch, so I constructed it as two rectangular pieces sewn halfway together, leaving a slit at the bottom. The patches were attached using a small back stitch:
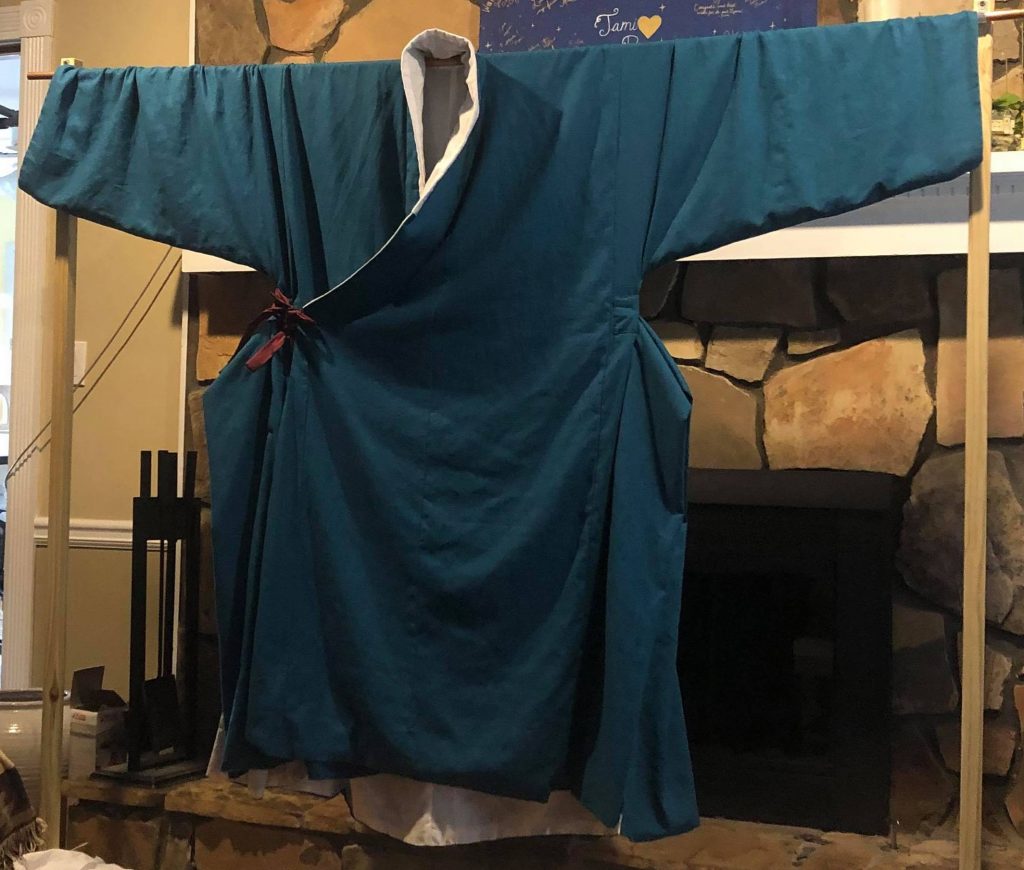
The jikryeong is now complete, but there are more accessories to add for the full outfit!
Seong Myeong Su Daegam provided a large amount of research and translation help with this outfit.
The next step of the jikryeong process was to finish the lower side panels. I was able to turn it inside out enough to access the edges I needed and sew these seams by machine:
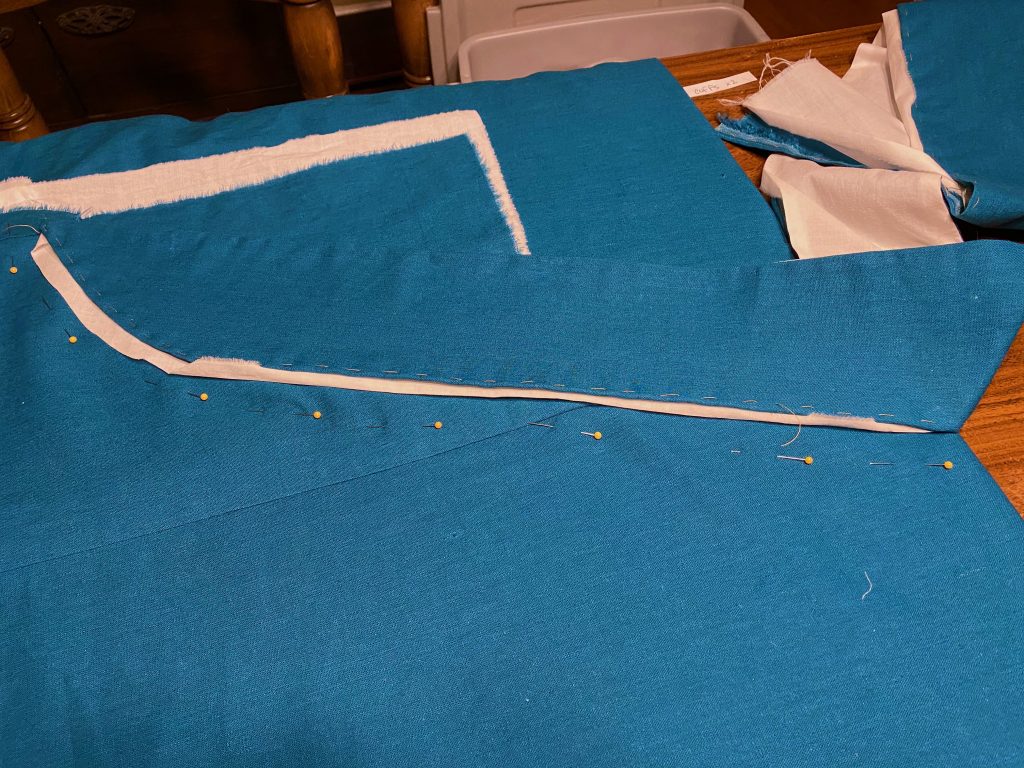
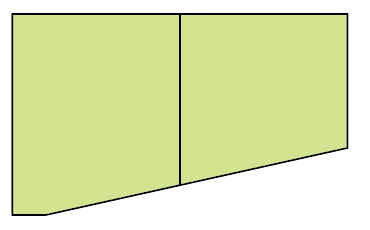
Next I had to tackle the collar. To give it some extra body, I cut two more strips of the teal linen (one without seam allowance) and machine quilted them together with zigzag stitches. I cut the curve on the end and then sewed the quilted piece to the outer and lining layers at the top edge. I then folded over and pressed the seam allowance on both layers. I basted the folded edge of the outer layer around the quilted interlining and then laid out where the collar would go on the front of the body:
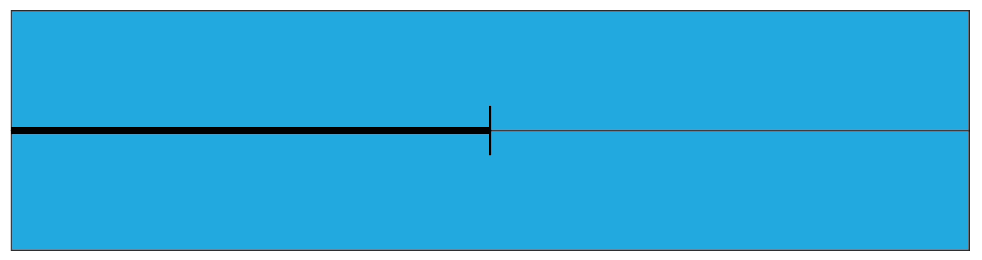
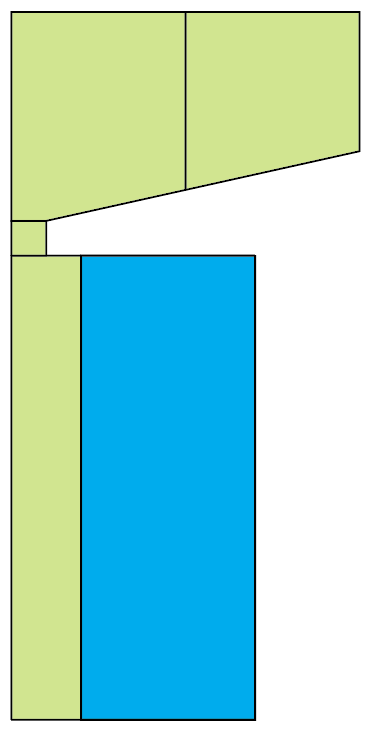
At this point the body panels had not been trimmed at all. The goal was to line up the collar so the bottom point hit at the top of the diagonal panel (in line with the side gusset below the sleeve) and the top hit the edge of the neck opening:
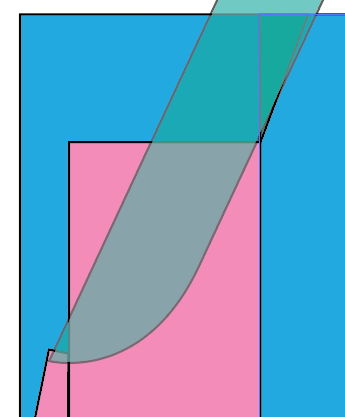
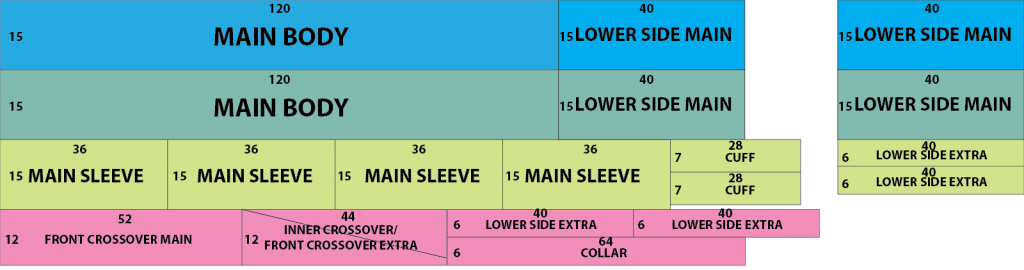
As you can see in the diagram, the collar just barely covered the point where the main crossover panel attached to the body. In the future, I will add a couple inches to this panel for safety.
The edge of the body lining didn’t quite match up with the outer layer, so I trimmed the lining to match and then slip stitched the diagonal edge. I could probably have done this by machine, but I didn’t want to risk throwing the collar out of alignment.
I then trimmed the body panels back under the collar and stitched the outer layer of the collar to the body. I cut a slight curve in the back of the neck opening and then continued sewing the collar down around the back of the neck.
I followed a similar method to attach the collar to the other side of the body. This part was simpler because there was only one crossover panel and the collar was square at the end. I had planned for extra length on the collar piece, and once I had it laid out I trimmed off the extra. Before attaching the collar here I sewed the edge of the crossover panel on the machine. Once the collar was attached all the way around, I sewed the lining down on the inside of the body.
Next I trimmed the lining at the cuffs and hand finished those edges. Finally, I made some silk ties for the front and a heavy linen tie for the inside.
The final steps will be adding the white band on the collar (dongjeong – 동정), hemming, and pleating in the side panels.
Seong Myeong Su Daegam provided a large amount of research and translation help with this outfit.
I did the majority of the construction for the jikryeong lining first, to work out the kinks before cutting the linen layer. First I attached the two sections of the lower side sections:
Next I combined the sleeve sections:
Then I sewed up the back seam of the body and cut the slit for the neck:
At this point I cut apart the two angled crossover sections and attached them to the body. The angled part of the front crossover needed to be shortened some. The part of the body where the collar will be attached will not be cut until the very end, when the lining and outer layer are together:
After checking the length on my arms, I ended up removing the cuff section of the sleeves before cutting the taper:
I cut 3″ squares for the side gussets out of scrap, then attached the sleeves, gussets, and lower side panels:
Finally, I attached the side sections to the body and sewed up the seam along the sleeve and side gussets:
There is plenty of extra length so I can adjust the hem once the layers are together. Next I will do all of this again in linen and attach them along the lower side panels.
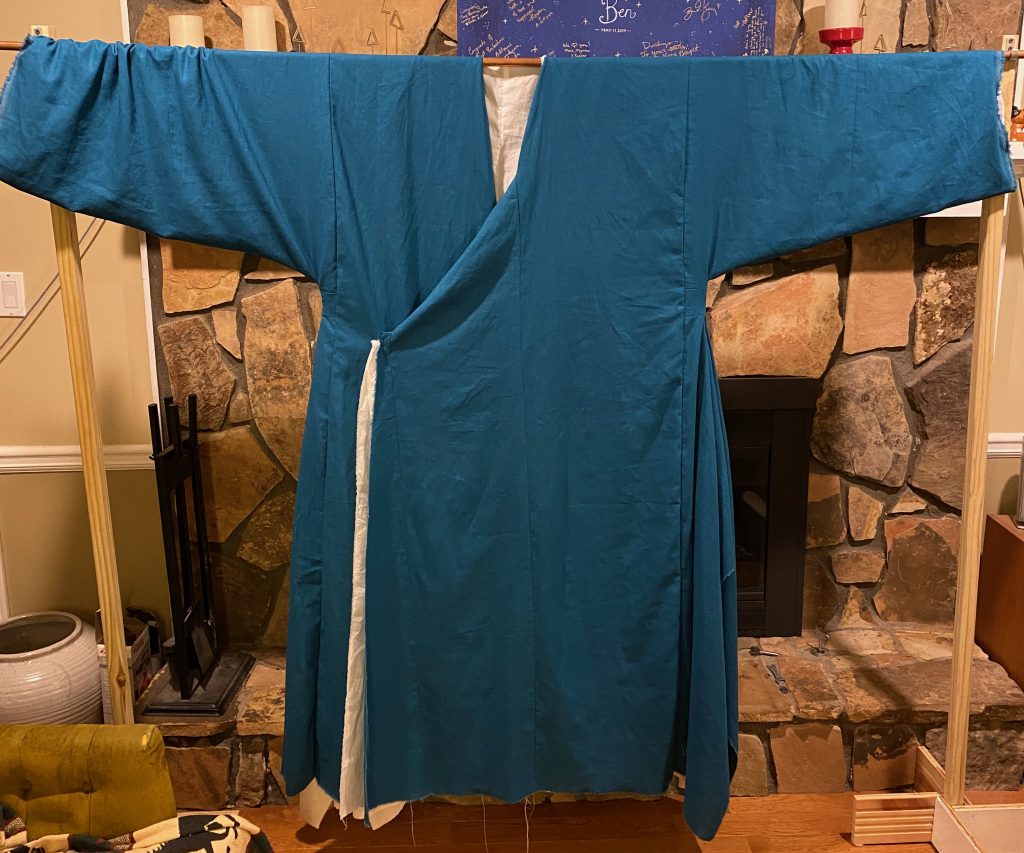
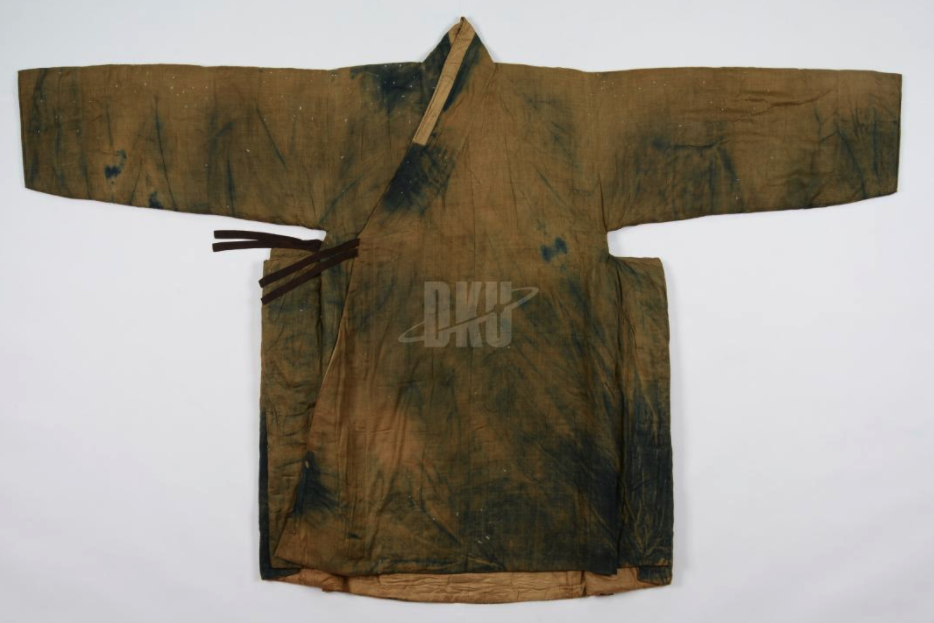
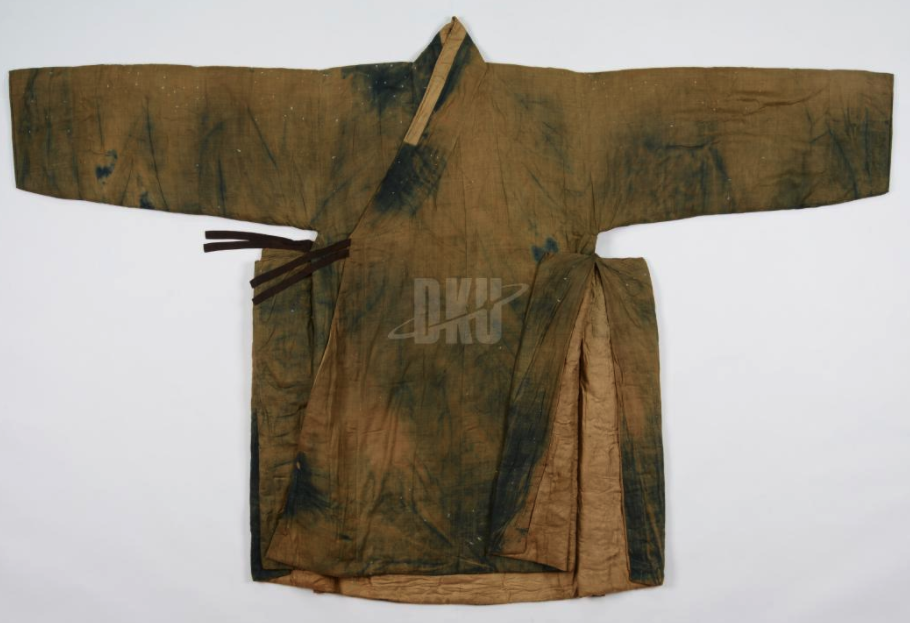
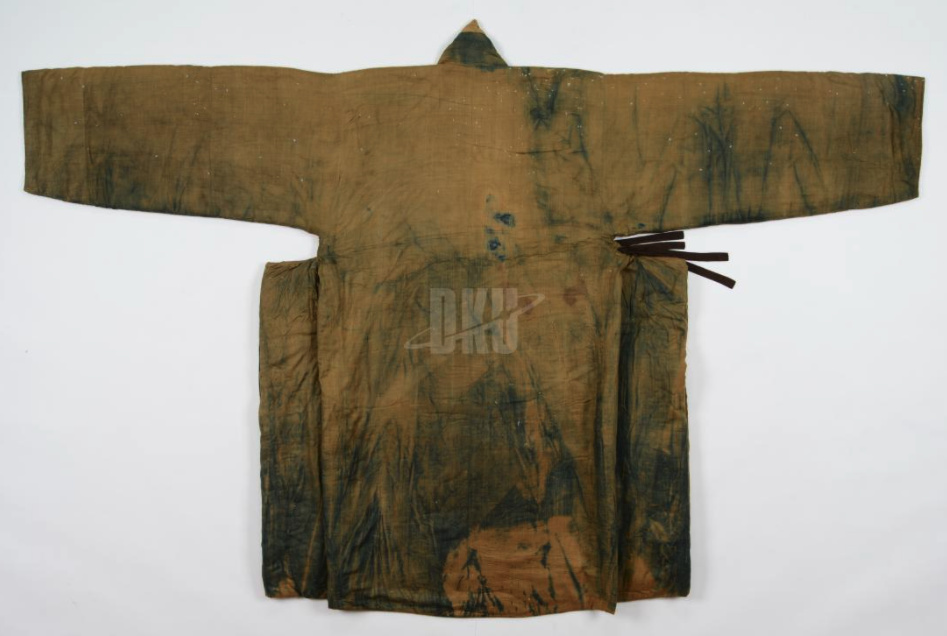
The most complex garment for this outfit is the jikryeong (직령, pronounced “jingnyeong”). This is a coat with a straight collar (as opposed to the danryeong, which has a round collar) and pleated sides.
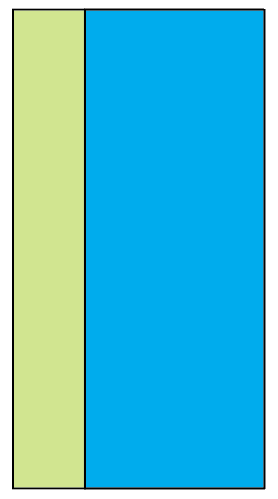
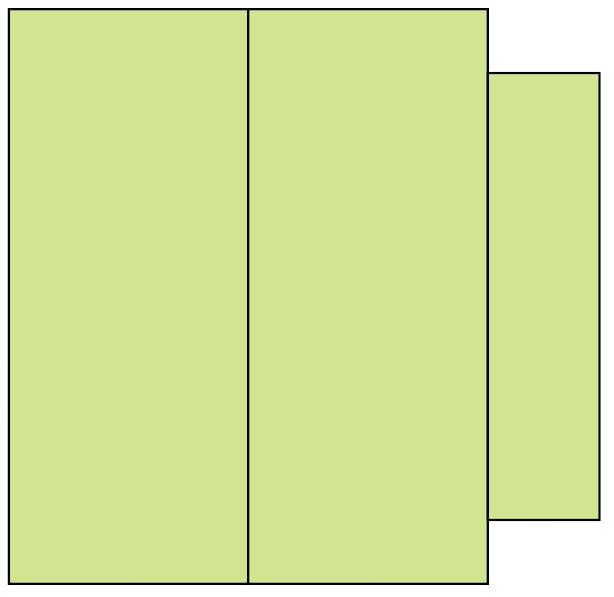
The original is made of silk, padded and possibly lined with cotton, dated from 1524-1582. Mine will be made of linen, lined with cotton. After estimating the measurements based on the above pictures, I came up with this cutting layout based on 58″ wide fabric:
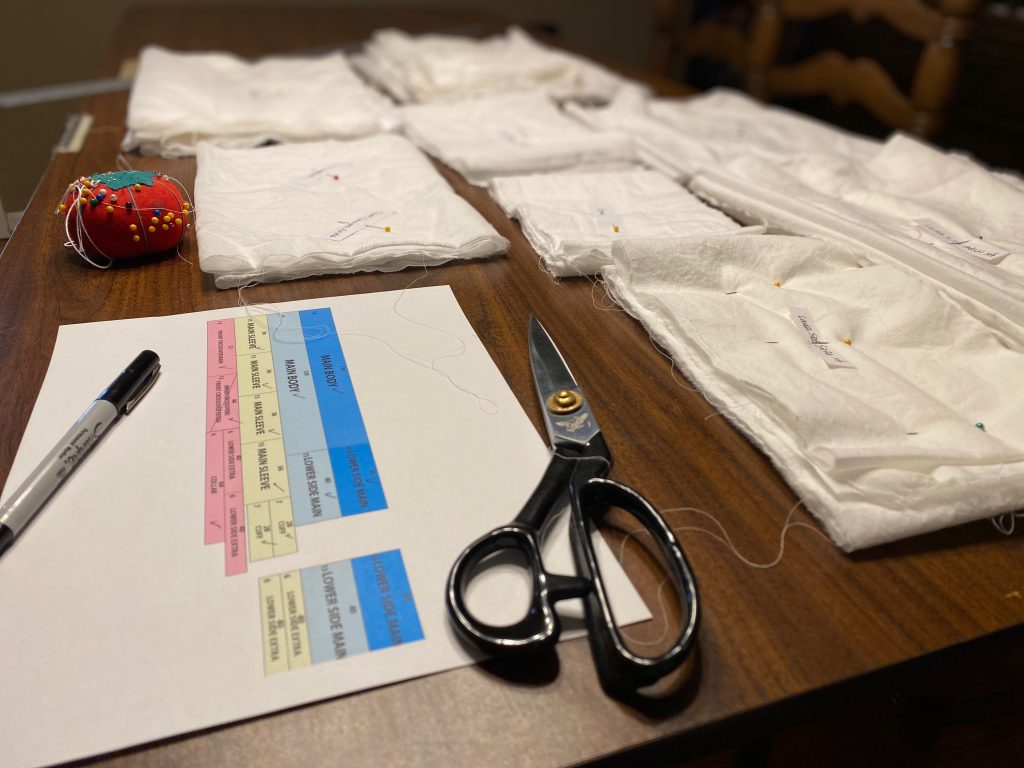
So far I have cut the cotton lining, which was in 5 yard chunks requiring a little adjustment to the above diagram. I made sure to label the pieces as I cut them so I could later tell the various rectangles apart.
Seong Myeong Su Daegam provided a large amount of research and translation help with this outfit.
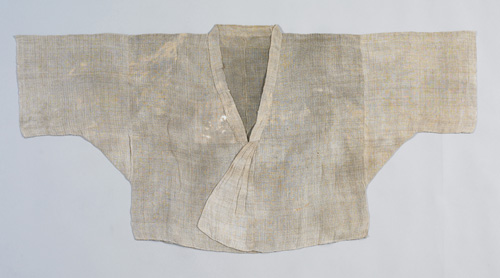
The jeoksam (적삼) is an under layer worn by both men and women, and is fairly simple in construction. There is a wide variety of methods for constructing the collar, underarm gusset, and sleeve available. I based the proportions for my jeoksam on the pictured example, but with a wider collar and without the pleats in the crossover panel in the front. The underarm gussets are squares cut in one piece with the sleeve and folded in half, a common construction in 16th century examples.
Possible materials that could have been used in period are silk, cotton, hemp, or ramie. I opted for cotton for my first attempt. The collar is doubled, but otherwise the garment is a single layer. The construction is mostly by machine, with French seams where it was easy to do so. Hems and final collar attachment were done by hand.
Seong Myeong Su Daegam provided a large amount of research and translation help with this outfit.