
The suit is pretty much done now. I still need to make some black stockings, maybe a new hat, a new belt, add a couple more buttons on the cuffs, and fix one of the shirt cuff toggles. It is done enough to take some pictures though, so here they are. The belt is too short, so it makes some unnecessary wrinkles at the waist. The trunk hose sit just a touch lower than I’d like, but that’s minor quibble. It’s all extremely comfortable, and I can sit with zero difficulty. All in all, I’m pleased.
Tag: alborghetti
Alborghetti Suit: Codpiece
The codpiece is made and installed. The main part of the codpiece is a single layer of wool with no interlining, stuffed with strips cut from a failed linen sleeve lining. The base is one layer of the heavy wool and a lining of white linen. The edge binding and racing stripe are velveteen.
I sewed the center seam on the machine, then turned t and basted it to the wool base. I sewed around the base of the stuffed portion, leaving an open section on one side to put the stuffing in. Once it was stuffed, I closed up the hole and sewed the trim on. Next came the binding in the usual manner. I did it in two pieces only because that’s what was demanded by the length of scraps I had on hand. At this point I sewed five pairs of hooks and eyes (alternating) on the center front opening of the trunk hose. The point of the codpiece was sewn in at the bottom of the opening; each side was only sewn on for about 2″. Eyelets in the codpiece and trunk hose finished the process.
Alborghetti Suit: More Trunk Hose Construction
The trunk hose are nearly complete now. All that remains is binding one of the canions, adding hooks and eyes at the center front opening, and building the codpiece.
Alborghetti Suit: Pocket
As promised, here’s the step-by-step for installing the pocket. To refresh your memory on what the pocket is supposed to look like, you can refer back to the portrait.
First we start off with the interlining for the “poof”. I cut it from the last of the wool that I’ve used for years and years for this sort of thing. It provides body and springiness and I’ll miss it terribly. There wasn’t enough of it left by this point to get the whole thing out of one piece. Instead of trying to piece in scraps of the same stuff (which would make really bulky seams) I finished the ends off with some cotton I’ve been using for patterning. Conveniently enough, this will help reduce bulk at the inner leg, which is always a good thing in these situations. The poof was patterned based on the trunk hose pattern, with the pieces spread apart. I eyeballed a lot of lengths and had to make a few changes along the way, but it seems to have turned out okay.
Alborghetti Suit: Trunk Hose and Buttons
I’ve made some progress on various bits, but the age old dilemma of the black suit means that the details are hard to make out.

One side of the trunk hose "poof" is in the process of being attached. You can't really see it, but the pocket was installed before attaching the poof to the foundation. There will be an entire post on the pocket later.

The buttons from my old black suit have been moved to the new doublet.

The little silver beads at the top of the buttons have been replaced with little black beads.
Alborghetti Suit: Buttonholes
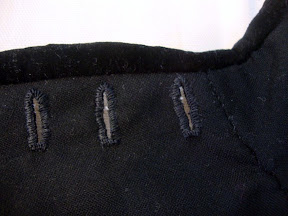 The buttonholes on the front of the doublet are done. I wish my hand would quit falling asleep while I’m sewing!
Alborghetti Suit: More Recycling
I dismantled the sleeves tonight and cut the wool up for the trunk hose canions. The canions are now covered, with hardly any waste. Not a lot of progress, but better than nothing.
Alborghetti Suit: Sleeve
 I finished binding the doublet edges, threw together a couple of shoulder wings out of scraps, and whipped up a sleeve pattern. I got one wing and sleeve on and it looks like it will work, more or less. I need to try it on with the right shirt to make sure it’s not too snug, but I have hope.
The morning after:
On reflection, I think even “a little snug” is too much. I’m going to recycle the wool for canions and redo them. It’s a little wasteful, but I have a few yards of the wool left and nothing else that needs it but the trunk hose poofs and codpiece.
Alborghetti Suit: Eyelets and Binding
I’ve got about half the eyelets in on the trunk hose waistband, and made some good progress on binding the edges of the doublet. The doublet edges had been kind of floppy and wavy, but (As expected) the binding has given them some great structure. I’m doing about a 1/2″ binding in cotton velveteen, which is larger than I usually do, but it’s intended as a visible design element. The visual difference between the wool and velveteen is quite striking. I had contemplated adding some extra stripes of velveteen aside from the edges, but the stuff I’m using would need to have its edges turned under, and the synthetic stuff that doesn’t fray looks different enough that I think it wouldn’t be advisable. I suppose I can always decide later.
Alborghetti Suit: Waistband and Belt
Last night I tested how the doublet and trunk hose would work together. I pinned the trunk hose foundation to the lacing strip on the doublet, then put everything on and tried to sit down. The pins in the back immediately popped out. Discouraged but still hopeful, I went back and basted the doublet and hose together instead, and this time it seemed to work much better. I went ahead and covered the waistband with black wool, and plan to put eyelets in it sometime this week. I’ll also start working on binding the edges of the doublet and putting in buttonholes. Also sleeves. Each piece will bring me closer to the final fit of the whole suit. Finishing the trunk hose will probably happen last.
Something else that concerned me was whether the looser fit of the doublet would affect how my belt would sit at the waistline. The good news is that I think the belt won’t have any problem staying in place. The bad news is that my current belt is a good bit too short and can’t easily be lengthened. Since I sand cast the current clasp, I can’t just pour up another one easily. Instead I plan to make a new clasp in a stone mold. I looked at several different styles for the new clasp, and I think I’m leaning toward this one:
 It will be easier to cast the loop if I don’t have to mess with rivets, and I’ll be able to move it to another belt more easily. Rather than casting a closed loop, I think I’ll make a flat bar and bend it into a loop. I can replace the lion head with an owl face as well, though it’ll take a little trickery to be able to cast both sides out of one mold. I have some ideas about how to manage that. I may just use the old S-hook for now until I decide I really want to make a new one. It would take a well-registered two-sided mold, which is hassle that I’ll avoid as long as I can.