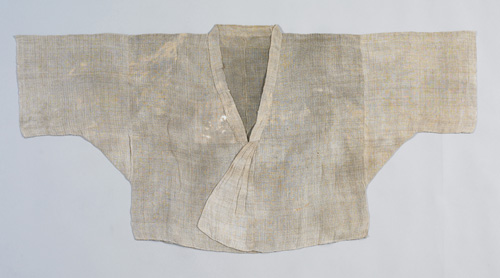
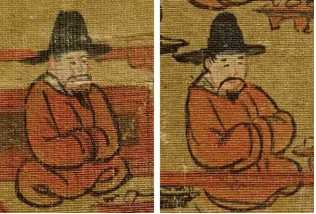
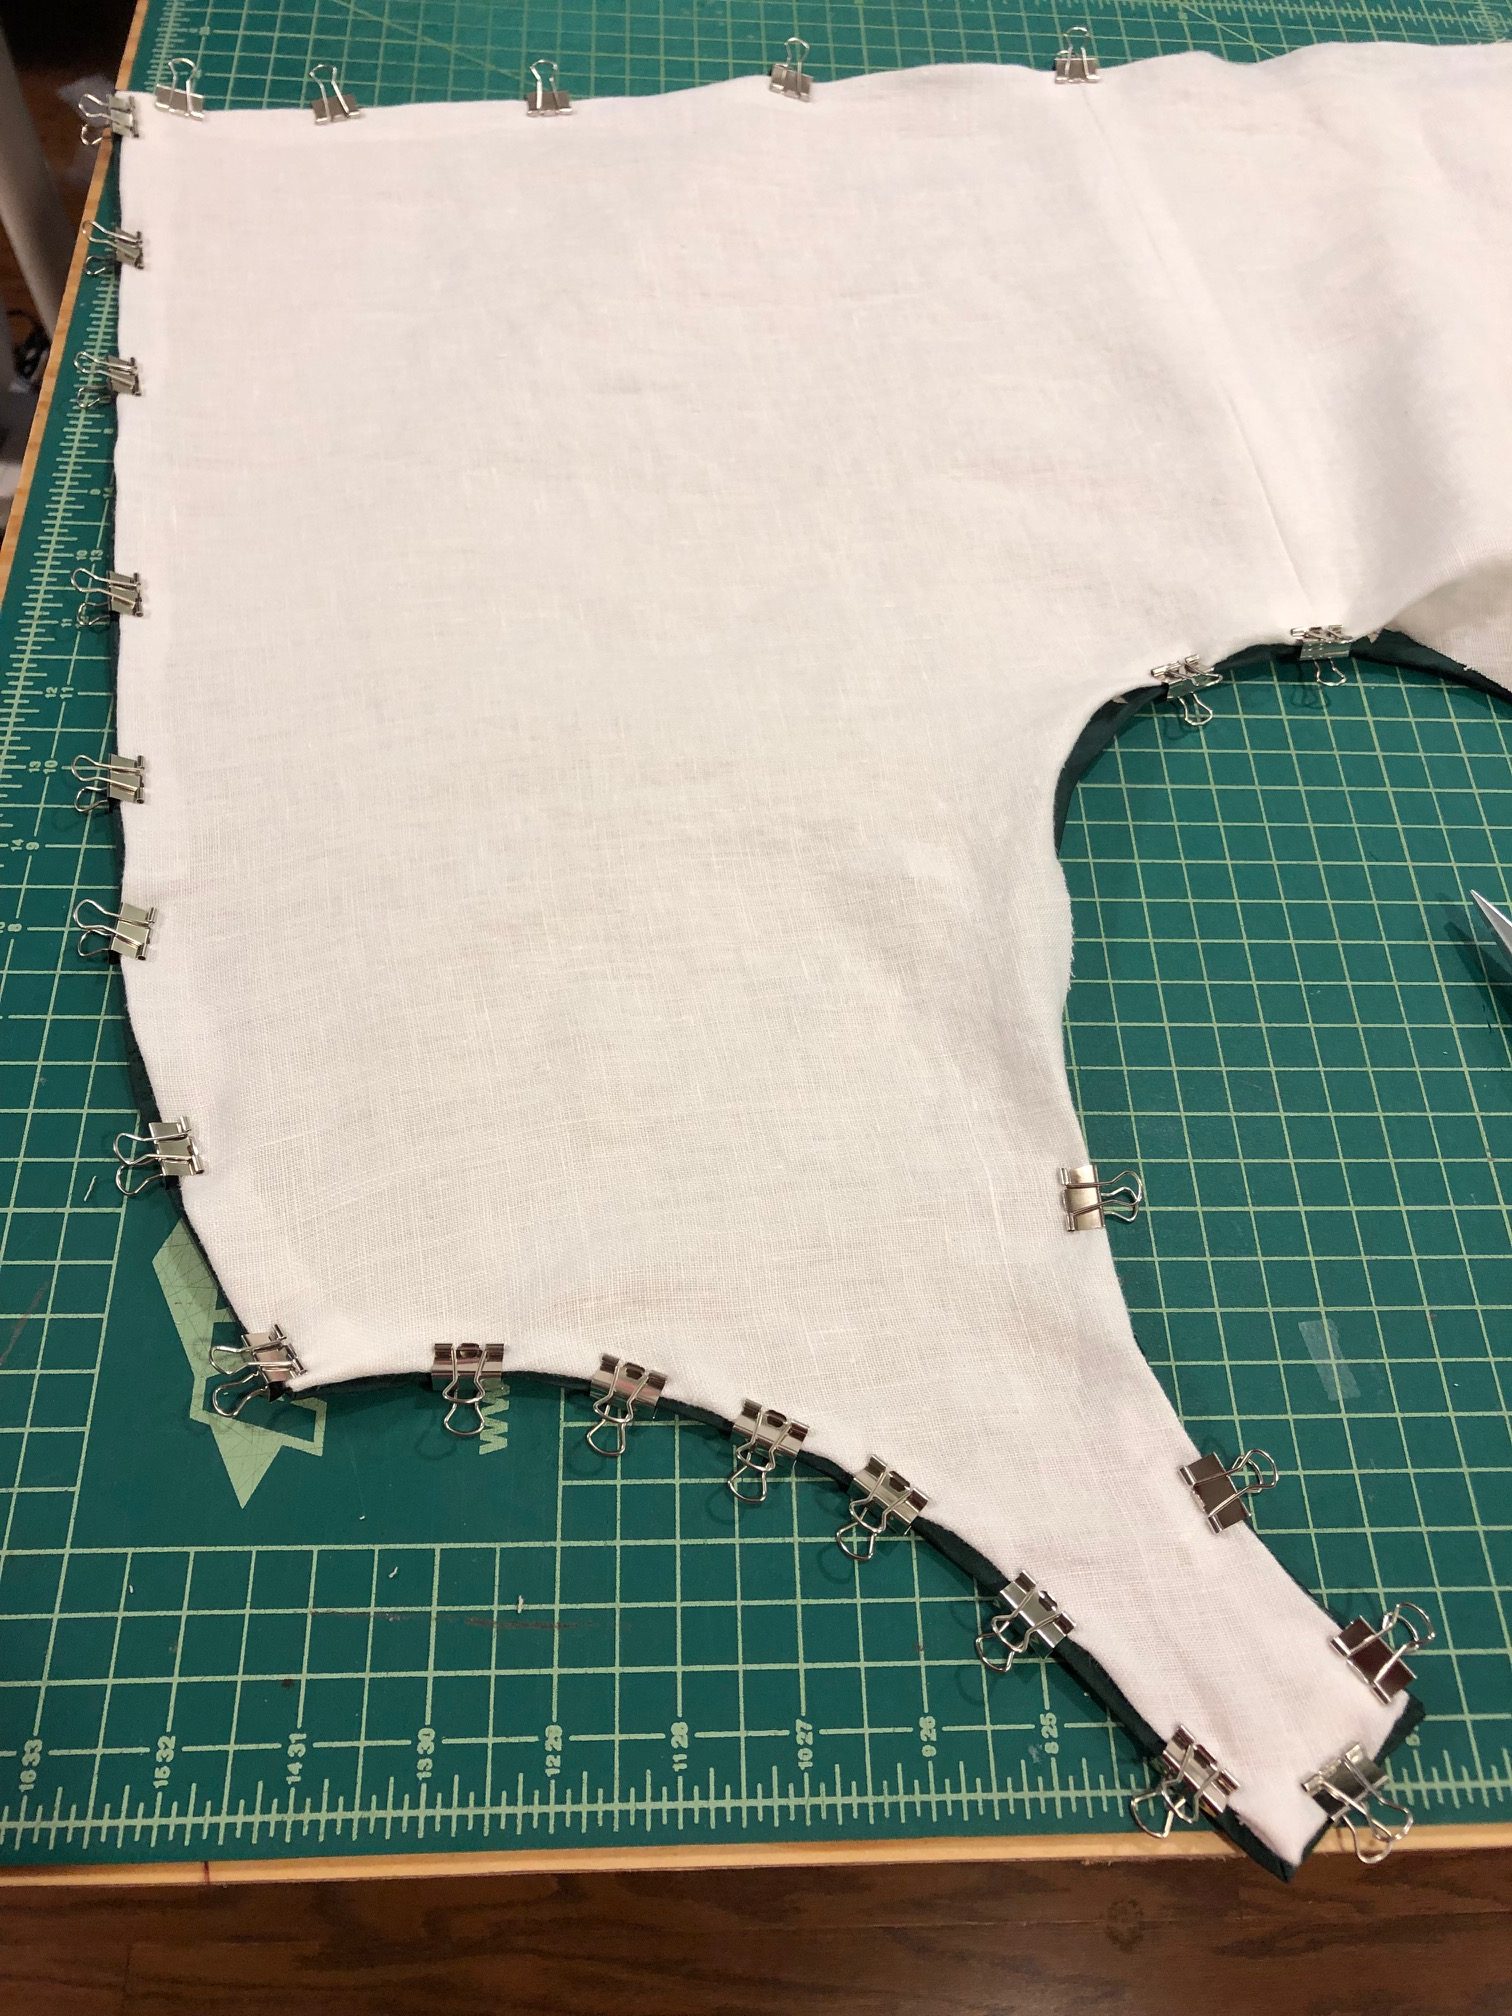
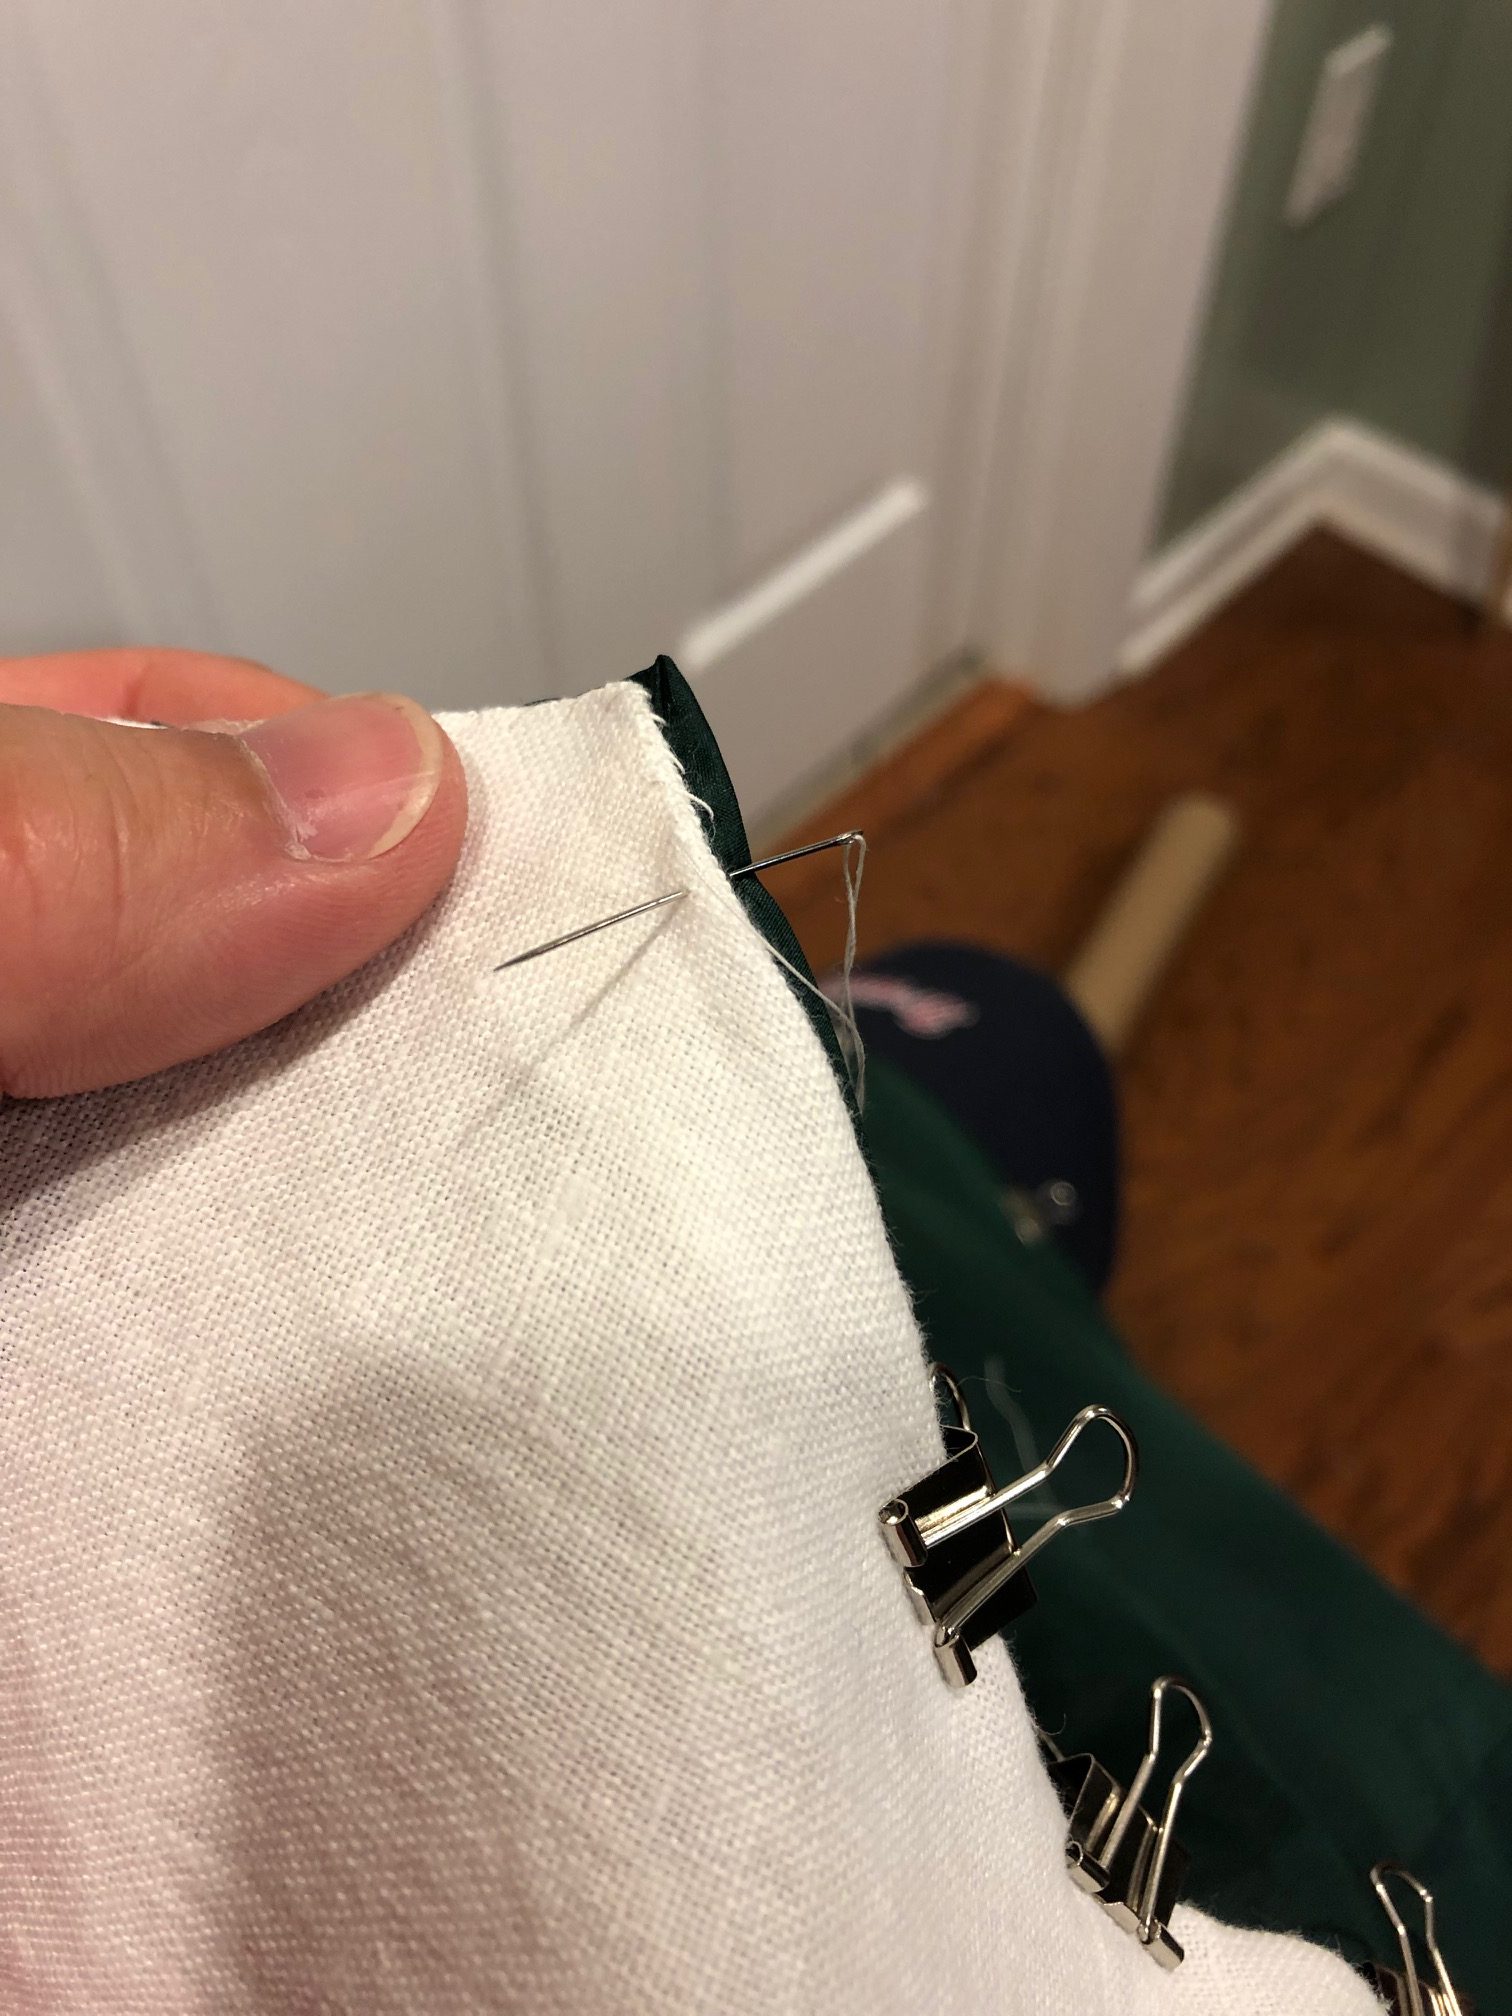
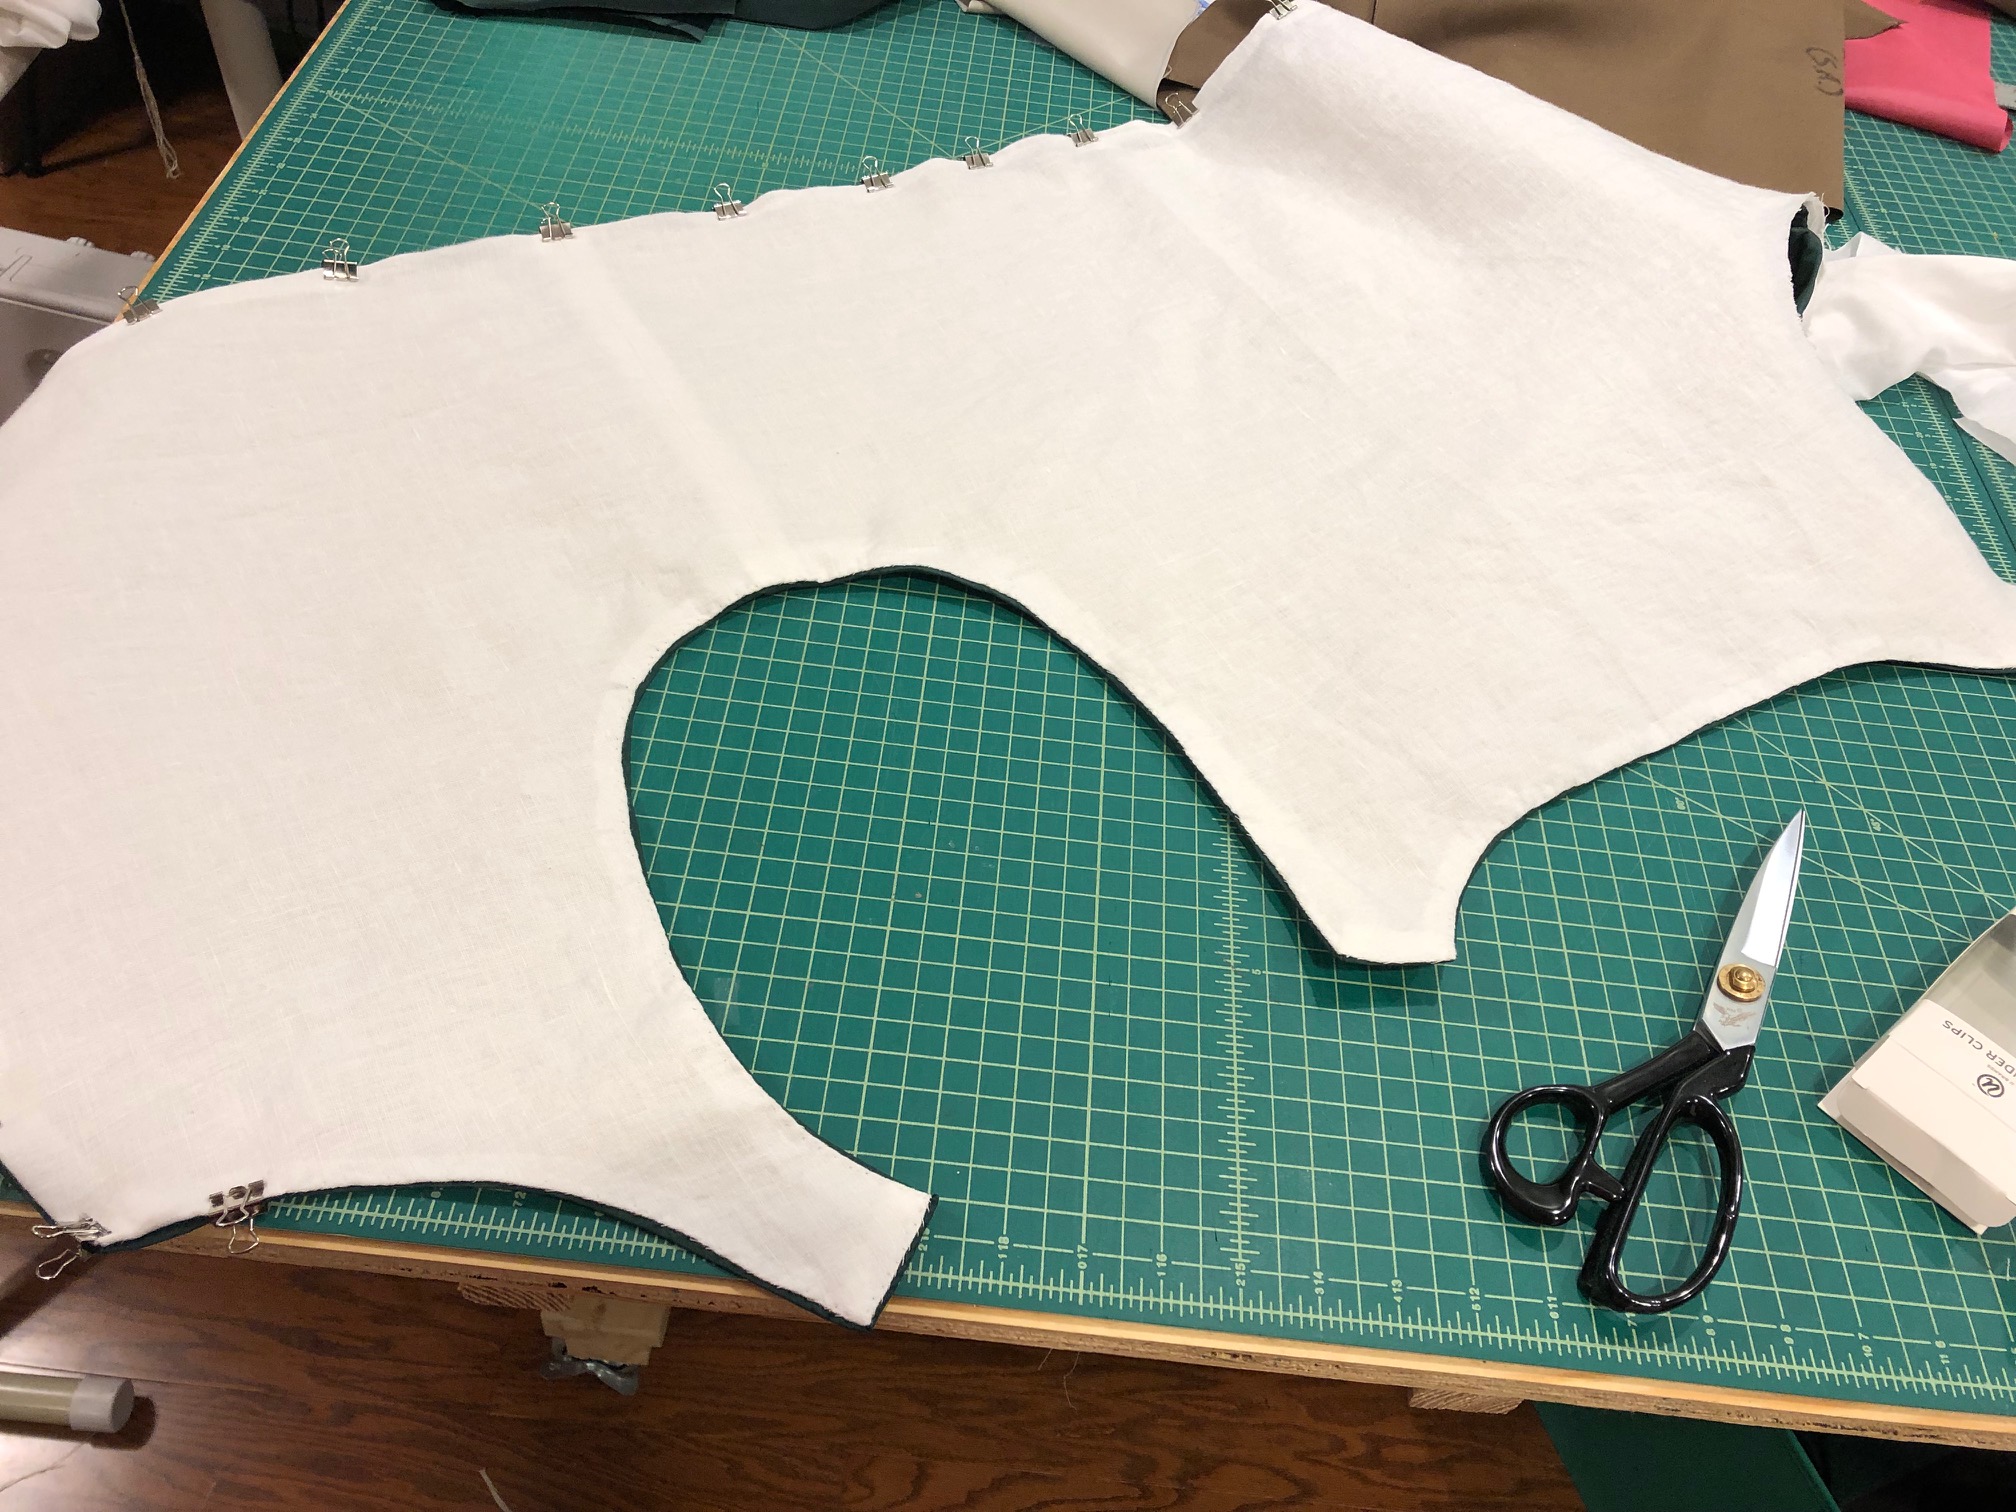
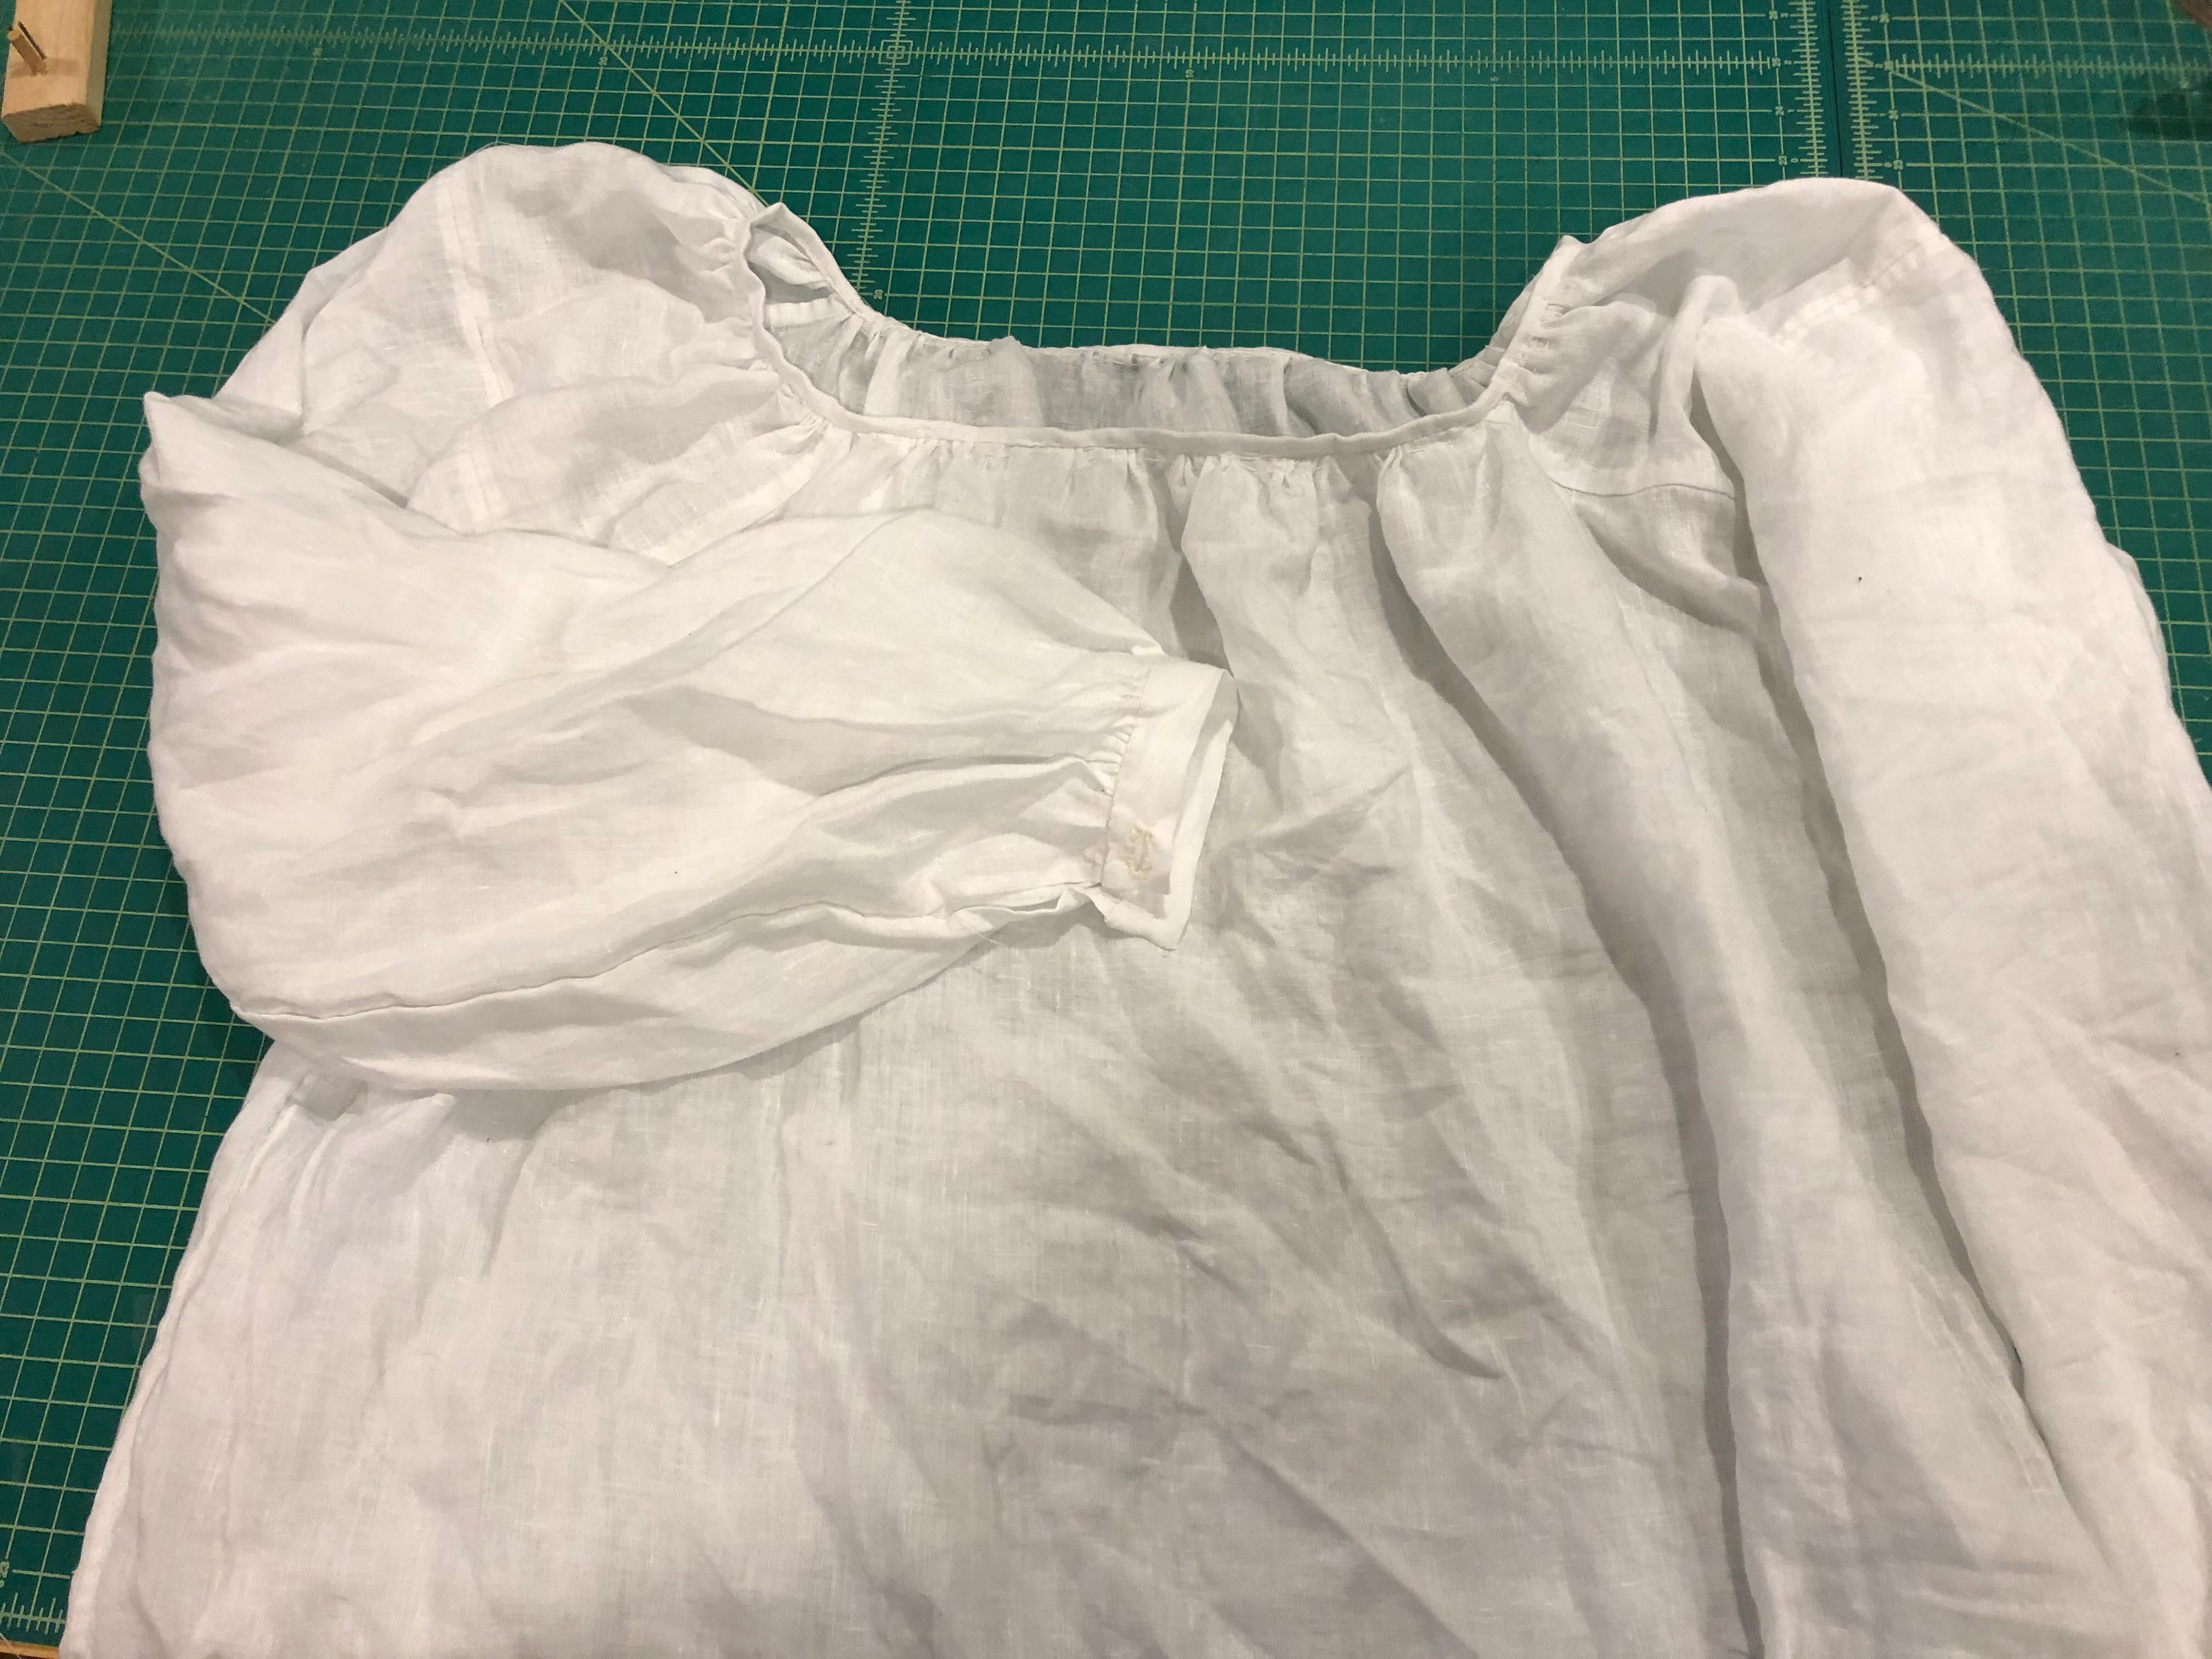
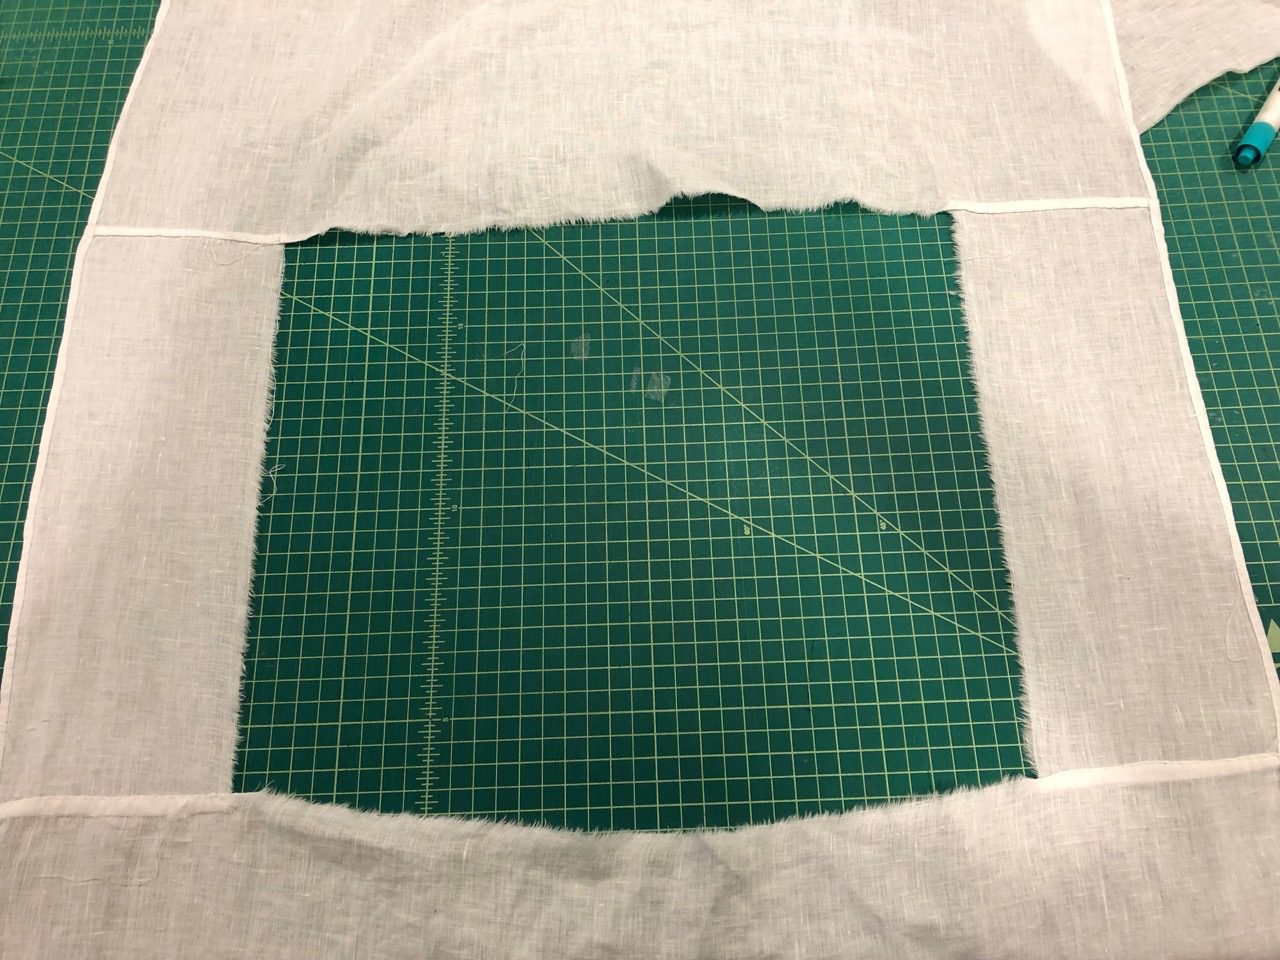
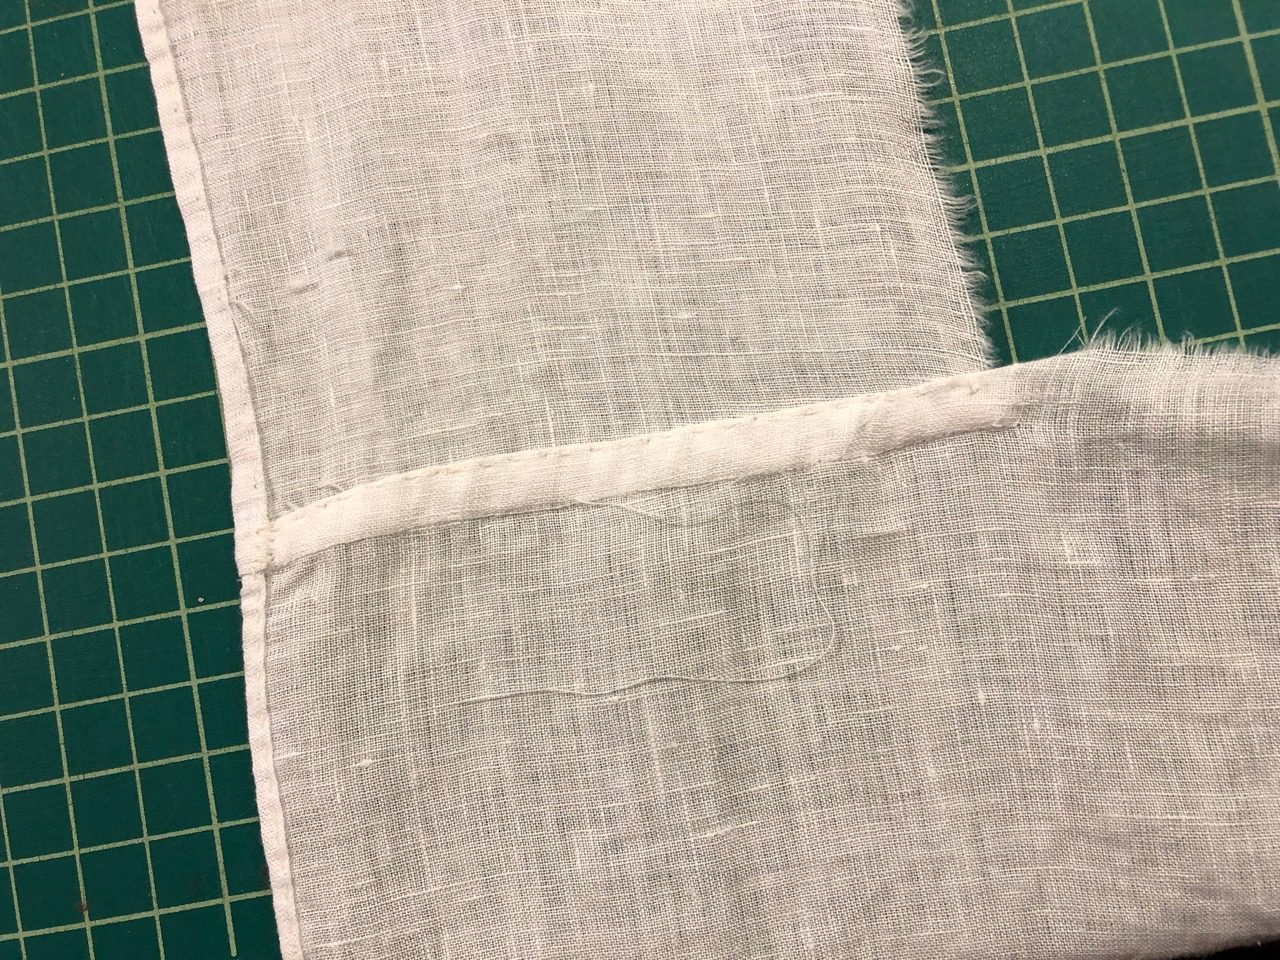
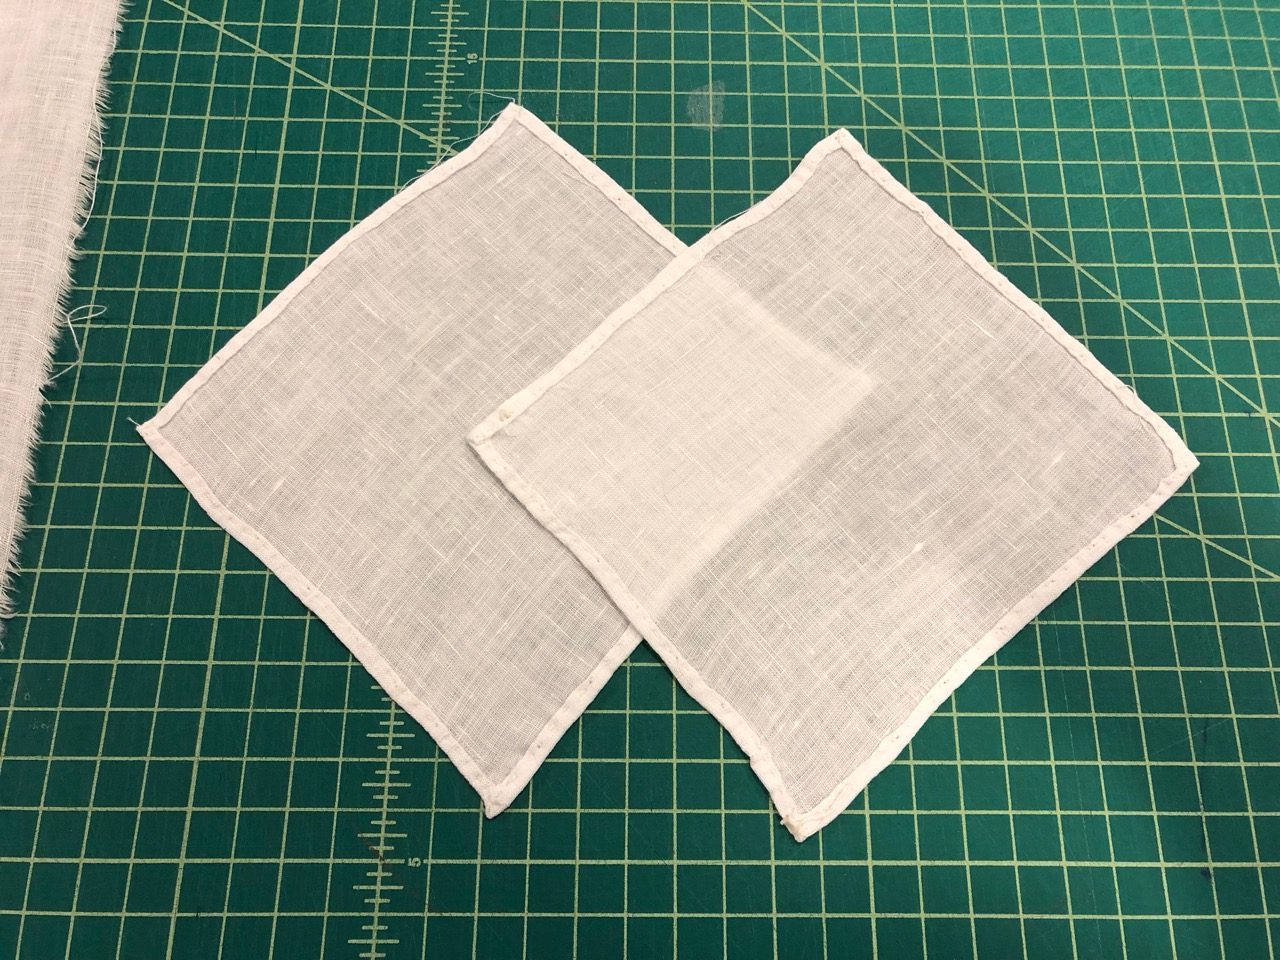
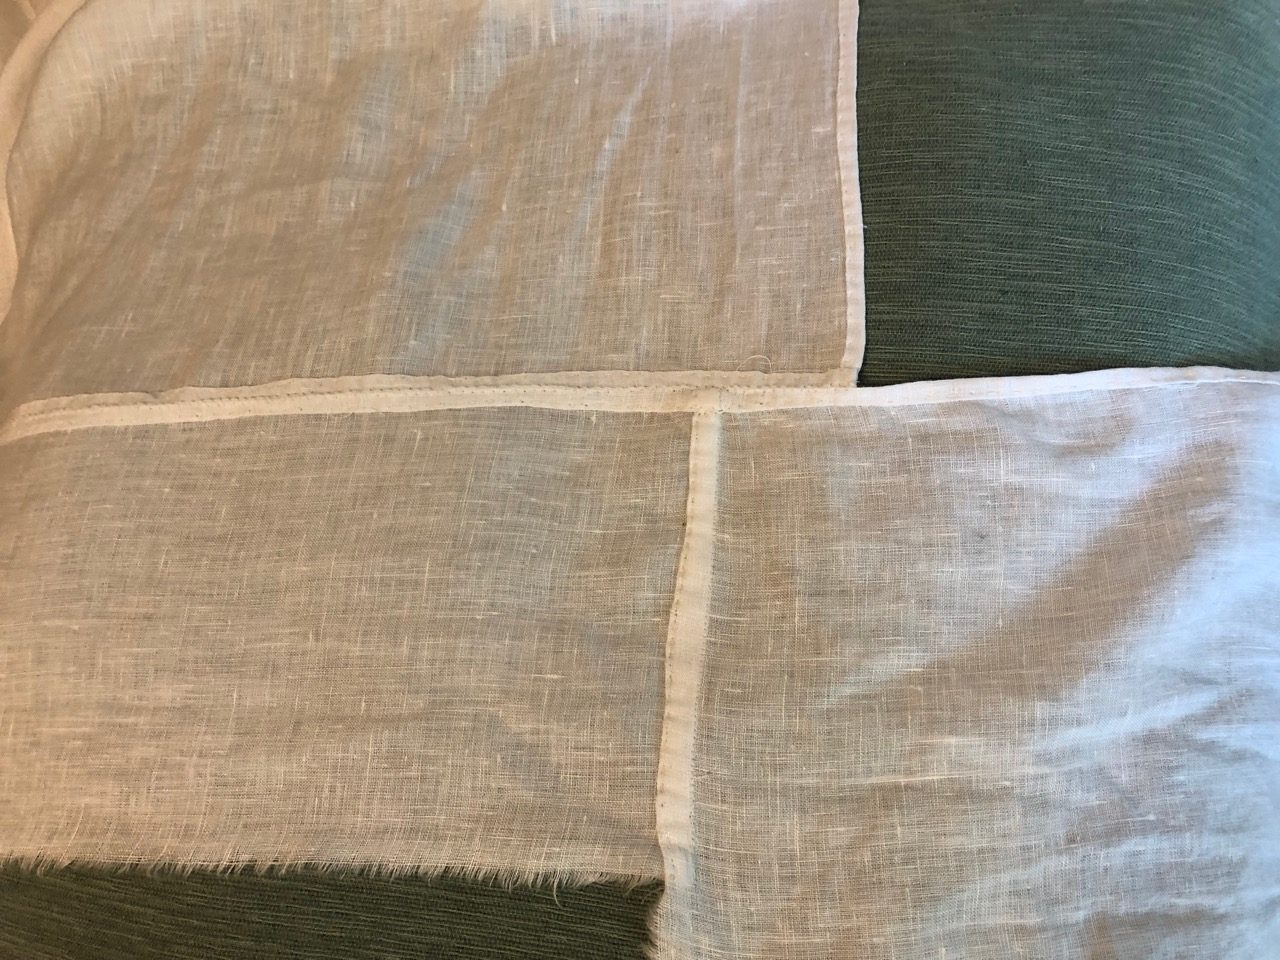
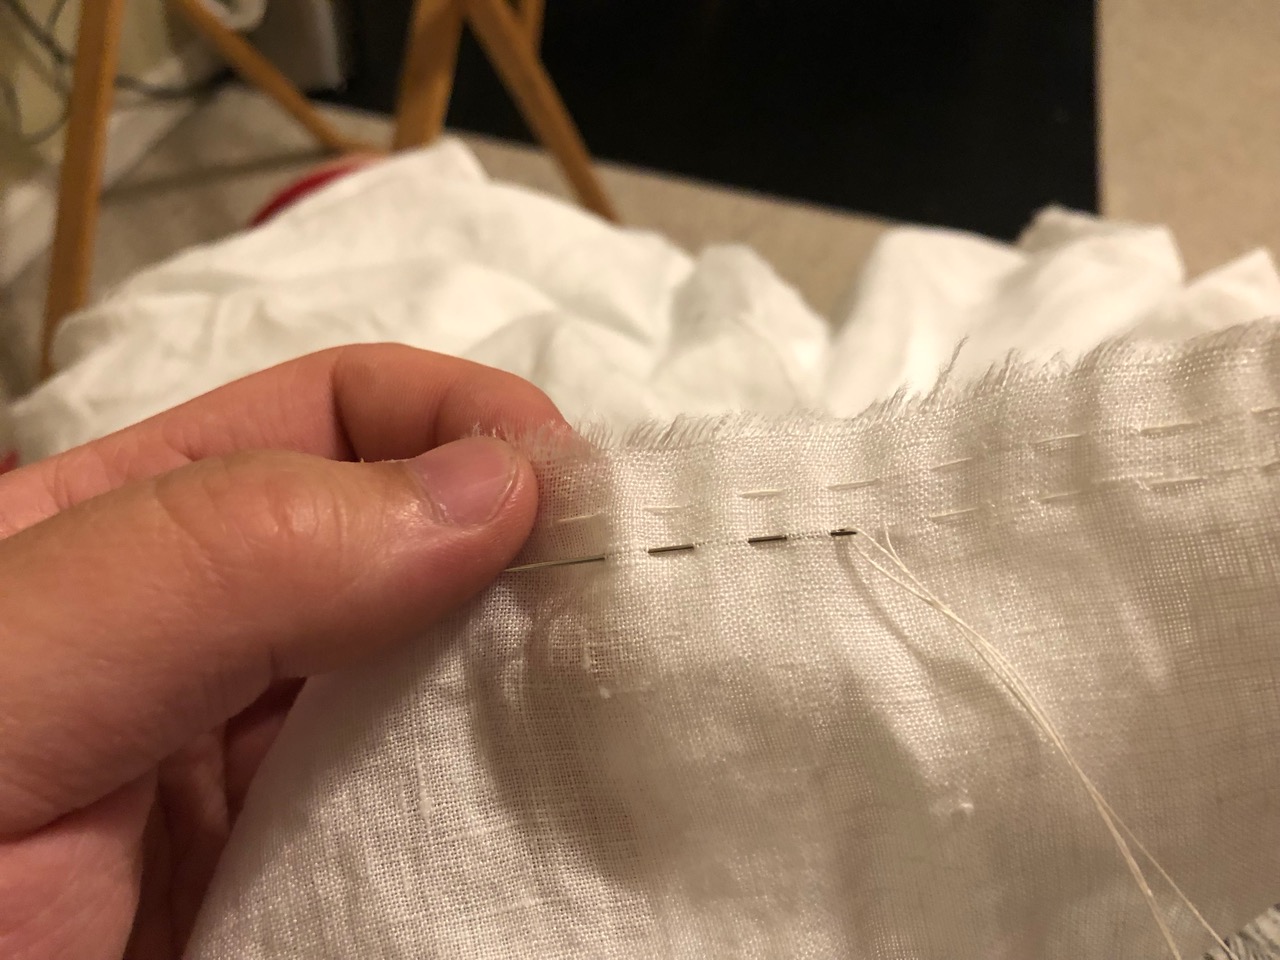
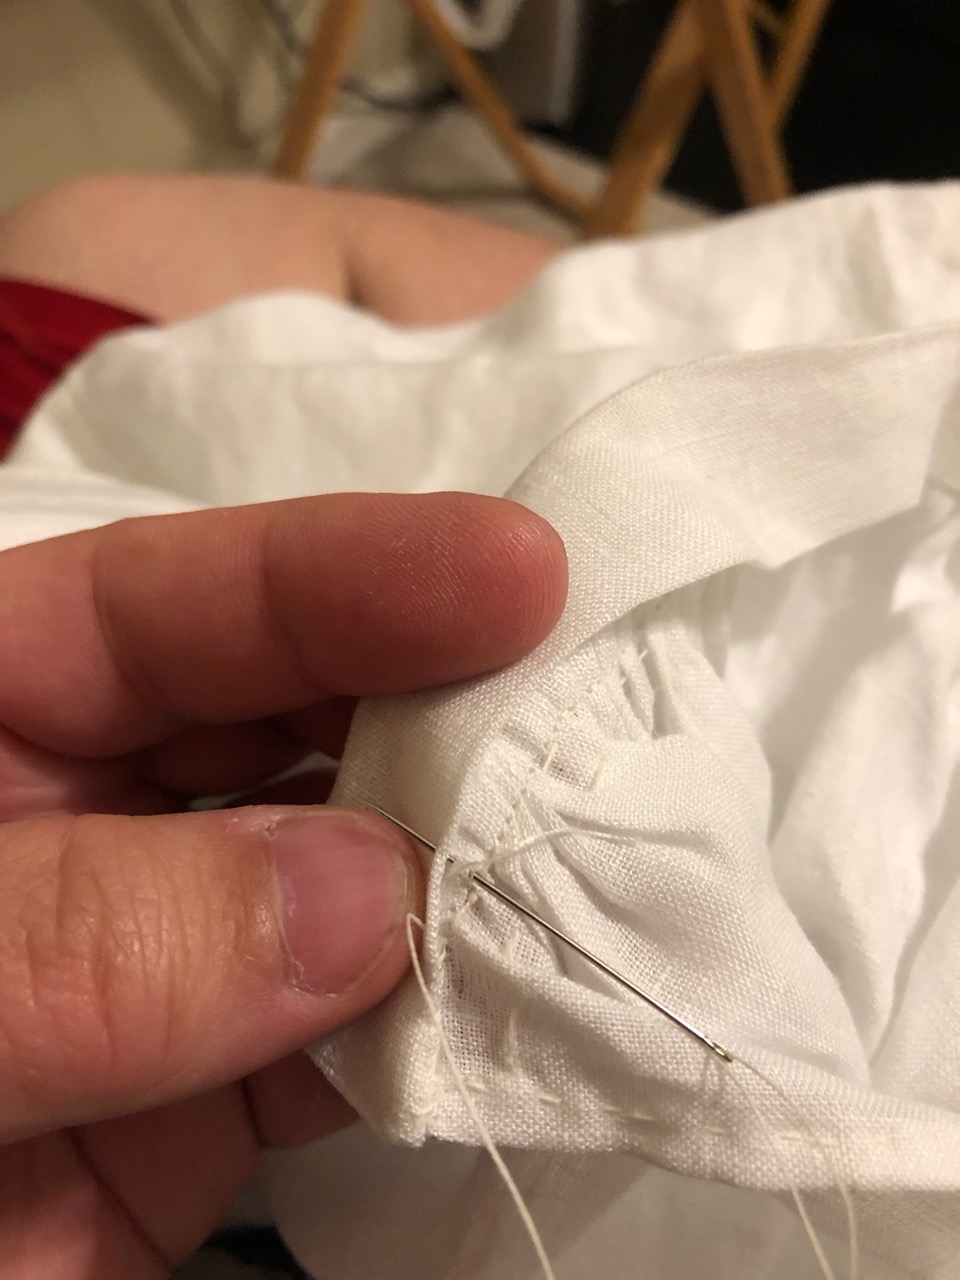
Category: Clothing

Man’s Hanbok – Beginning

Details from a 1567 painting depicting
a social gathering of Joseon aristocrats [1]
A drawing of an outfit similar to the above detail. [1]

With the research assistance of Seong Myeong Su, I am going to make an attempt at a 16th century (Joseon: 조선) Korean man’s outfit, or hanbok (한복). My goal will be clothing appropriate for daily wear for an aristocrat or official.

The items for this outfit will include the following:

  • Jeoksam (적삼) – undershirt
  • Baji (바지) – pants
  • Beoseon (버선) – socks
  • Jikryeong/jingnyeong (직령) – coat with straight collar

Sources:

  1. Bae, Jin-Hee, Eun-Joo Lee. A Study on the Costumes of the Characters of Higyongru , Annual review in cultural heritage studies v.51 no.4 , 2018, pp.44 – 65  

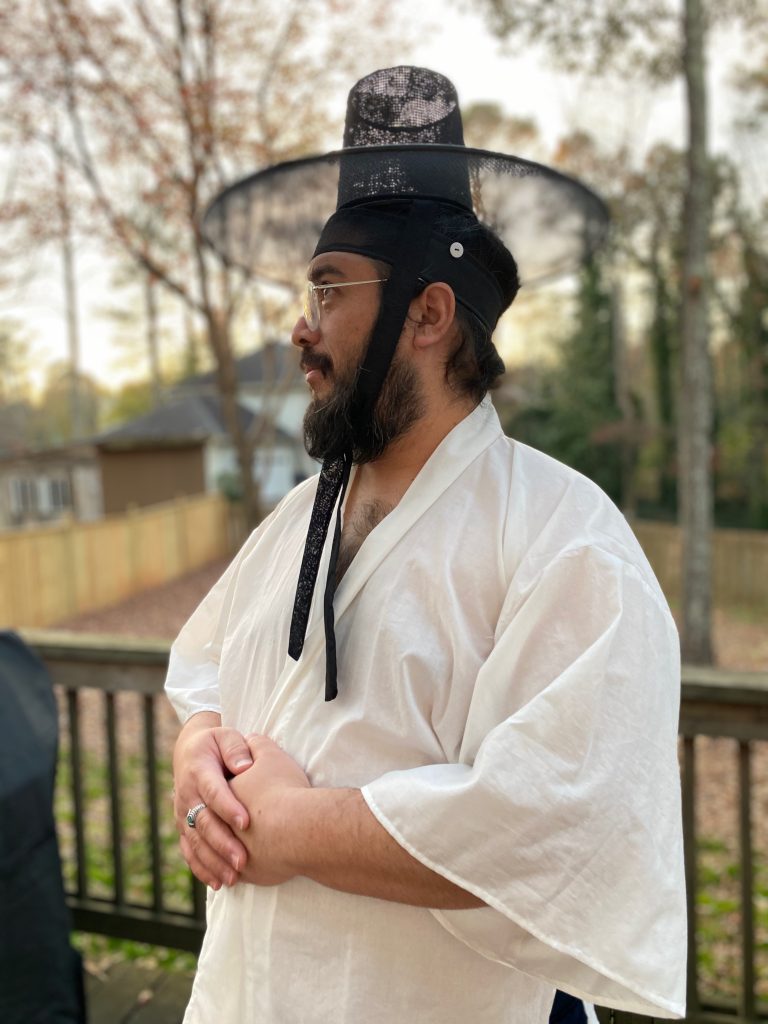
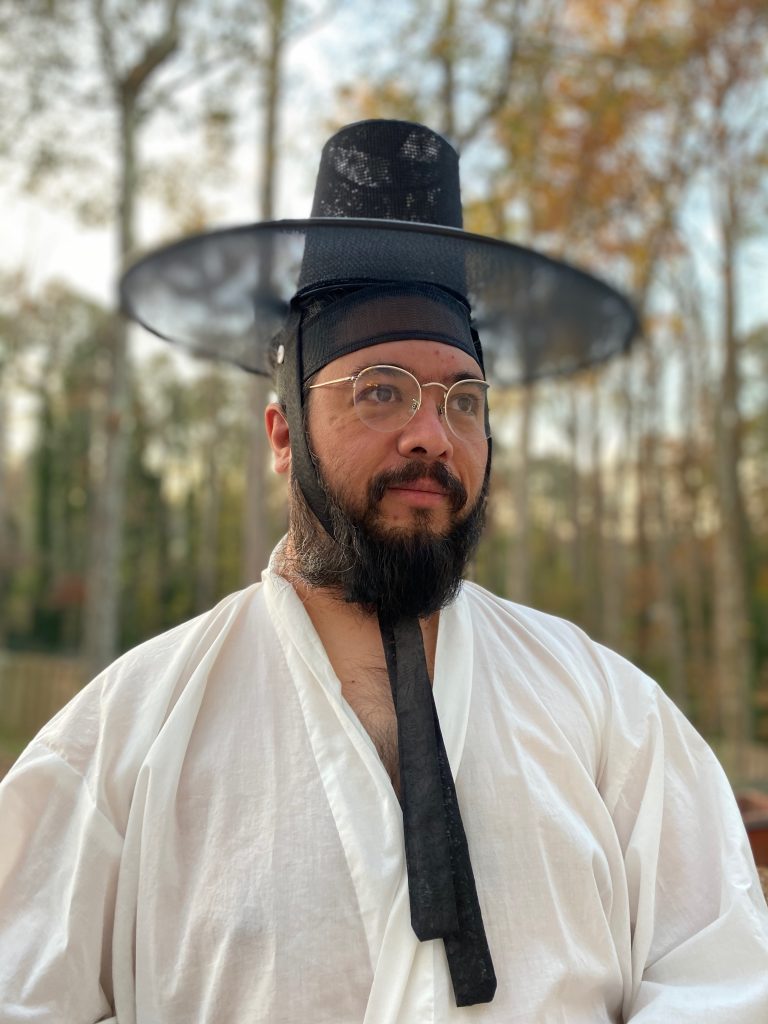
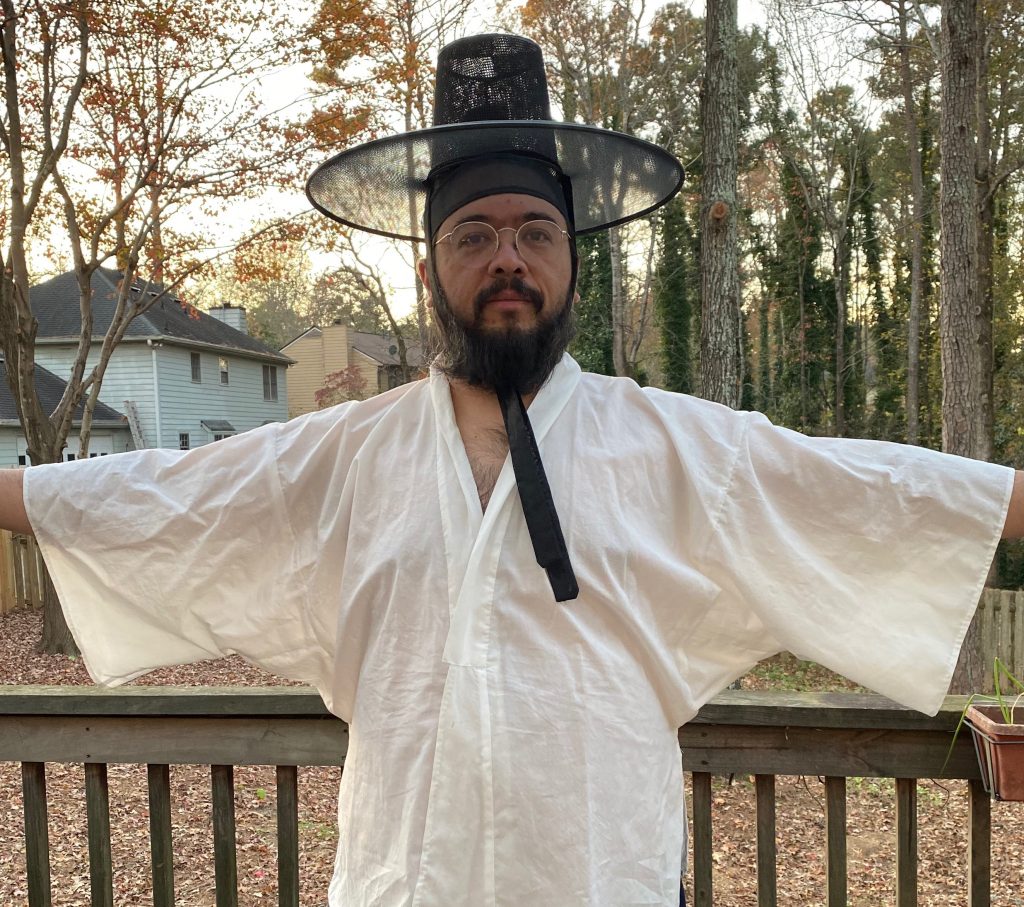
Seong Myeong Su Daegam provided a large amount of research and translation help with this outfit.

IRCC 2019: Guibbone – Body

This guibbone (doublet) is based on a number of images of similar garments. The common features are:

  • wide, round neckline
  • center front opening (often unfastened at the top)
  • sleeves that are full to below the elbow, then narrower (but not tight) below that
  • a square front panel up to the mid-chest

The first step is to create the body that all the other pieces will attach to. The outer shell is green silk taffeta, interlined with cotton canvas for stiffness, then lined with medium weight white linen.

Since the heavy interlining made bag lining impossible and there was no evidence of a bound edge in the images, I decided to cut the interlining without seam allowance and wrap the silk around the edge, then sew the lining in by hand. The side, back, and shoulder seams were done by machine, and then it was just a lot of hand sewing to get all the layers together. Normally I would do a lot of basting to keep thing in place while sewing, but taffeta is very bad about showing pin holes. Instead, I used mini binder clips to hold the edges together as I worked on them. It worked surprisingly well, despite being a little cumbersome.

The front is closed with seven pairs of hand made hooks and eyes sewn in under the lining.

IRCC 2019: Camicia

I have made a few camicie with gathered necklines for both men and women, usually using the raglan sleeve pattern that has been running around the web for ages. Invariably these fit poorly when I make them, especially in the armpits. This time around I took a look in Patterns of Fashion 4 and found two boys’ shirts with gathered low necklines and these were made in a way that I was unfamiliar with. They are basically T-tunic shaped, with a large rectangular neck opening bounded by a front and back panel and two small strips on the shoulders. While the earliest date mentioned for either of these shirts is 1550, the pattern seemed simple enough that it was entirely plausible for a similar shirt in 1515.

This camicia is made entirely of 3.2 oz white linen. The main seam for attaching the shoulders to the body panels and the initial attachment of the cuffs and neckline binding are done by machine with polyester thread. All other construction and finishing is done by hand with waxed linen thread. The seams between the shoulders and front and back panels are flat felled. All other seams for attaching the body, sleeves, and gussets are done by hemming the edges of the pieces and whip stitching the finished edges together. The side seams are left open from the hips down, and the total length is about mid-thigh.

The cuffs are gathered with a 1/4″ inch double running stitch into plain cuffs with a cloth bag button and buttonhole. The neckline is similarly gathered and bound with a strip of straight cut linen.

IRCC 2019: Brache

Francesco del Cossa, Allegory of April (detail) (1476-84)

While there are no extant brache to go from, there are a number of images depicting underwear of various sorts. Mutande are shorter and tighter fitting, while brache are longer and somewhat looser.

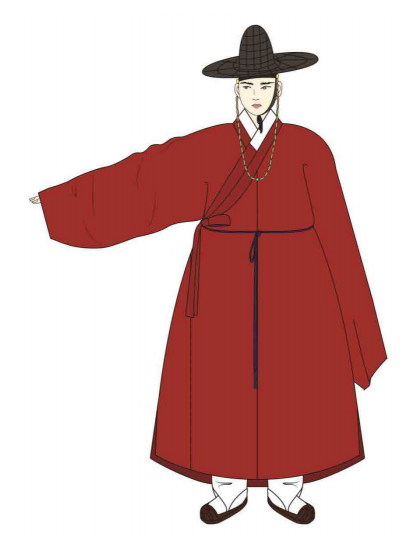
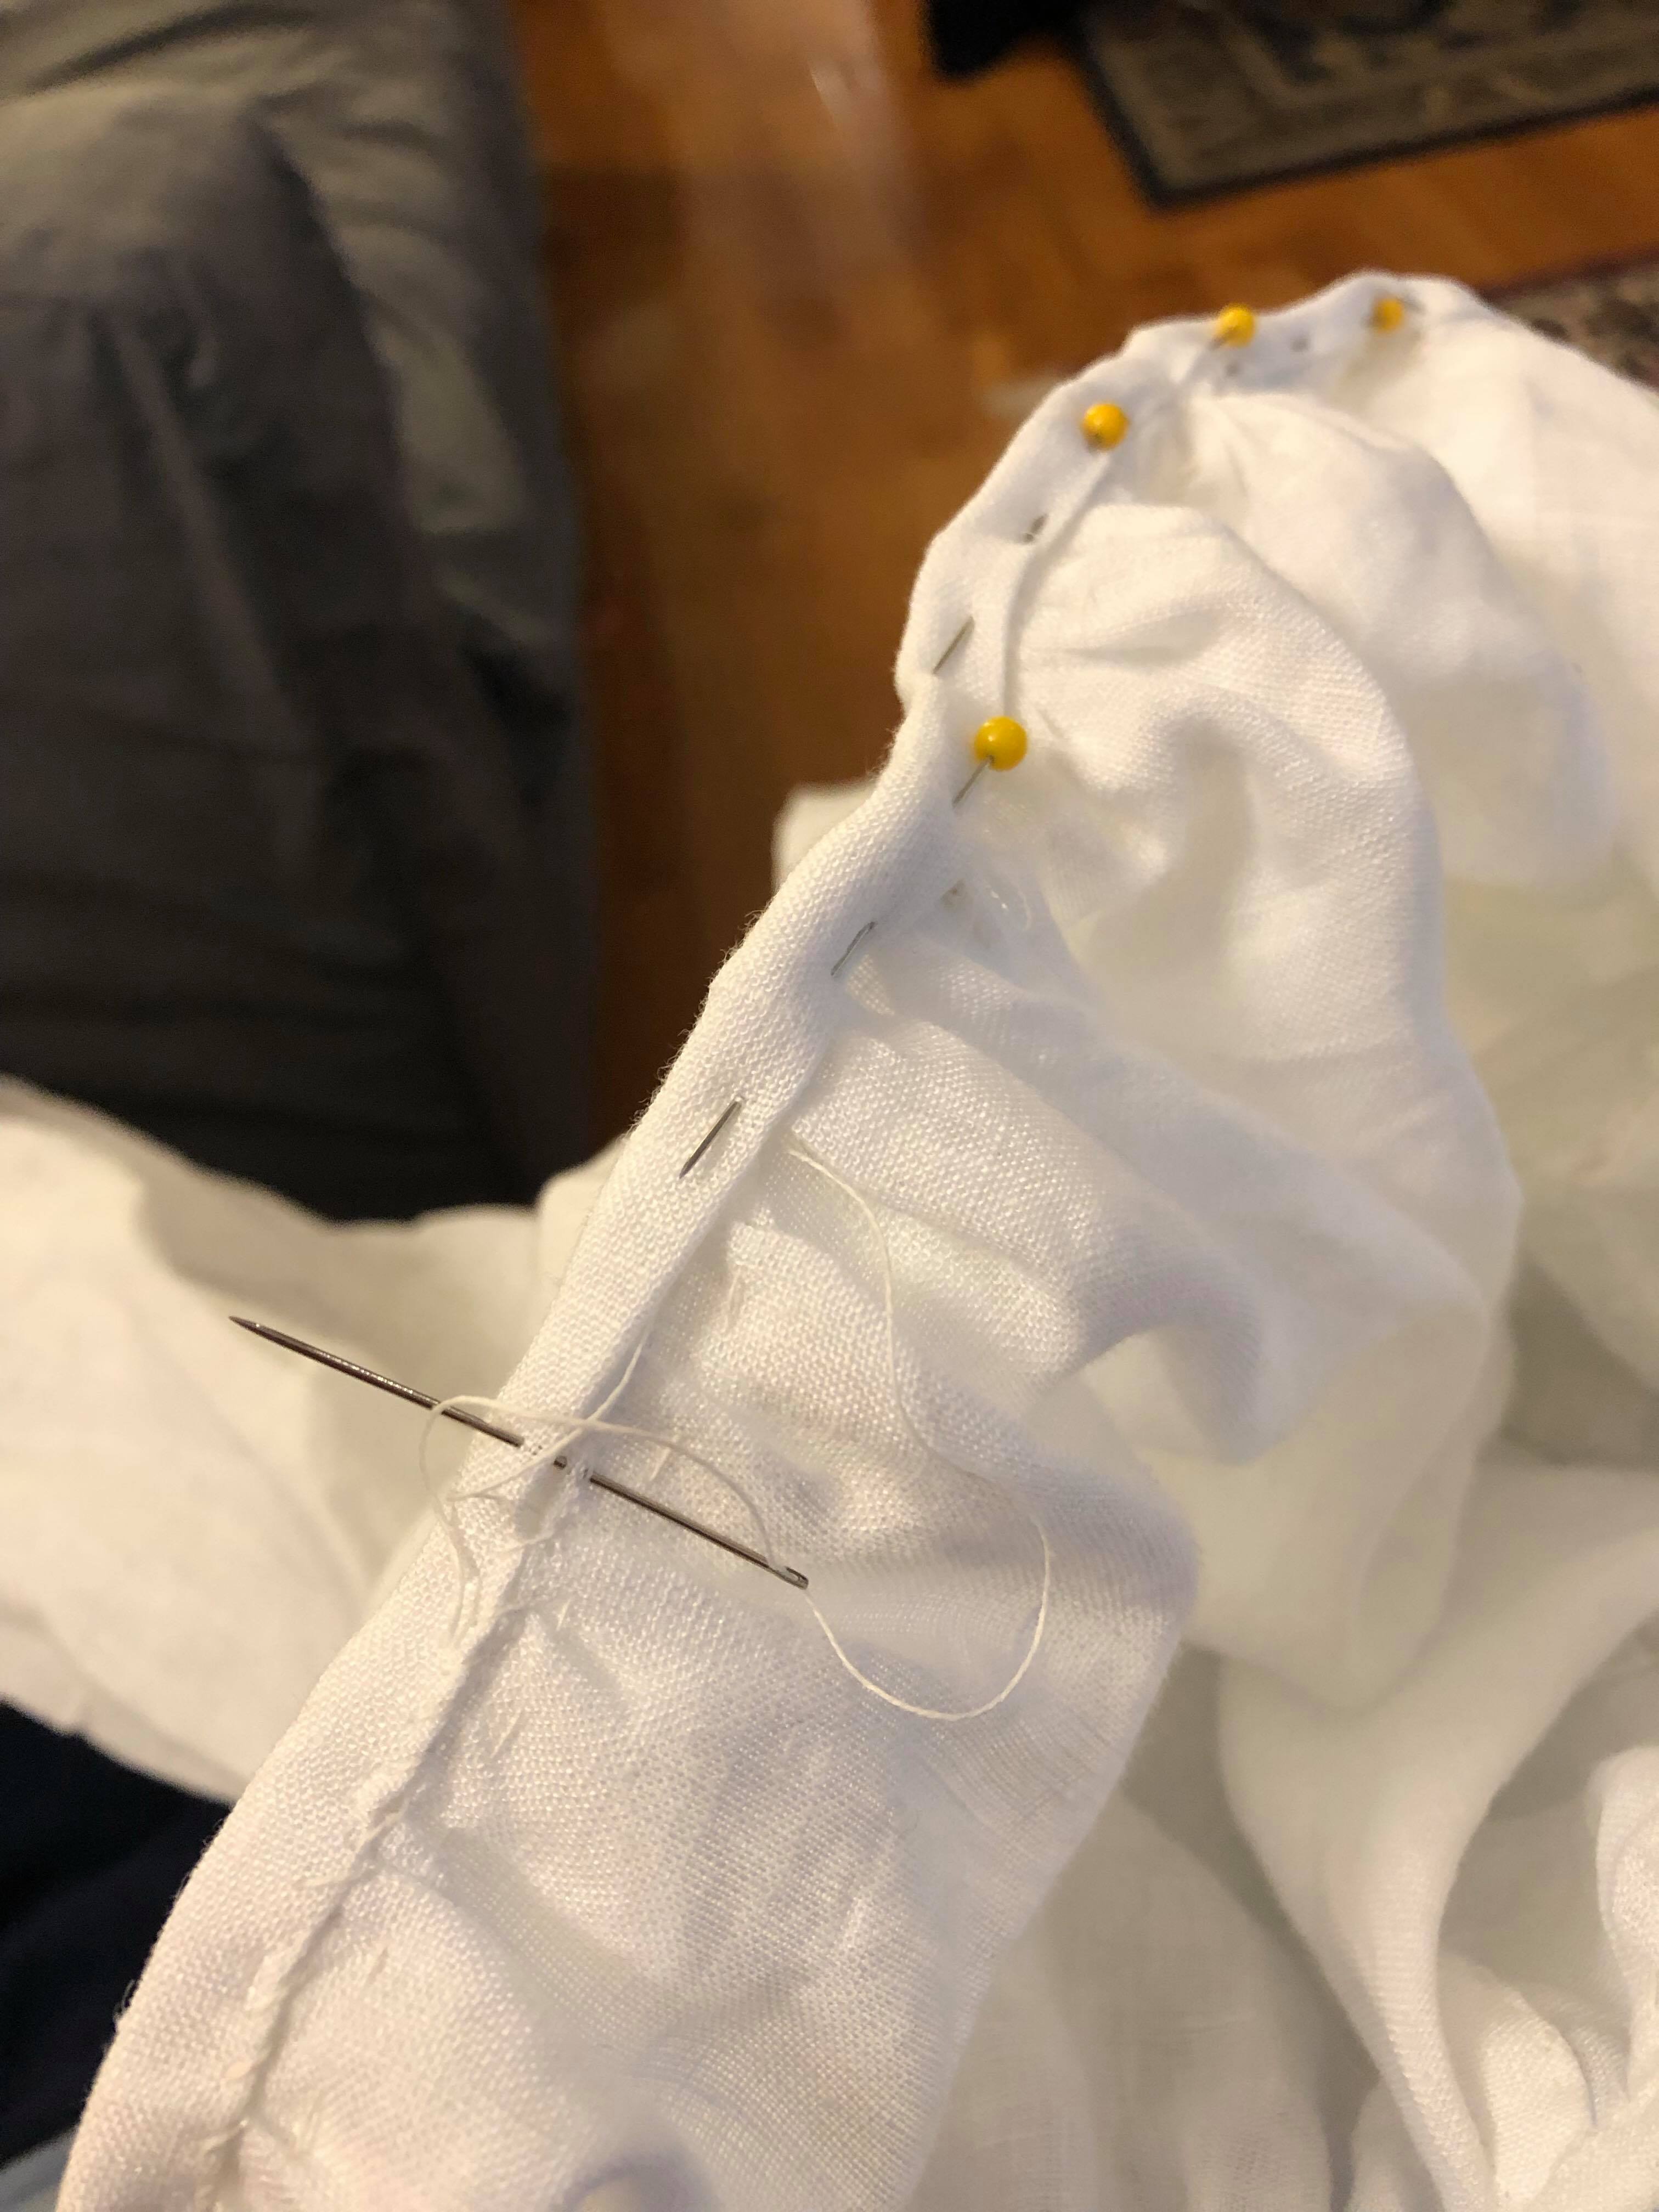
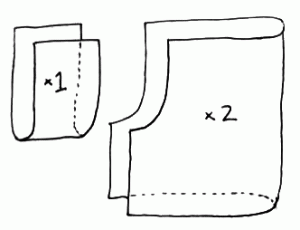
I have used several different patterns for these over the years, but in this instance I chose to make two separate legs with a curved crotch seam and a rectangular panel between them. I added a casing and drawstring at the top.

The fabric I used is medium weight white linen (from fabrics-store.com). The construction was done by machine and the finishing was done by hand with waxed linen thread. The drawstring is a plain weave tape made from cotton crochet yarn on an inkle loom.

IRCC 2019: Beginnings

I was encouraged by my dear friend and apprentice Alessandra to enter something for the Italian Renaissance Costuming Challenge. I haven’t done a lot of sewing for myself in recent years, so I thought it would be a good excuse to get back in the swing of it.

Lorenzo Lotto, St Dominic Raises Napoleone Orsini (1513-16)

I have done a lot of 15th century Italian clothing already, and enough later 16th century clothes to be interested in trying something new. I came across this Lorenzo Lotto painting while looking for evidence of stay tapes on pleats for 15th century men’s giorneas. While this is not a smoking gun for that (I found a better source elsewhere), it does do a good job of showing the various layers of this style.

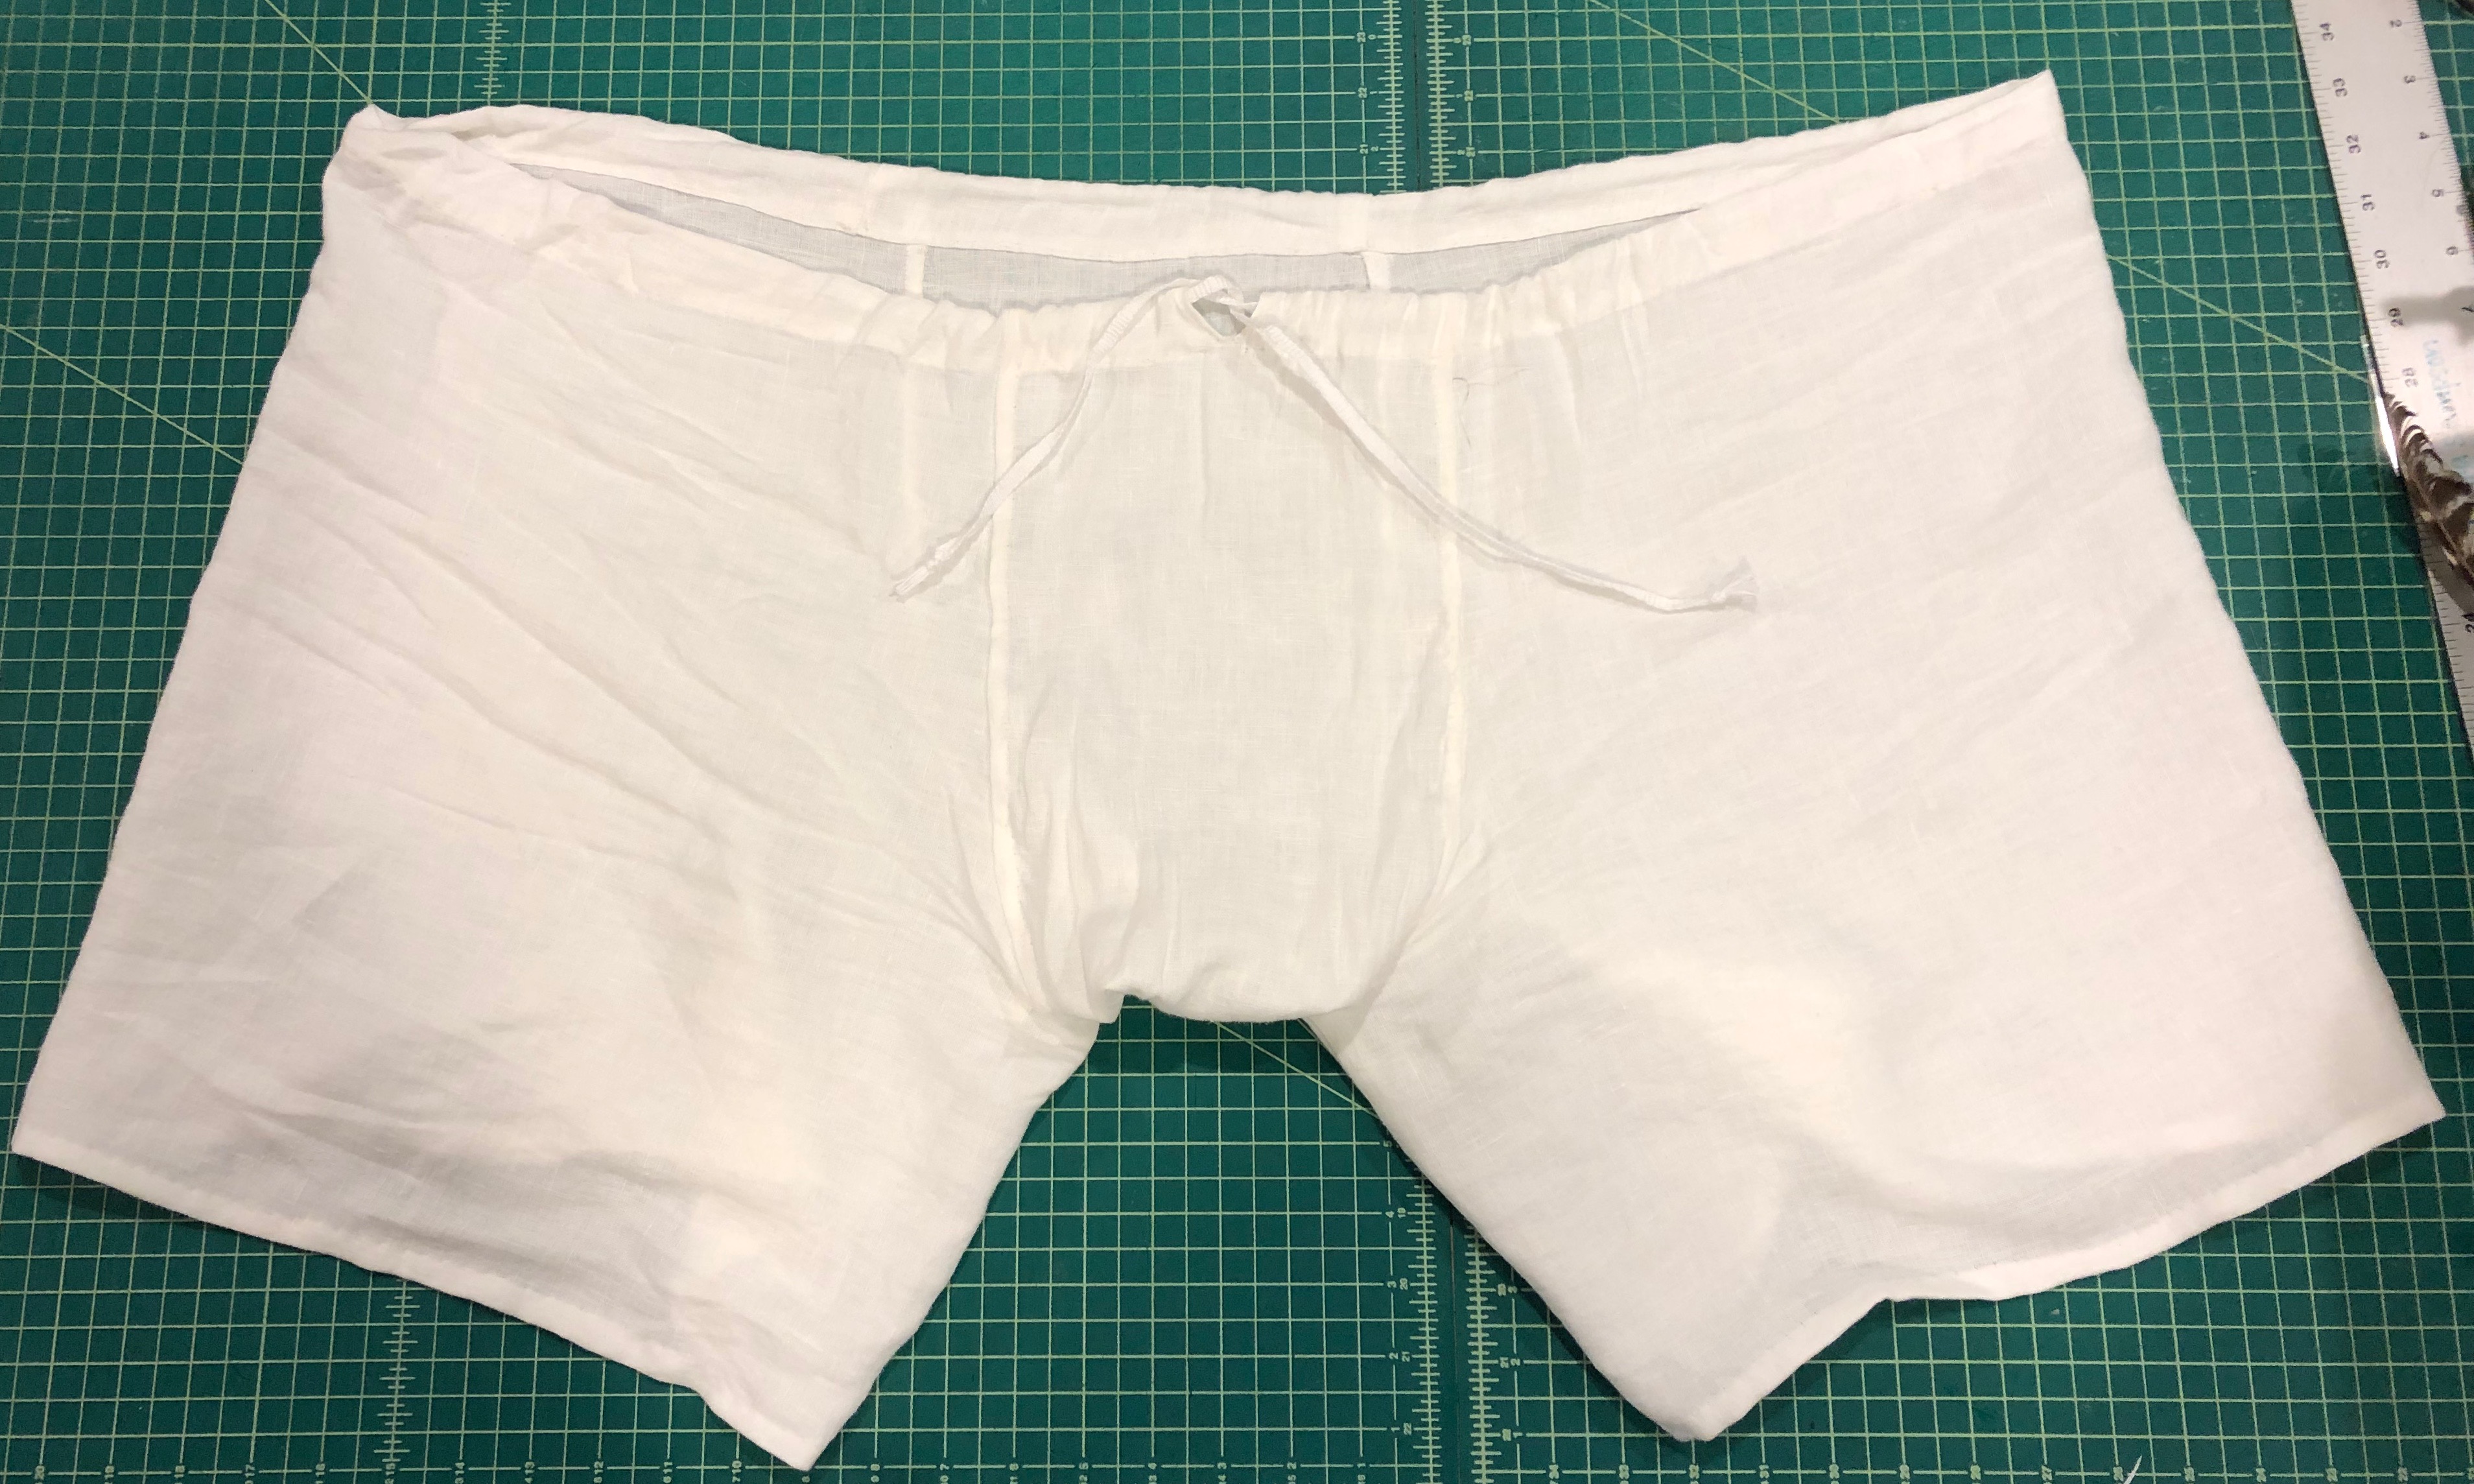
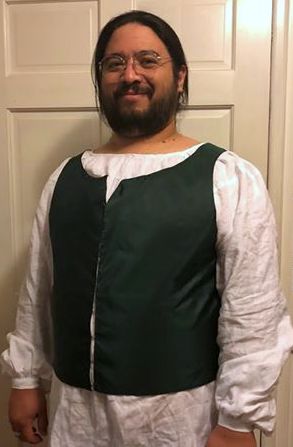
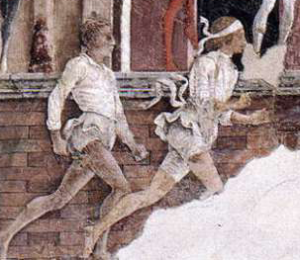
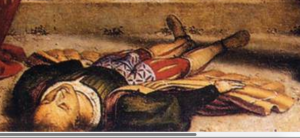
The first layer of the outfit will be brache (drawers) and camicia (shirt), both made from linen. Next will be a guibbone (doublet) of silk and calze (hose) divided into upper and lower parts, both made of wool. The outermost layer will be a saio (gown) made of wool lined with silk.

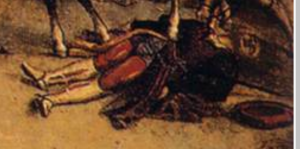
I will not be including the riding boots shown in the image, but will likely be making some sort of hat (one can be seen in the right side of the painting, but there is little detail as to its shape). I have already acquired the fabrics I plan to use, assuming all goes to plan.

Muffs

IMG_1843IMG_1842On the occasion of the investiture of Bjorn and Genevieve as Baron and Baroness of Iron Mountain, I decided to make a fur muff as a gift for Her Excellency. For good measure, I made a pair of matching muffs for the Queen and Princess as well. Most of the materials came from my stash, except for the beads for the buttons and the chains and the satin for the appliques. The red muff is a damask of unknown fiber content, interlined with two layers of polar fleece and lined and trimmed with fake fur. The cords are fingerlooped from cotton crochet yarn, which was also used to make the thread wrapped buttons. The applique is polyester satin glued to a paper backing and outlined in couched cord. The black and white muff is made from similar materials an in a similar fashion, except for the shell being made of velvet and the applique involving some extra chain stitch, back stitch, and beads in the center. This was not a very deeply researched project, but it was pretty satisfying for being done on relatively short notice. Stella, Serafina, Veronica, and Sefa helped with many aspects of the construction.

Blue Satin Cioppa: Beginning

IMG_1210I wanted to have something new for our upcoming investiture, so I decided to make a new cioppa. I got a decent deal on some blue silk satin, and I have black velvet for trim and white satin for lining in my stash already. The body of the cioppa is pretty much the same as the Pesellino cioppa, except with the normal 6 pleats per section rather than 3. After wearing the other cioppa for a while I will also omit stay tapes below the waist (at least in front), as they make things lay funny when sitting. This cioppa is primarily intended for wearing in court, so looking right when sitting is important. I am also making it with short sleeves, which are uncommon but do pop up from time to time in period images. As much as I like my giant sleeves, I don’t want to have to deal with them in a court setting. If I really don’t like the short sleeves, I should have enough fabric left over to make some larger ones.

Pesellino Cioppa: Pleating

The yoke of the cioppa was taken straight from my farsetto pattern, expanded a bit to account for layers worn underneath and little ease to get in and out of it. Looking at the source image, I decided that the pleated section would start just under the armscye, which made things nice and simple. I guesstimated how big I wanted the final hem to be, did some math based on the number of pleats I wanted, and came up with 4″ wide finished pleats at the bottom. Since they needed to be round, I planned for them to start at 6″ wide, with the extra taken up in the tucks and the curvature. I did some similar guesswork on the width of the pleats at the top, which came out to 3″ for each of the 24 pleats. This is the same ratio I’ve used in the past, so that was reassuring. Despite the lack of precision in the design phase, everything ended up lining up exactly where I needed it to go.

If none of that pleating stuff makes sense, there’s an explanation of what I’m talking about in this handout.

Here’s a picture of one of the panels:

IMG_0841Here the edges are basted together (they will be run through the serger after the pleats are sewn), the pleats are marked out, and one of the tucks has been basted. The basting stitches along the line of the tuck keep the layers together so I don’t miss one when I sew it. The top and bottom edges have also been turned under and finished already. Once all the panels are complete, they are sewn together at the edges and stay tapes are installed:

IMG_0842


Pesellino Cioppa: Beginning

I’ve been wanting to make a new cioppa for years now. The first one I made was an experiment using an unfortunately orange cotton print and some kind of nasty fake fur. The second was made of heavy grey upholstery velvet with bag sleeves (more on those later) that fell victim to the displeasure of a cat. The third was made of white satin and is still in service, though the pleats are unattractively flat and creased.

I was finally inspired to start working on a new cioppa by the works of Francesco Pesellino, particularly the Story of Griselda. I had found need of a way to fasten the center front of my previous cioppe, but with no obvious closure visible (and only a hint of a center front seam at all), I had used hooks and eyes. In this image, however, there are clearly cioppe with buttons! I decided to focus on the figure in the center of the image (the grey cioppa with white trim), which can also be seen from the front in the full version of the painting. The pleats start quite low on the chest, and they are relatively wide compared to other examples.

The main way I intend to deviate from the Griselda cioppa is the sleeves. There are a number of different types of bag sleeve, including one on the far left of another Pesellino painting, but I have always been enamored of a certain pair of sleeves from a tomb in Antwerp. They’re a good bit later and not Italian, but I don’t think they’re unreasonably outside of the realm of possibility.

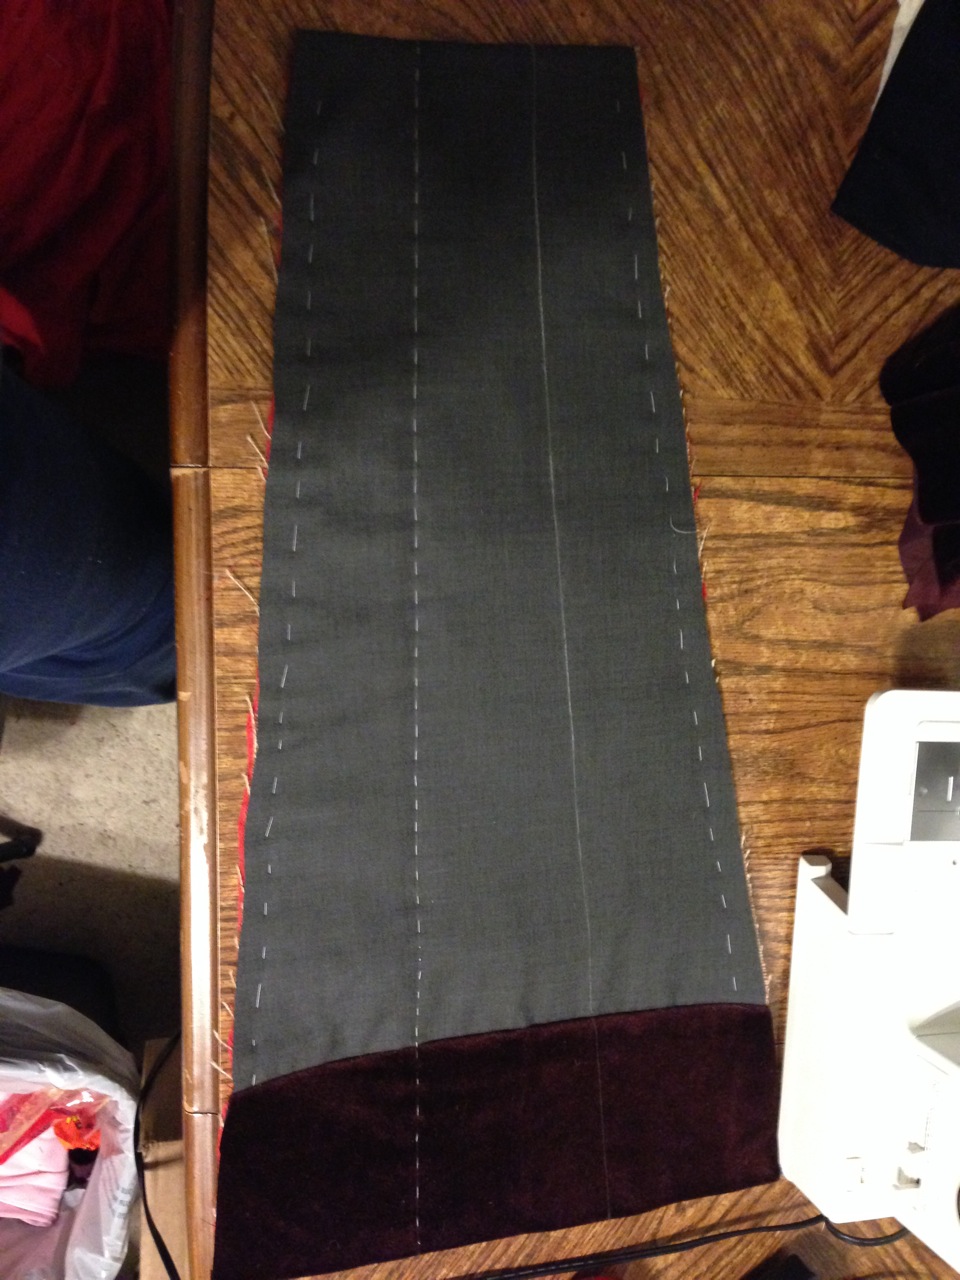
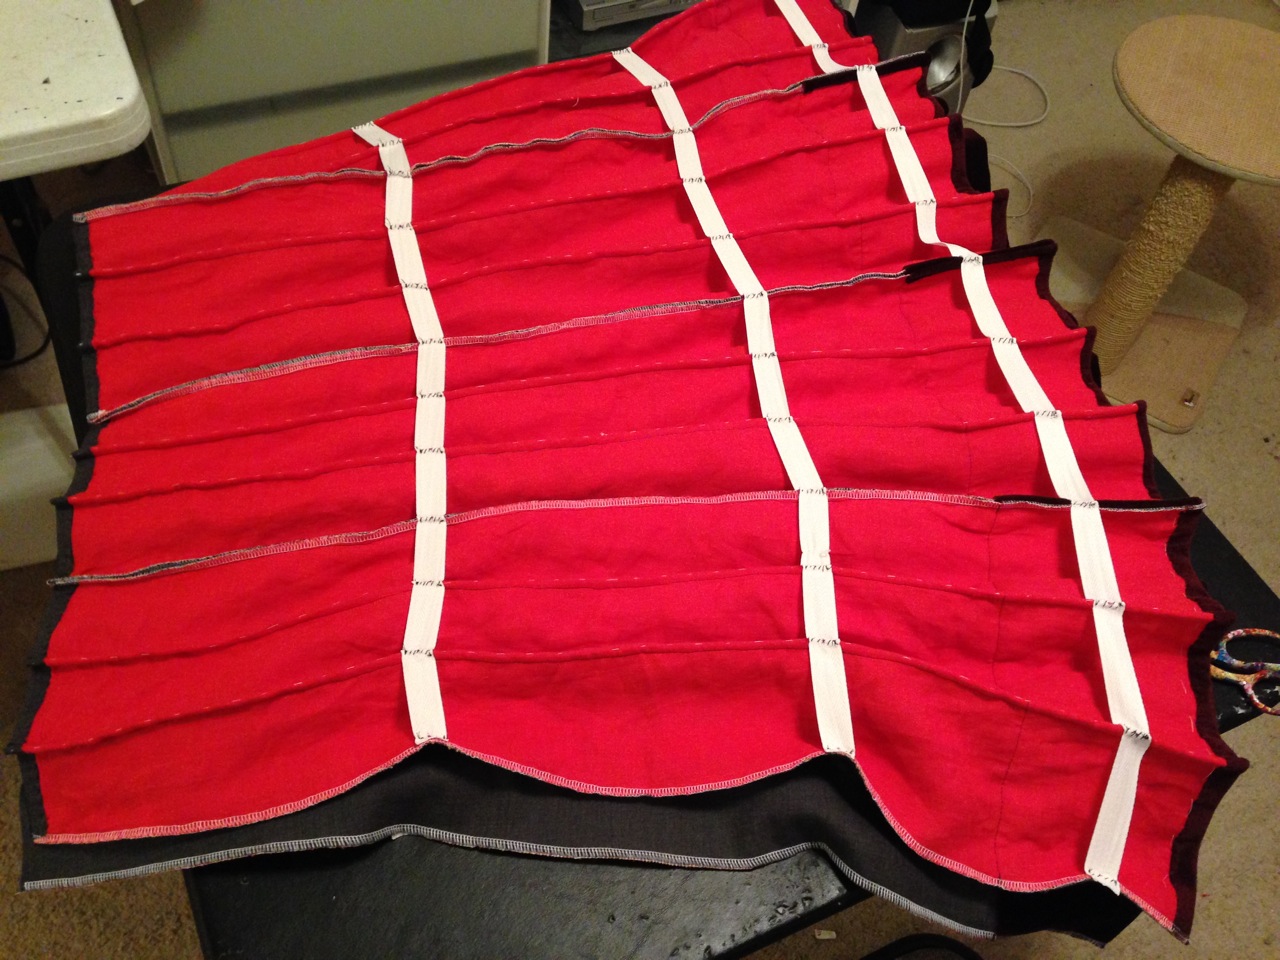
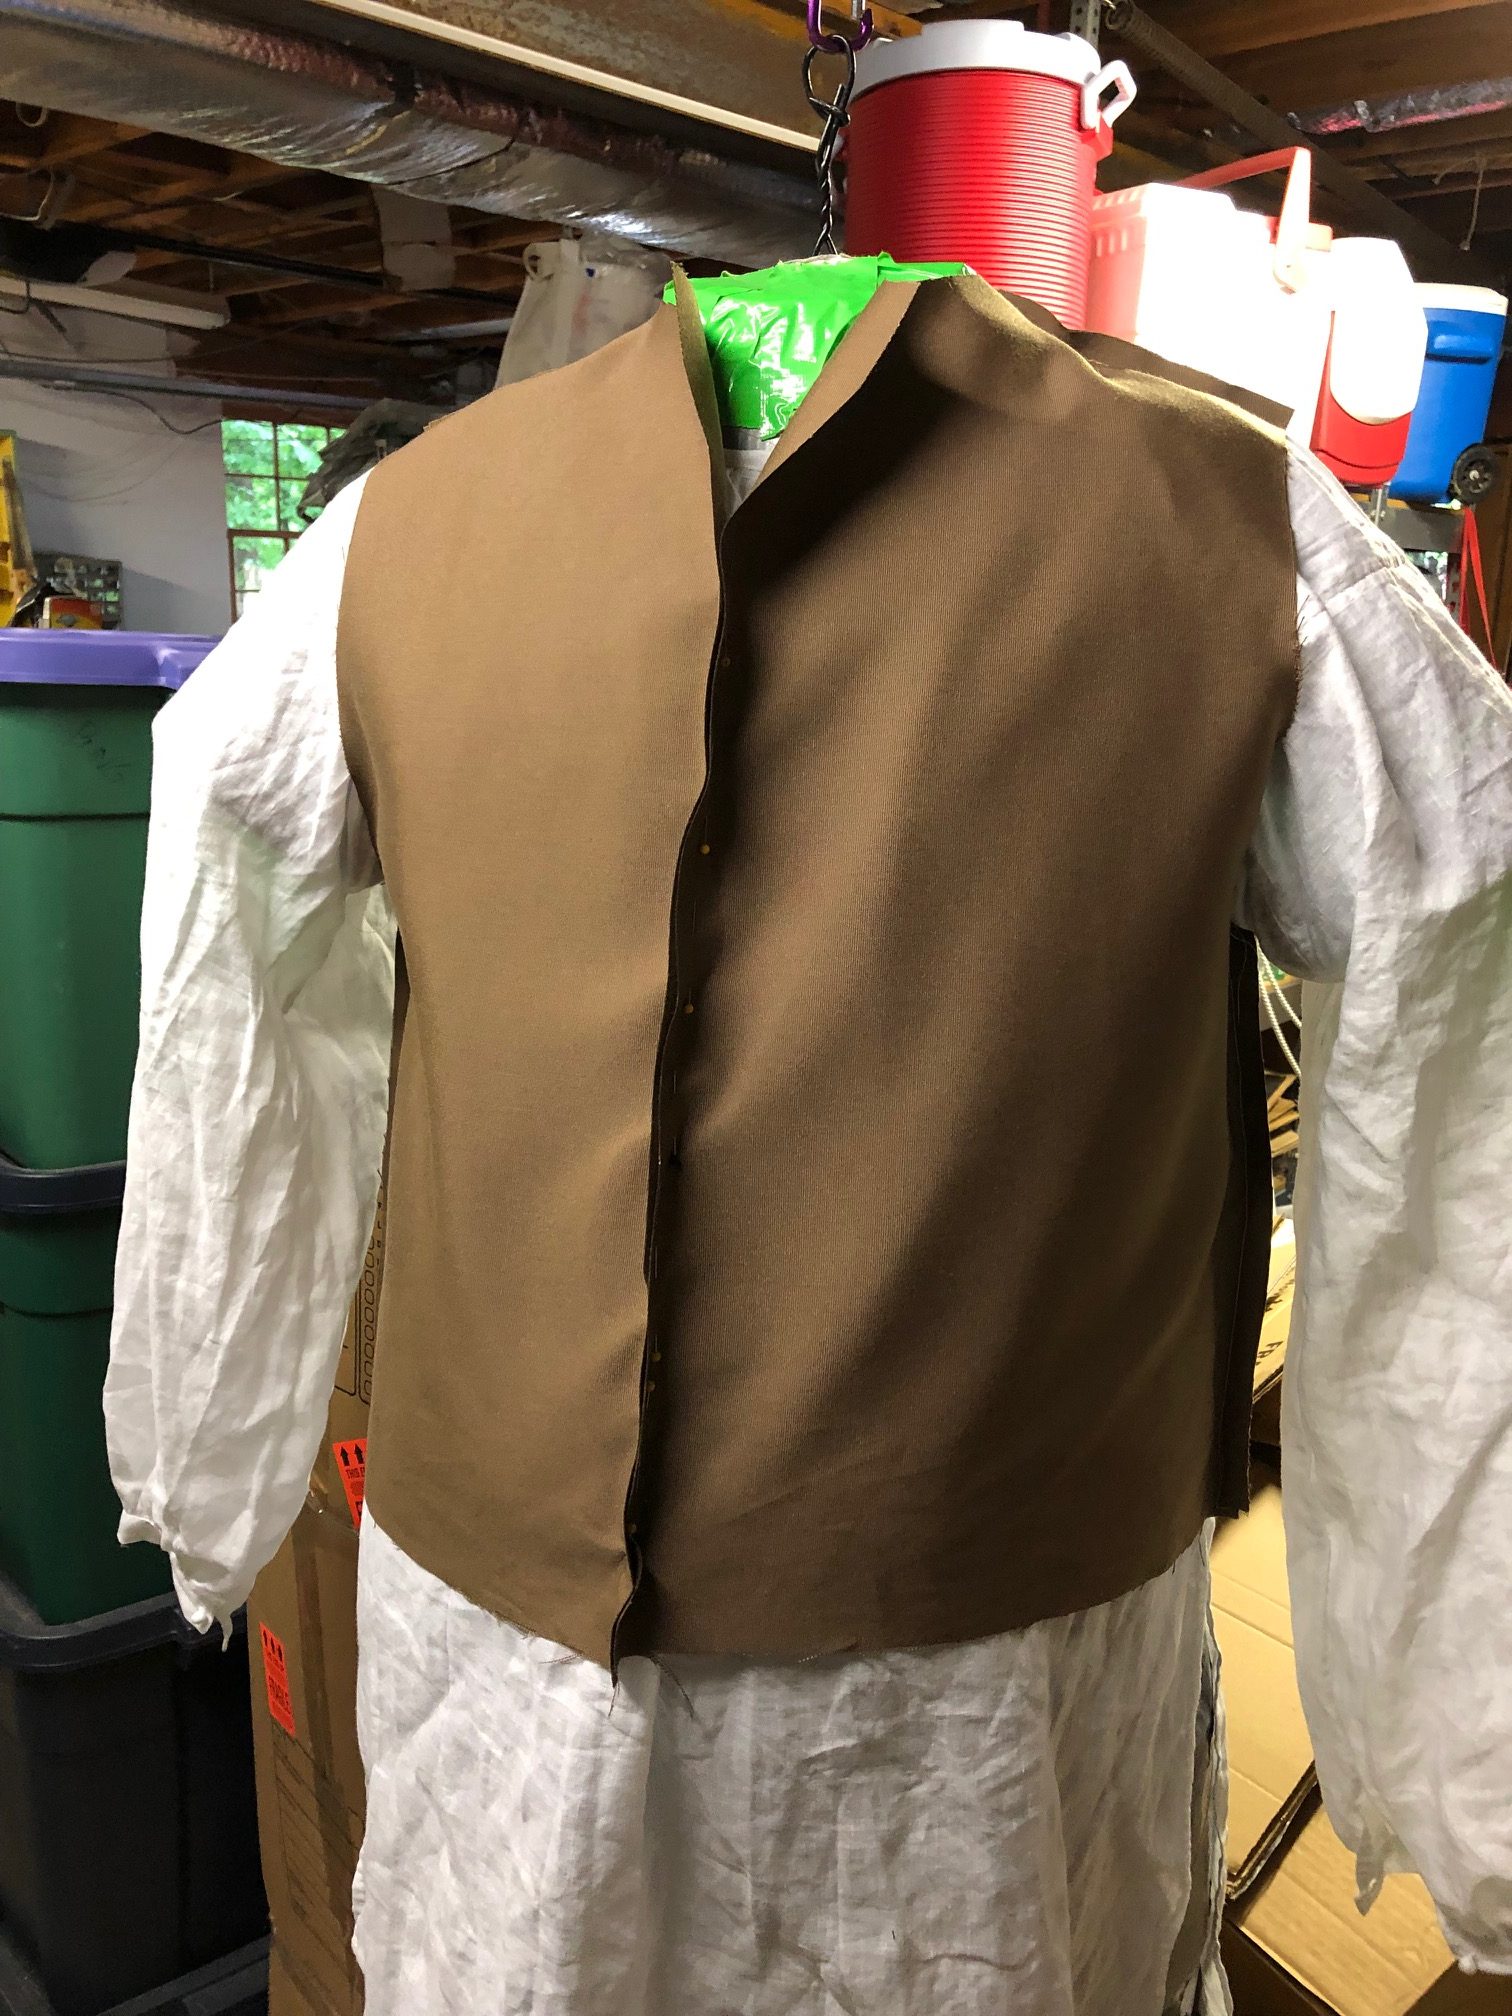
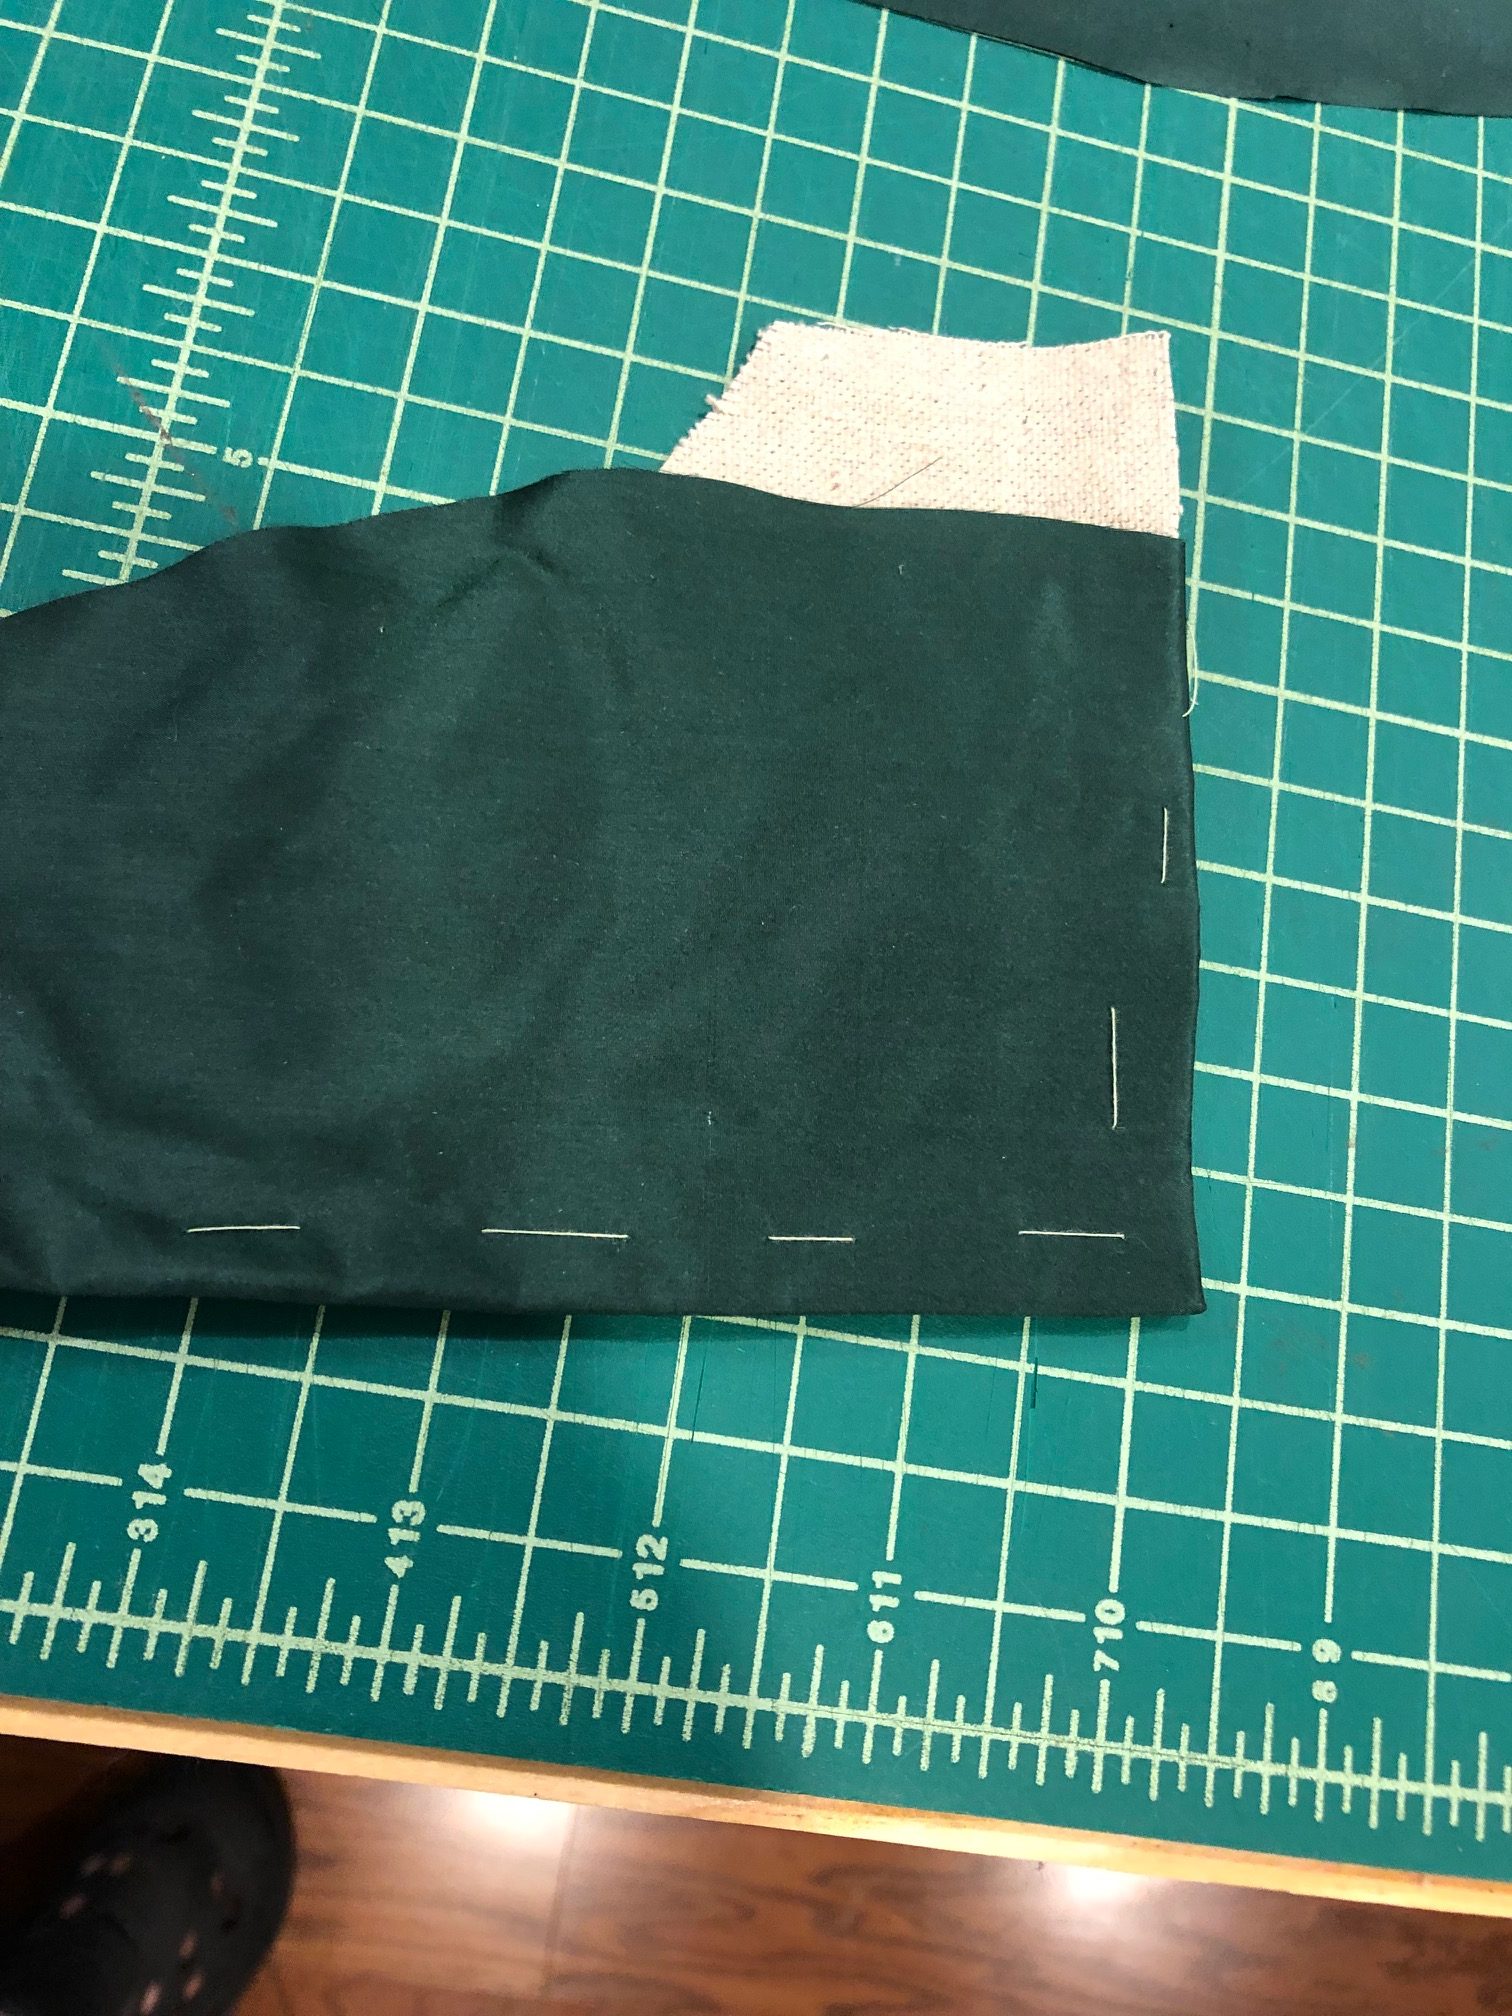
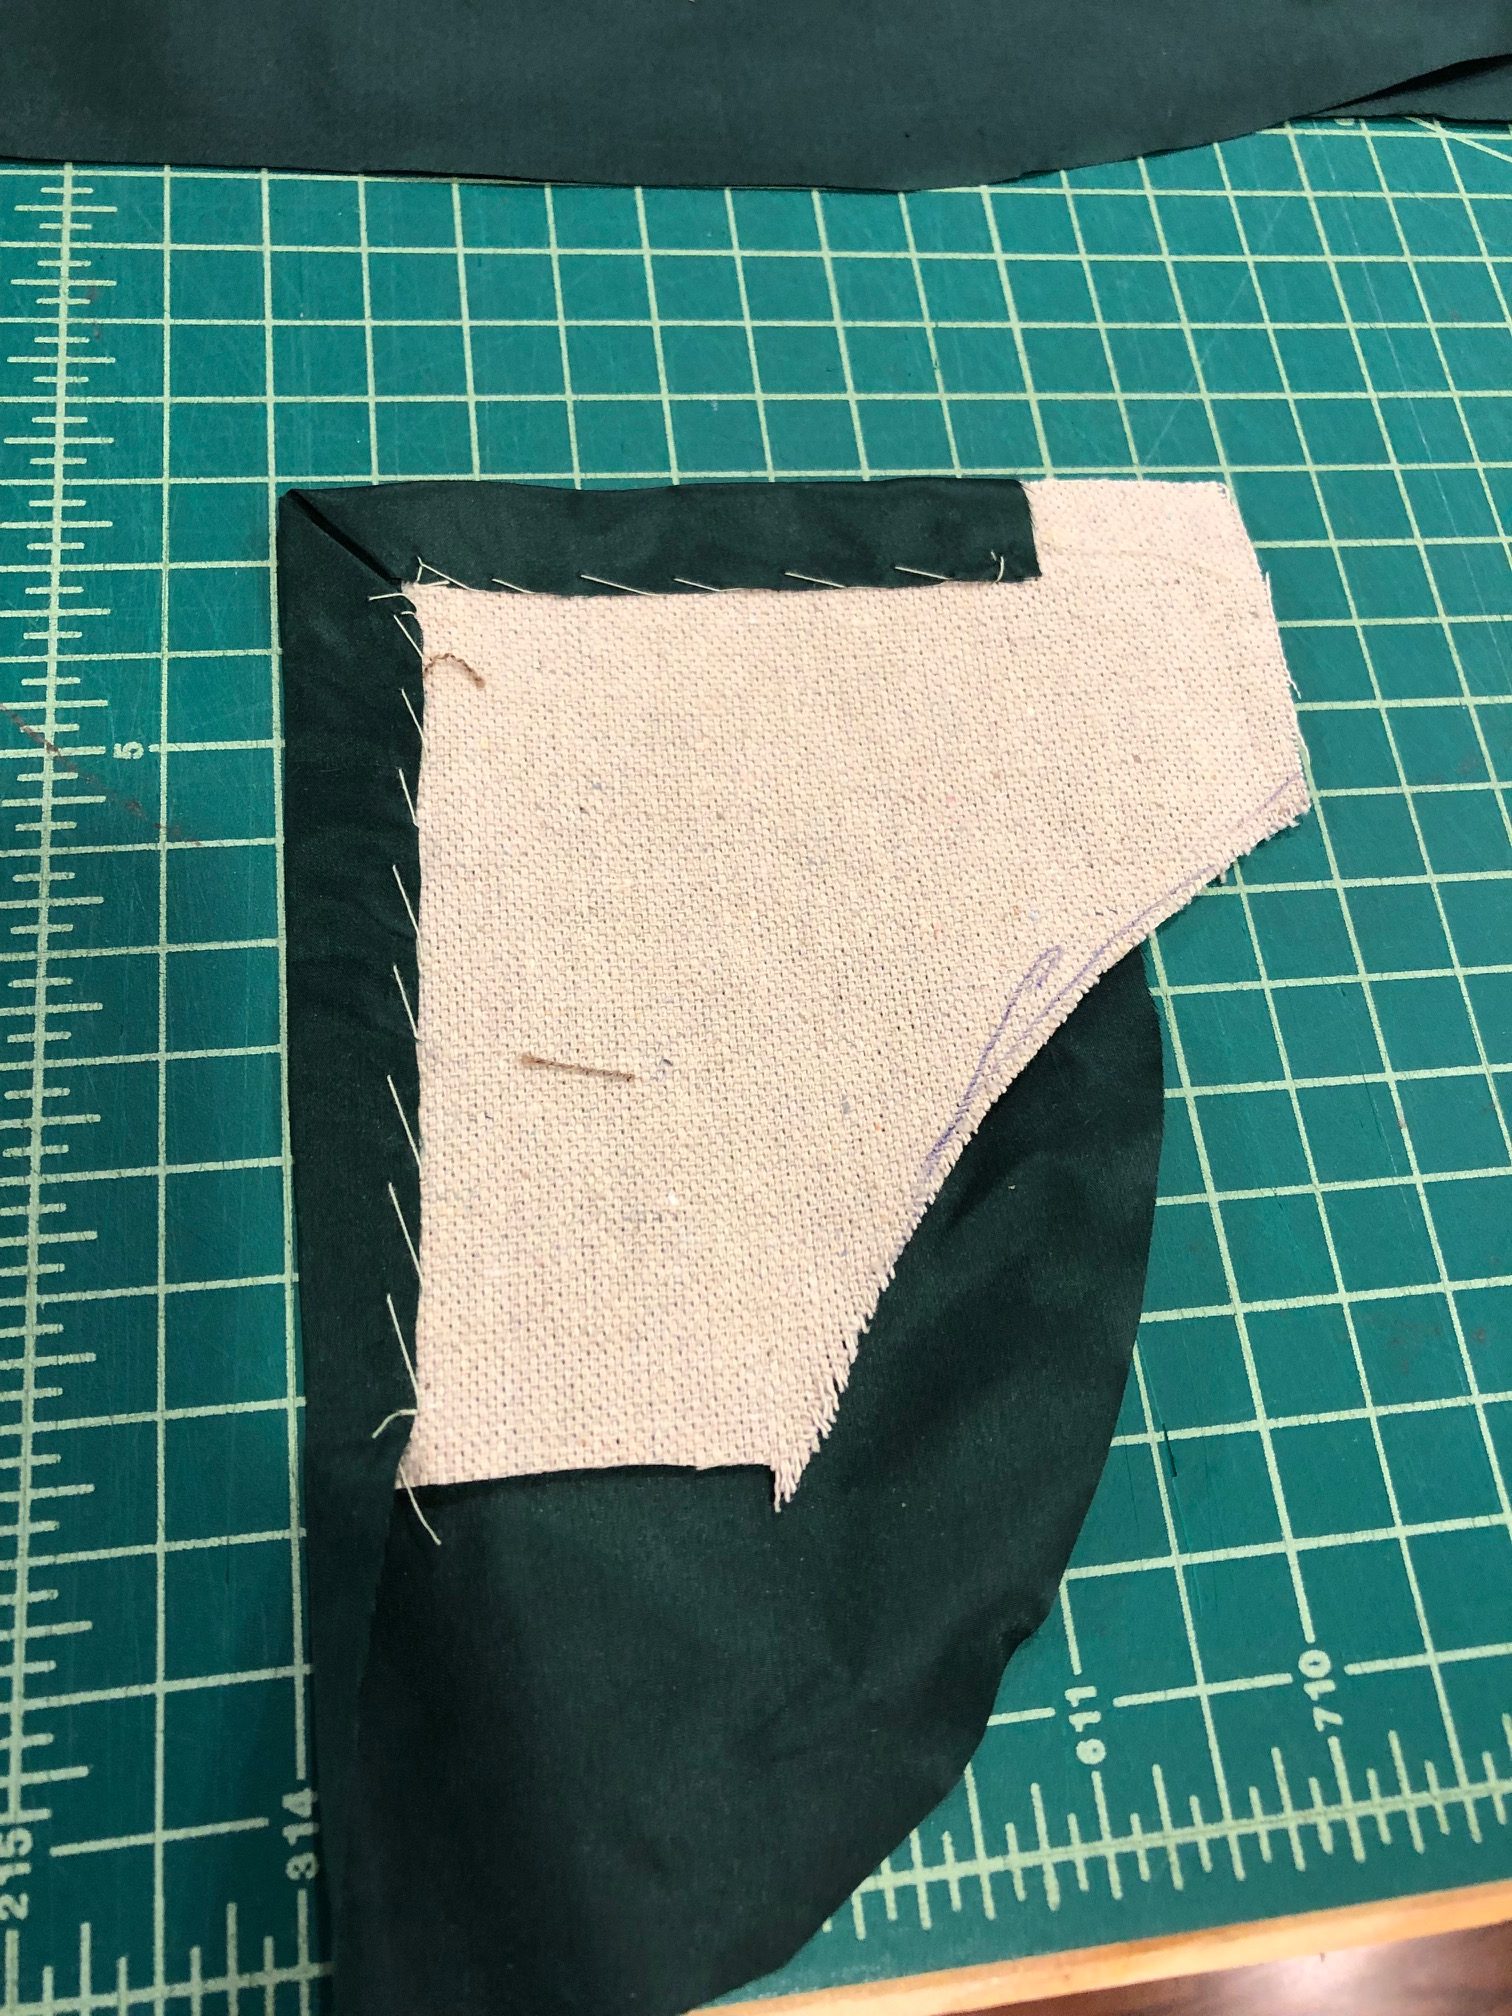
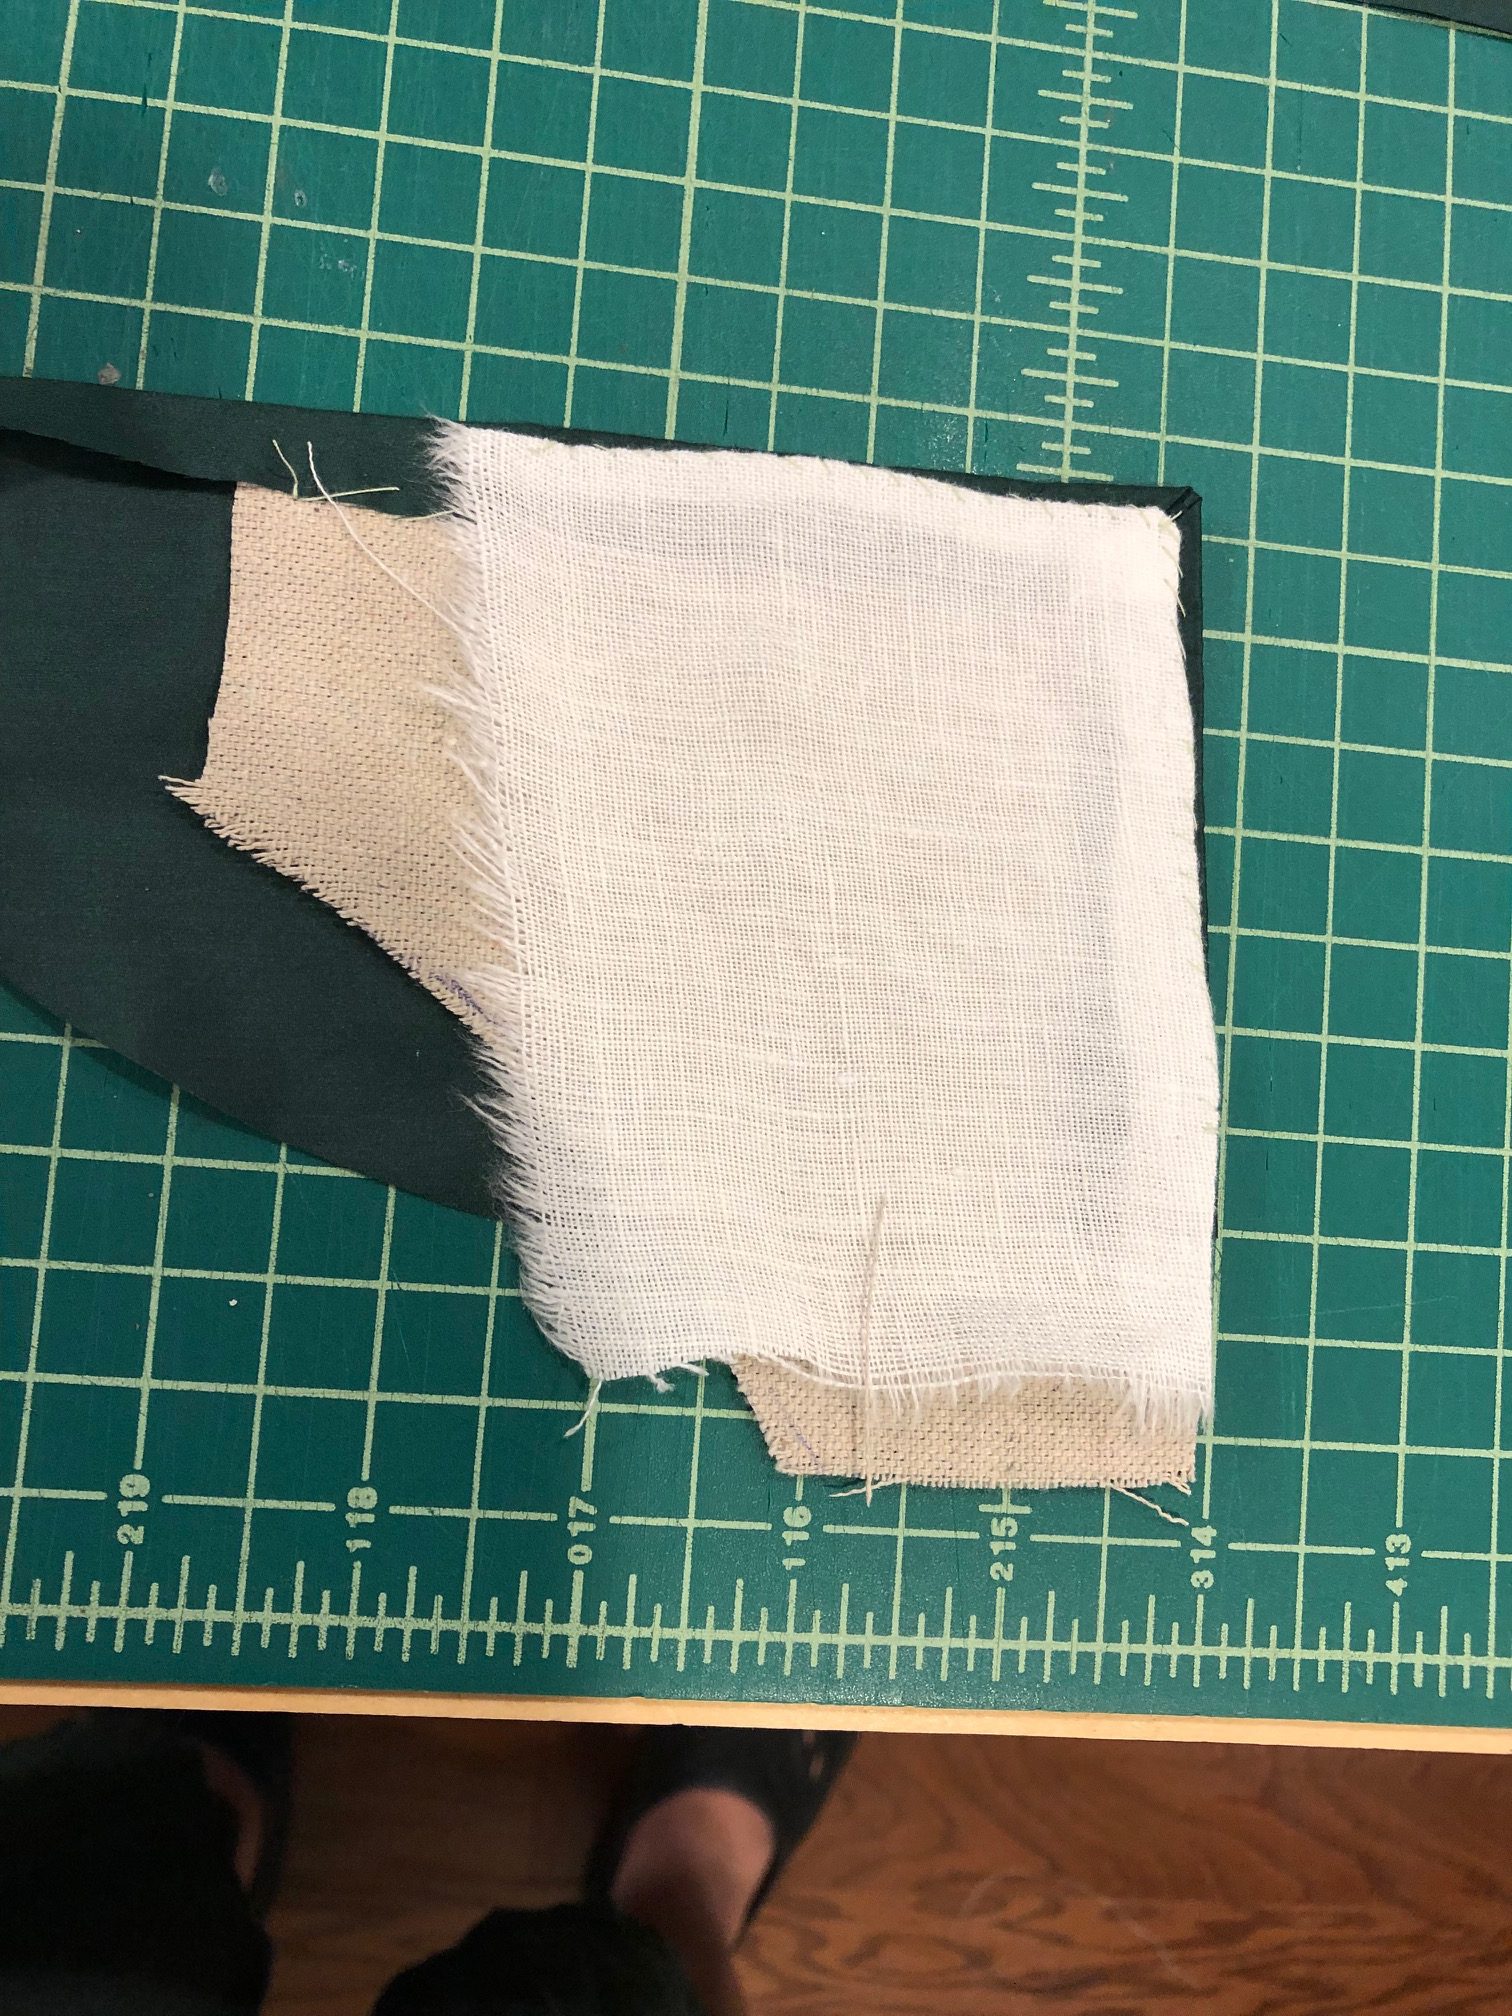
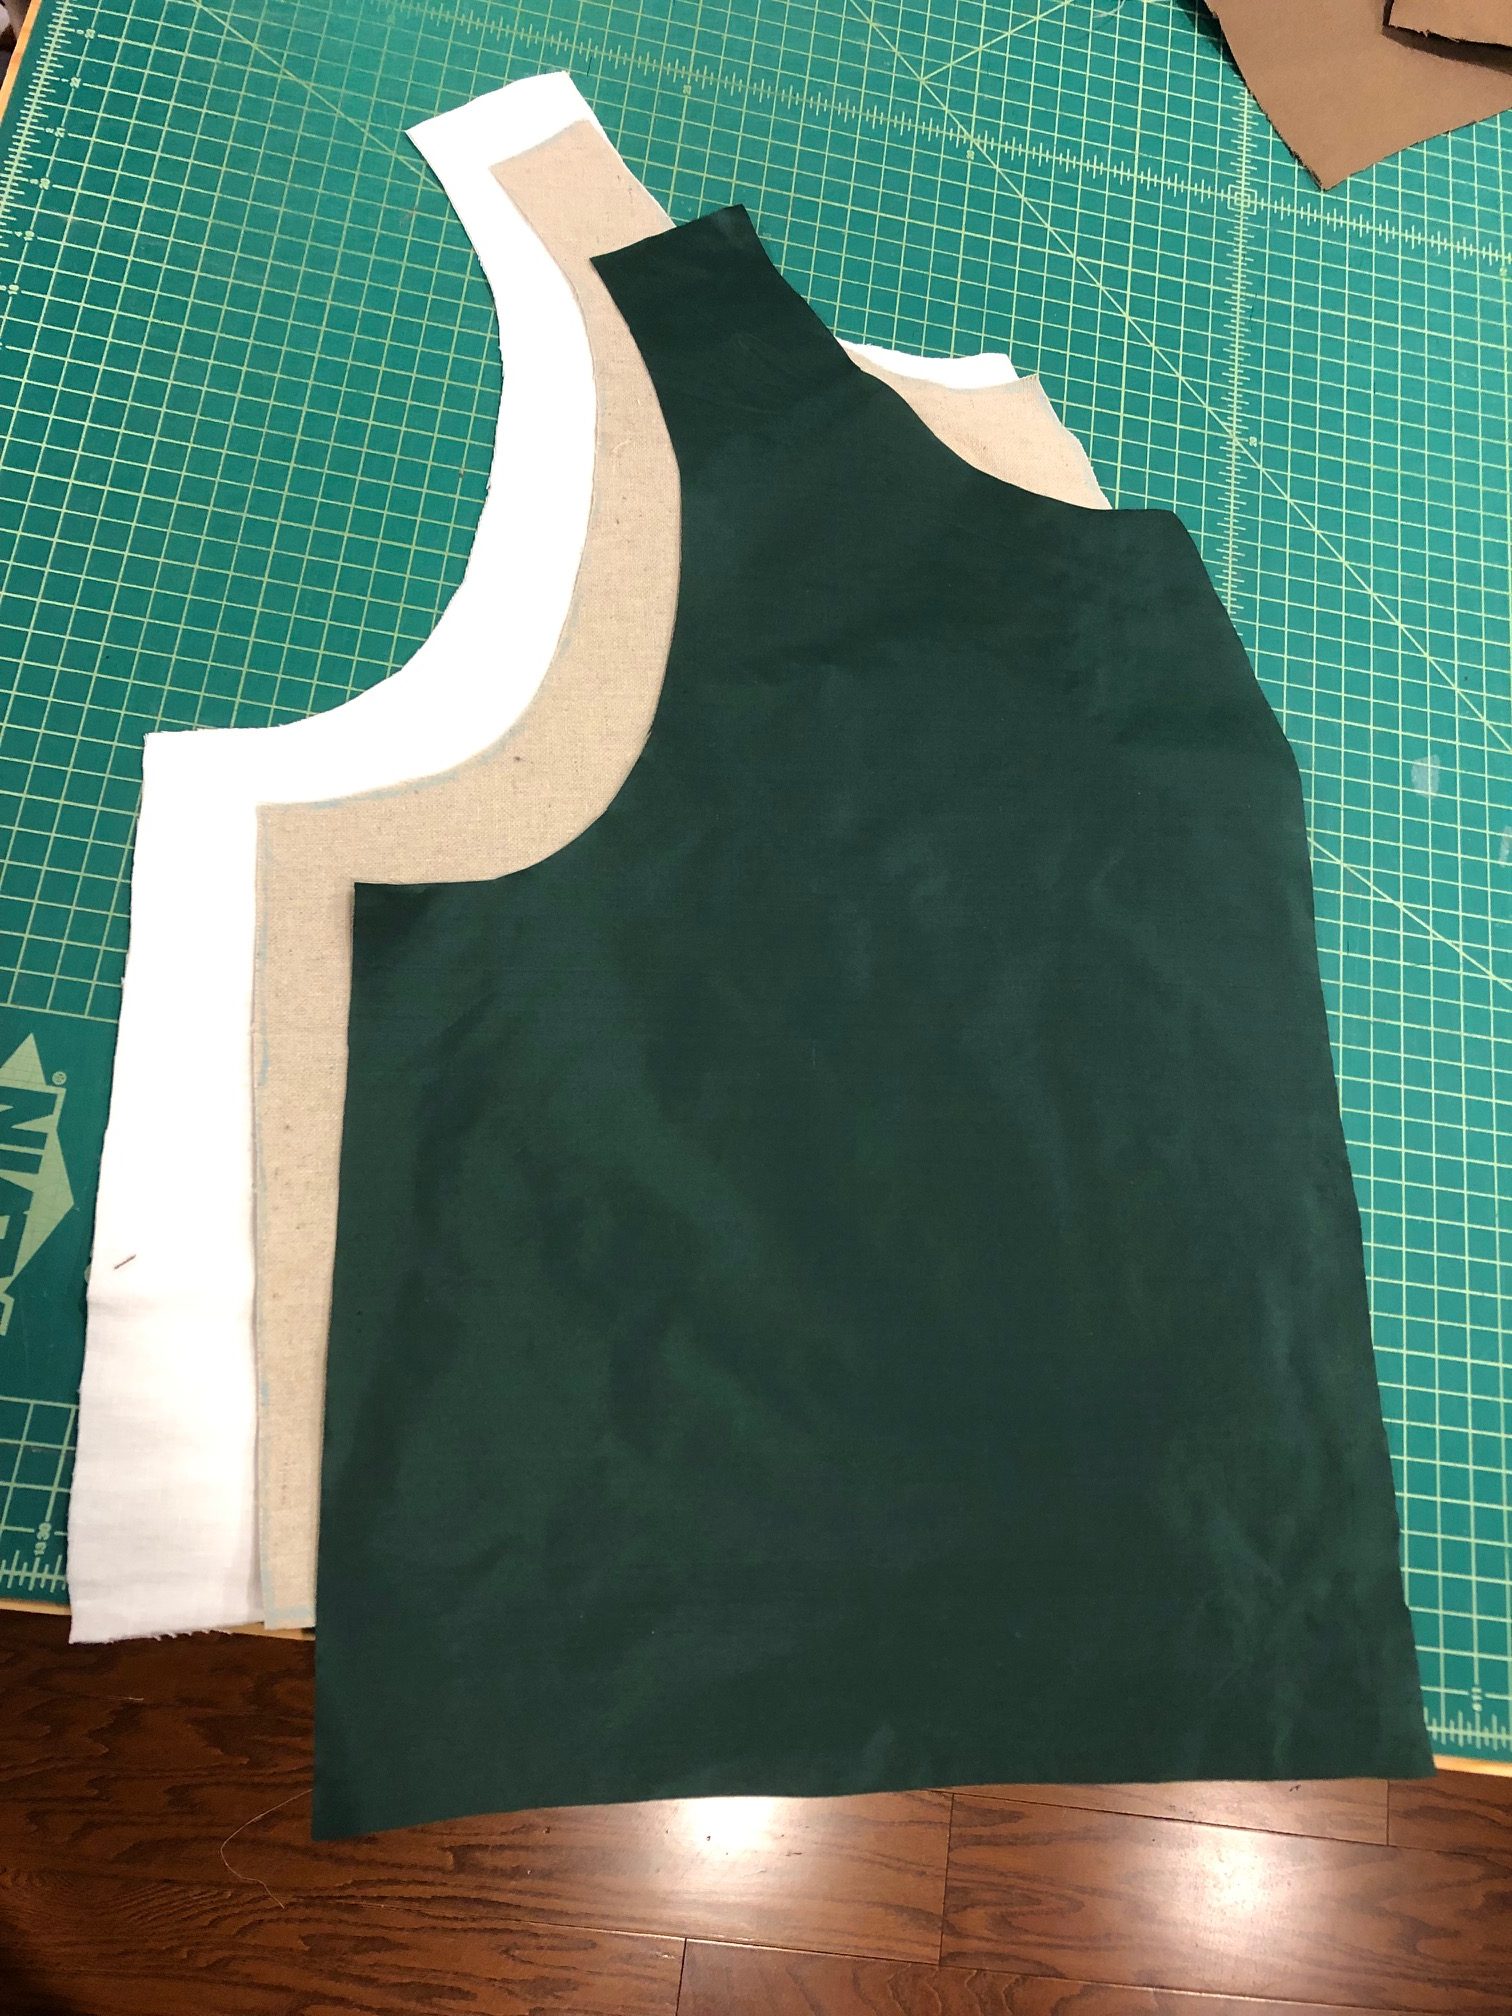
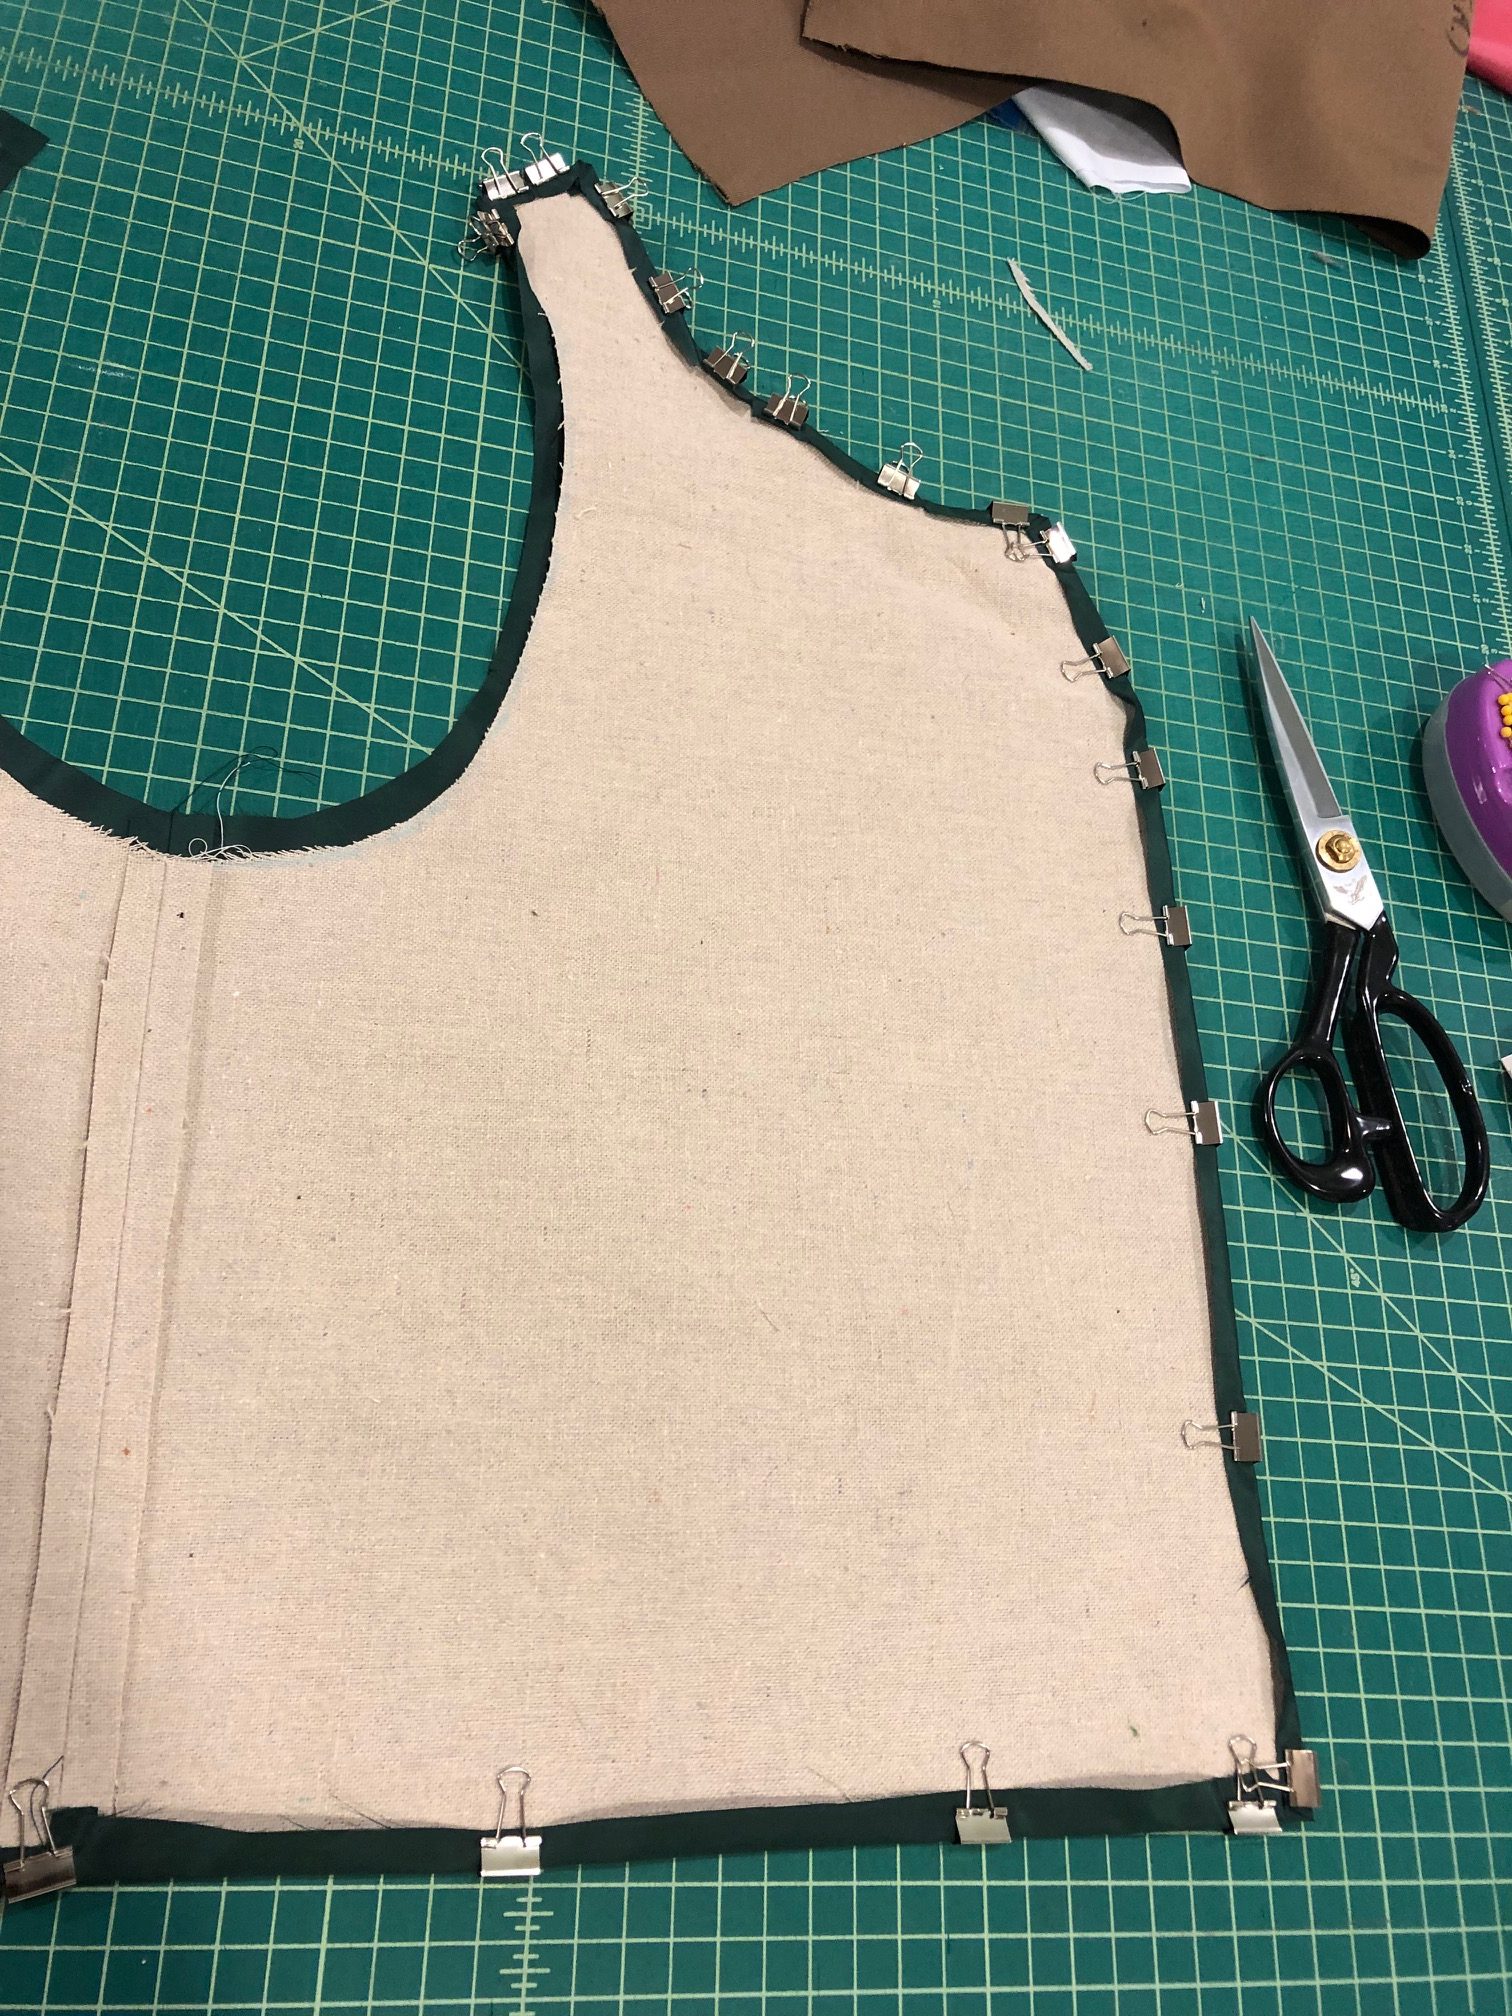
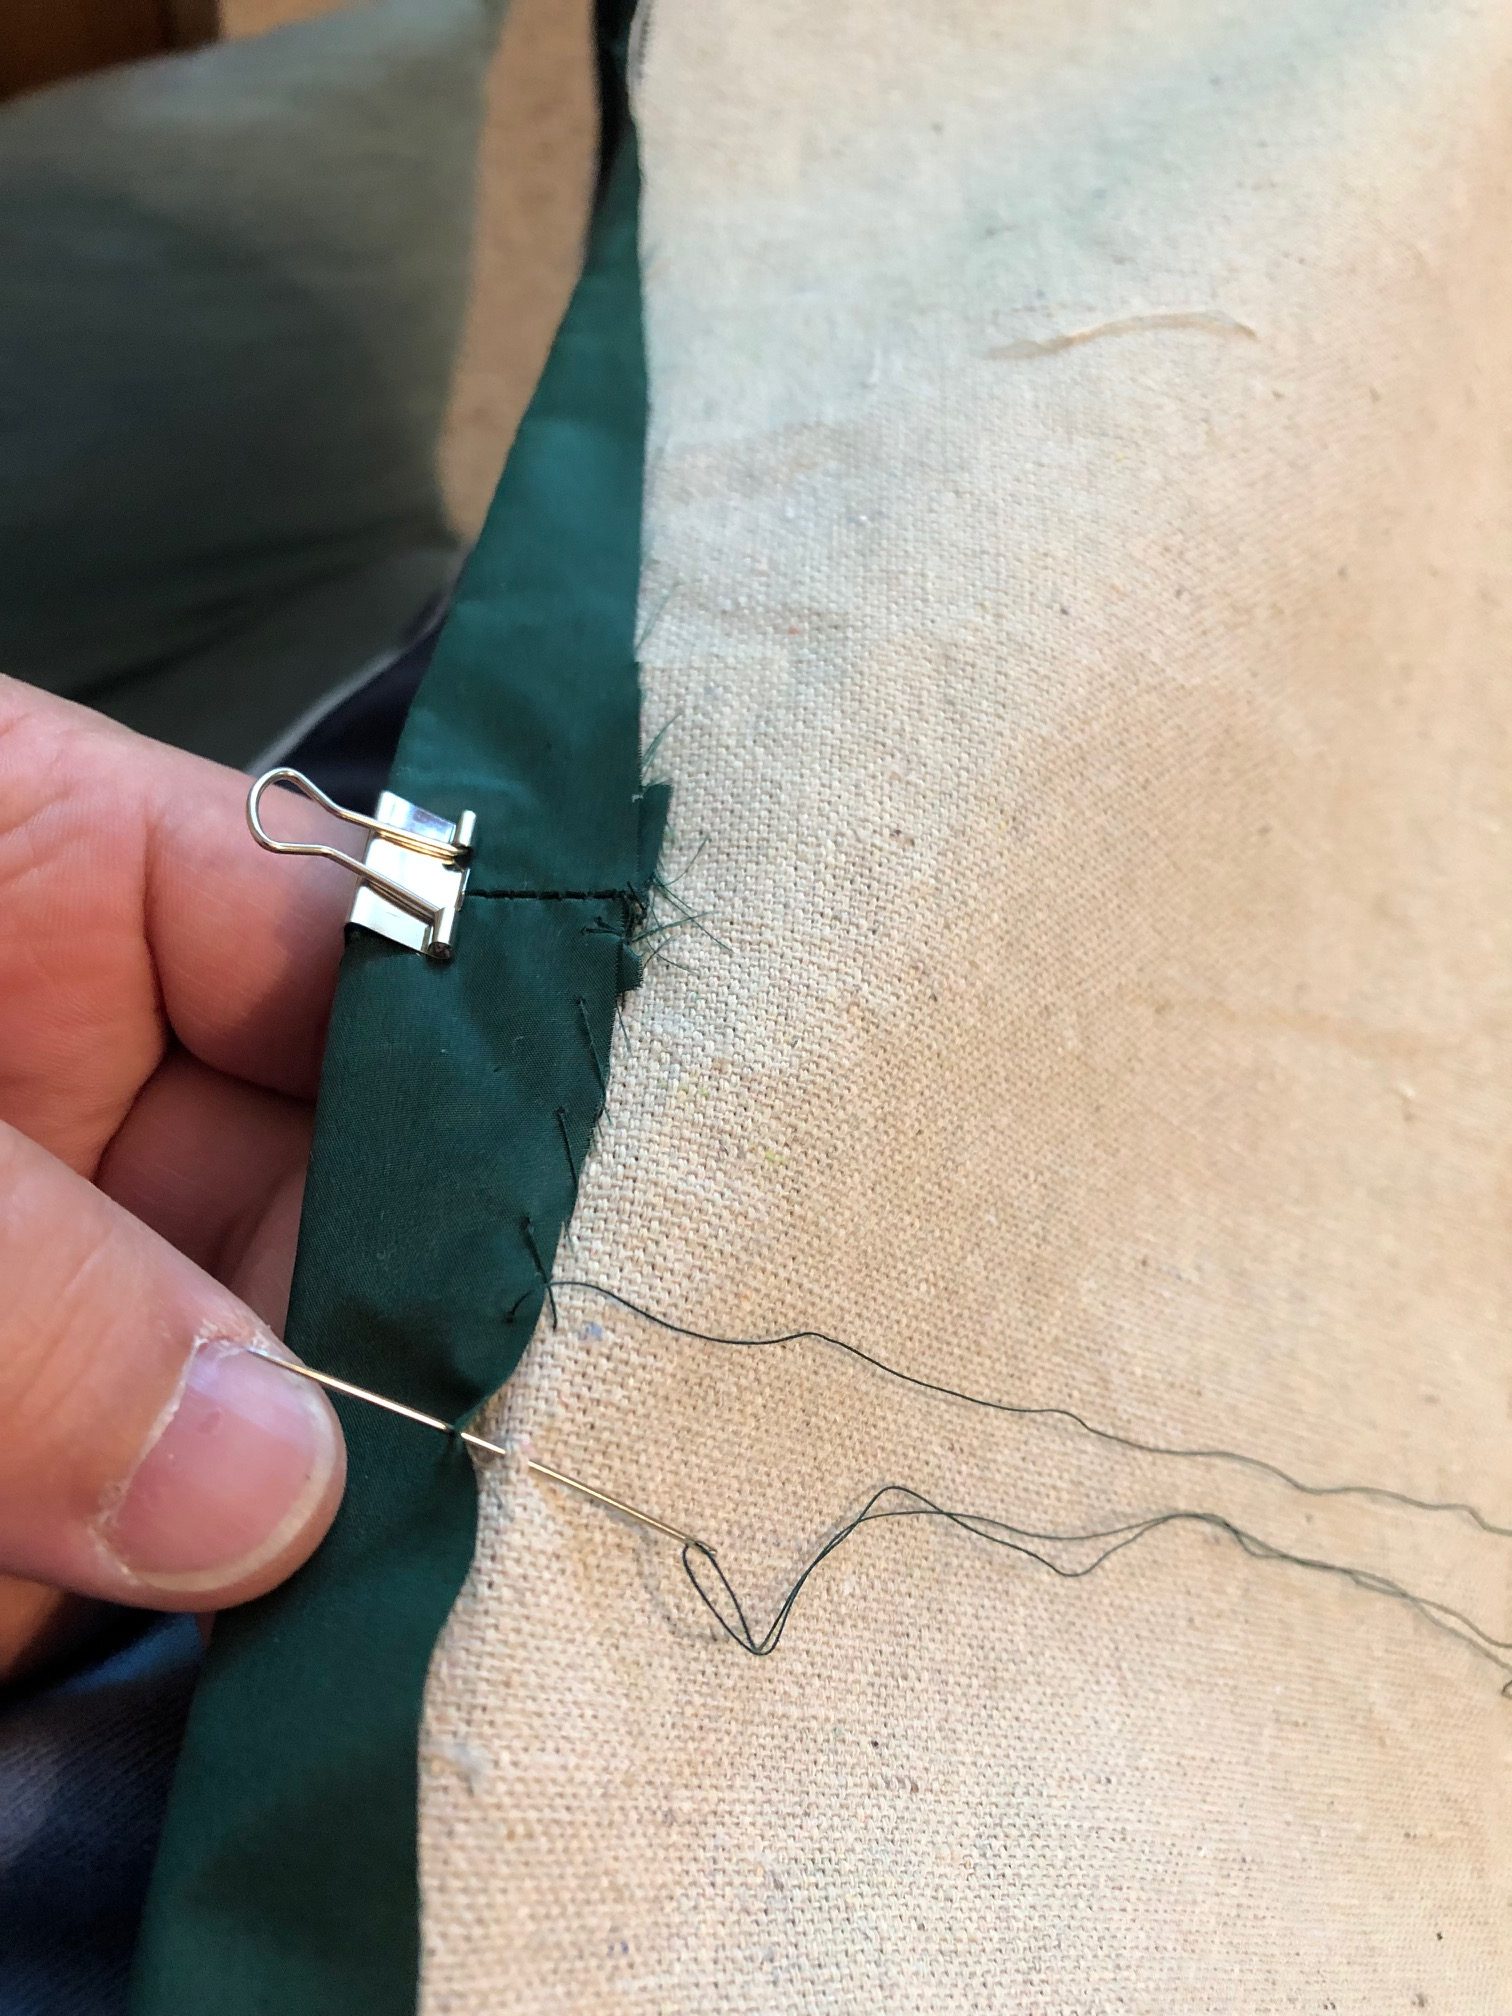
I’ve started on the body of the cioppa already. The primary fabric is a charcoal grey wool suiting, interlined with cotton flannel and lined with red linen. The guards are synthetic burgundy velveteen. The heavy wool I used to use for lining my pleats is sadly all gone, so I am attempting to use burlap to serve the same purpose. Time will tell if this was a good idea or not.
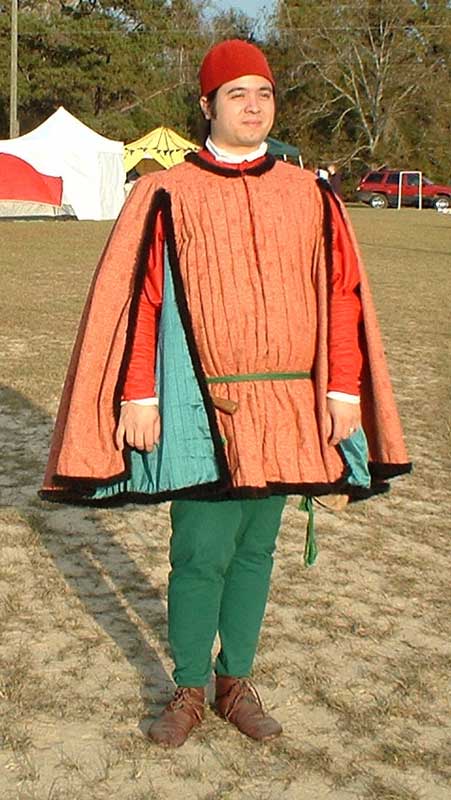