
I was trying to put stuff on Pinterest, but there is too much good stuff in Eugenio Larosa’s Flickr sets so I’ll just put a link here. 15c Italian living history pics, pertinent paitnings, manuscript scans, lots of extant pavises.
Category: Clothing
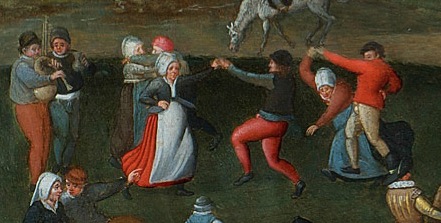
Flemish Peasant Details
I saw some paintings this morning that I hadn’t run across before. A few interesting bits stood out to me. First were two paintings of the Feast of St. George by Pieter Balten.
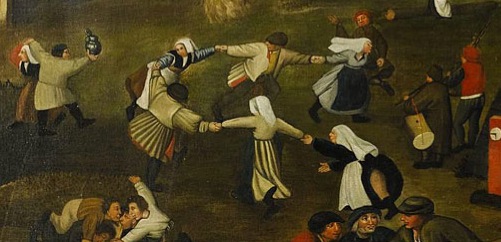
Here we can see a vigorous line dance being led from one end, without couples (though genders seem to alternate until they run out of men). On the left are two other dancers executing what appears to be an under-the-arm turn.
Here is another instance of a woman turning under the arm of a man.
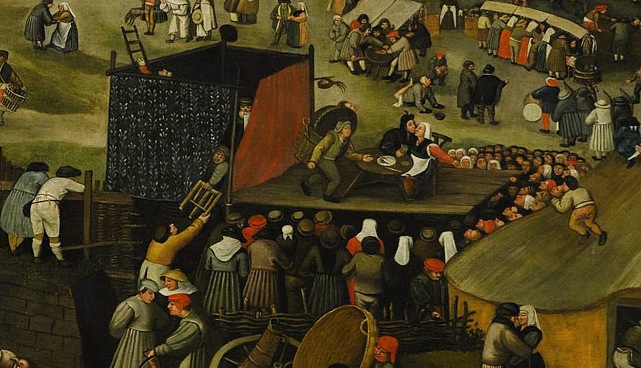
This is a very clear depiction of a play being performed, with a curtained off backstage area.
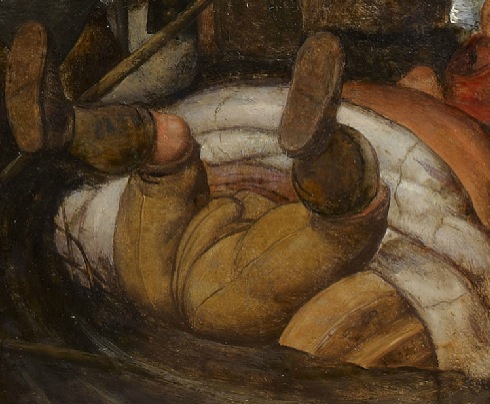
Maerten van Cleve’s Parable of the Blind shows a good angle on a codpiece (martingale?).
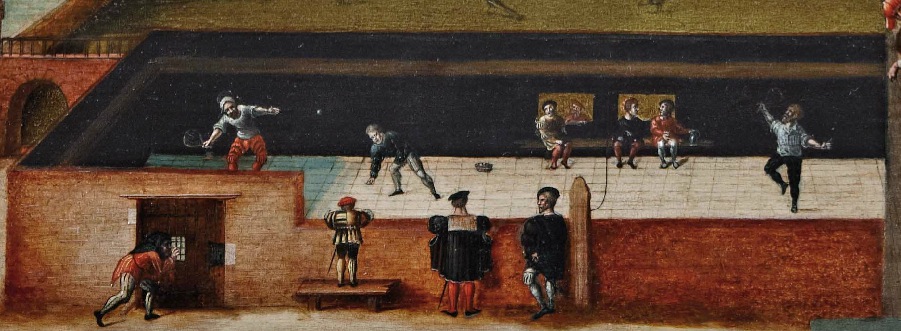
This Lucas Gassel landscape has a nice layout of a tennis court:
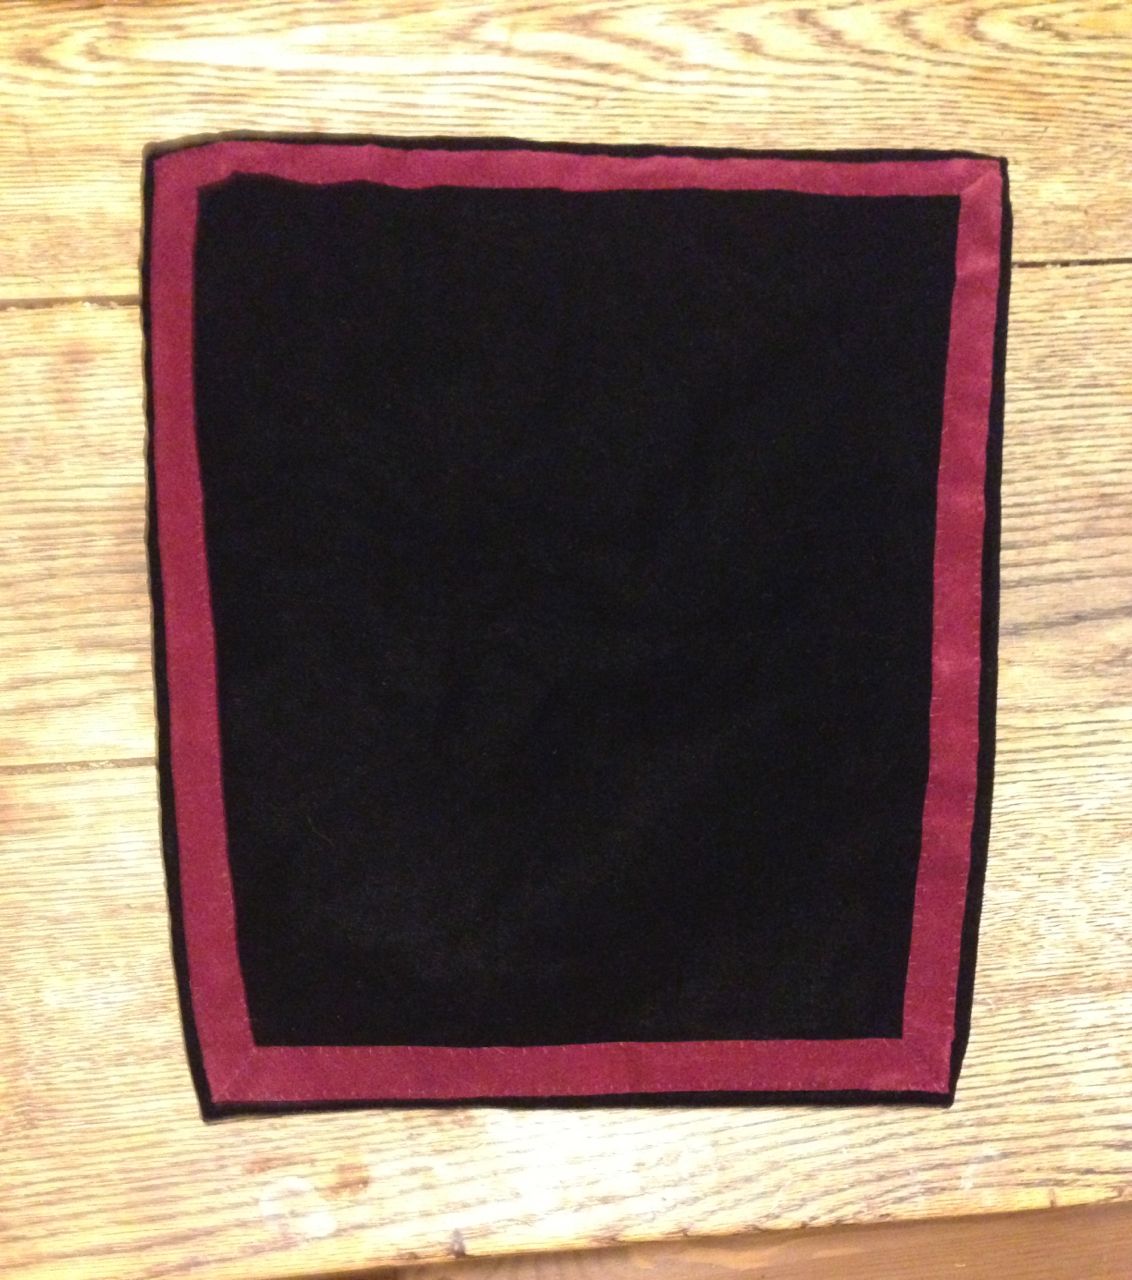
Romanino Doublet: Plastron
For lack of a better term, let’s call this thing on the front of the doublet a “plastron“. I started with two layers of the yellow cotton, quilted together on the machine. The velvet was basted on the front side, wrapped around the edges and tacked down. I managed to squeeze a lining out of the remnants of the black linen and attached it by hand. Finally, I applied a border of red velvet ribbon:
I pinned it onto the doublet and played with the position a little. I think it will end up about here: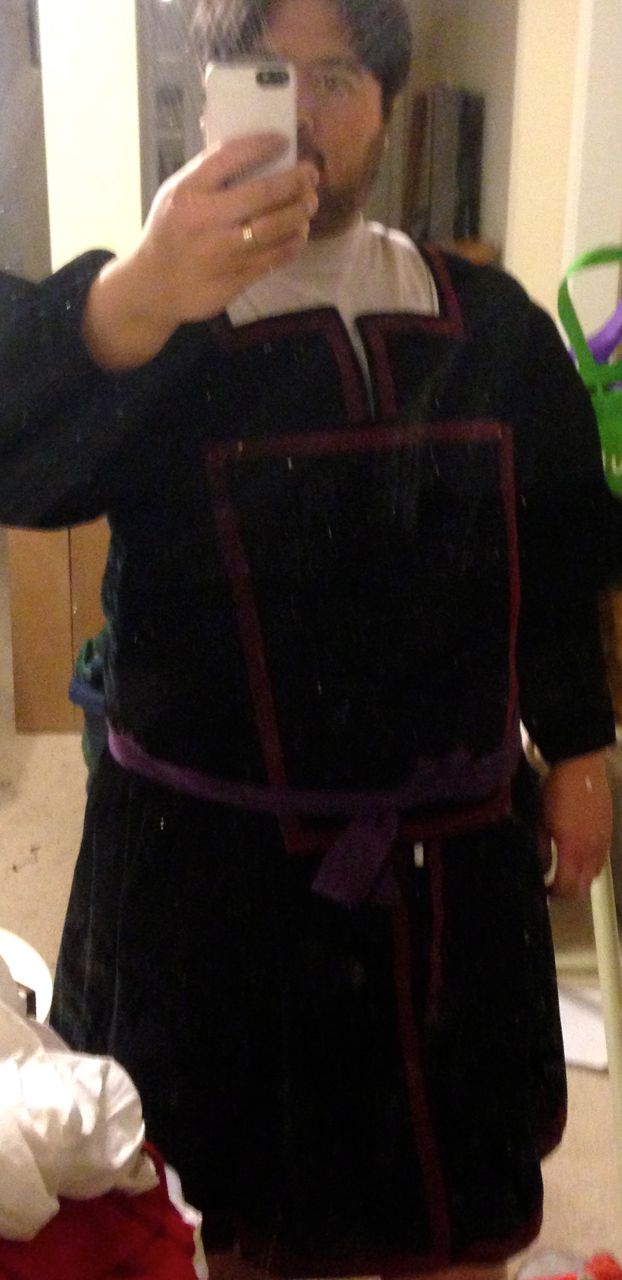
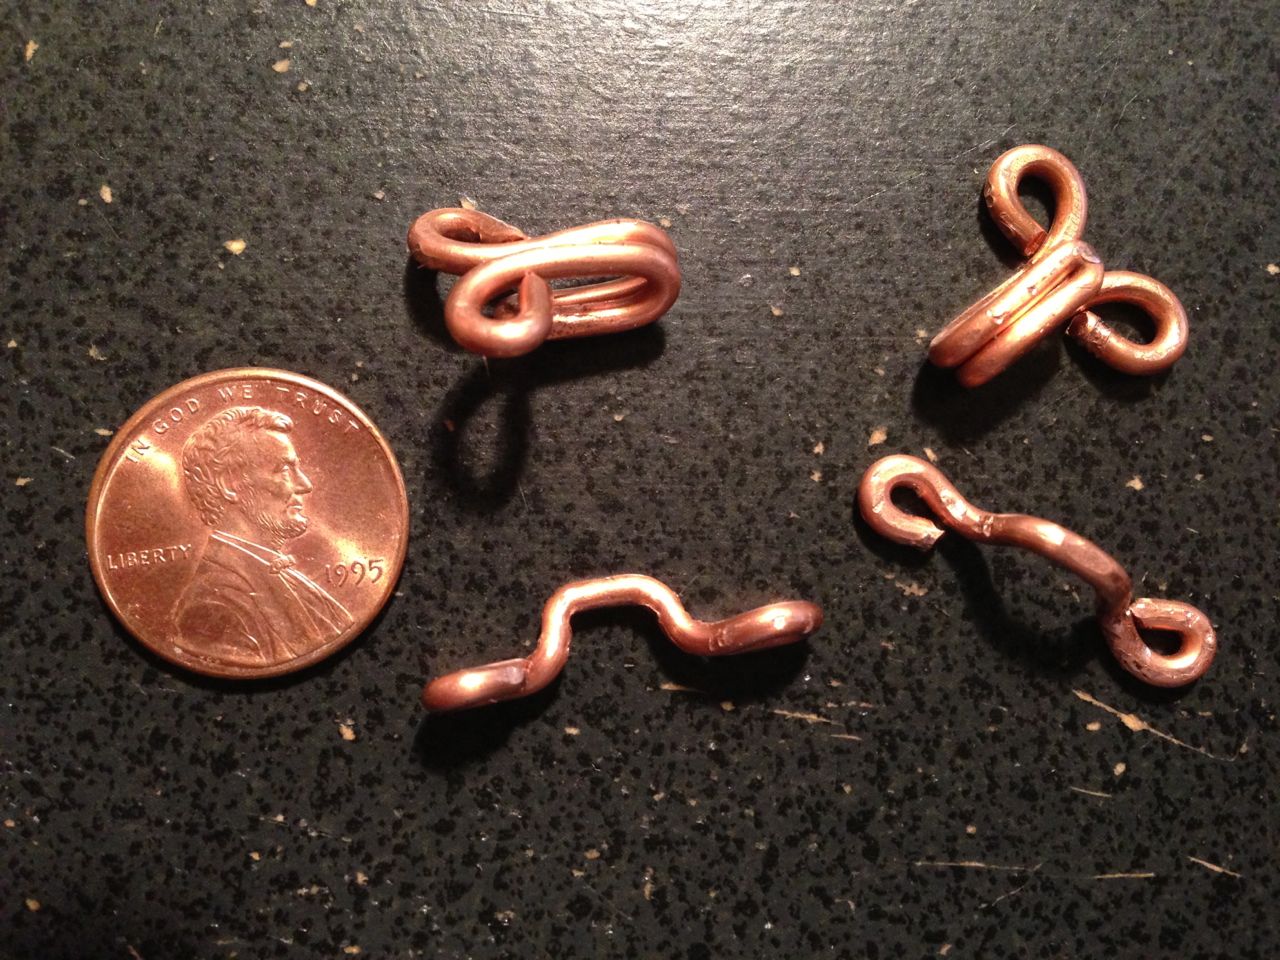
The belt in that picture is just a couple scraps of purple linen tied around. I’d like to do something involving black silk scarves, but I haven’t decided where to get them from yet. The current plan is to tack the corners down on one side, and fasten the other side with hooks and eyes I made from copper wire:
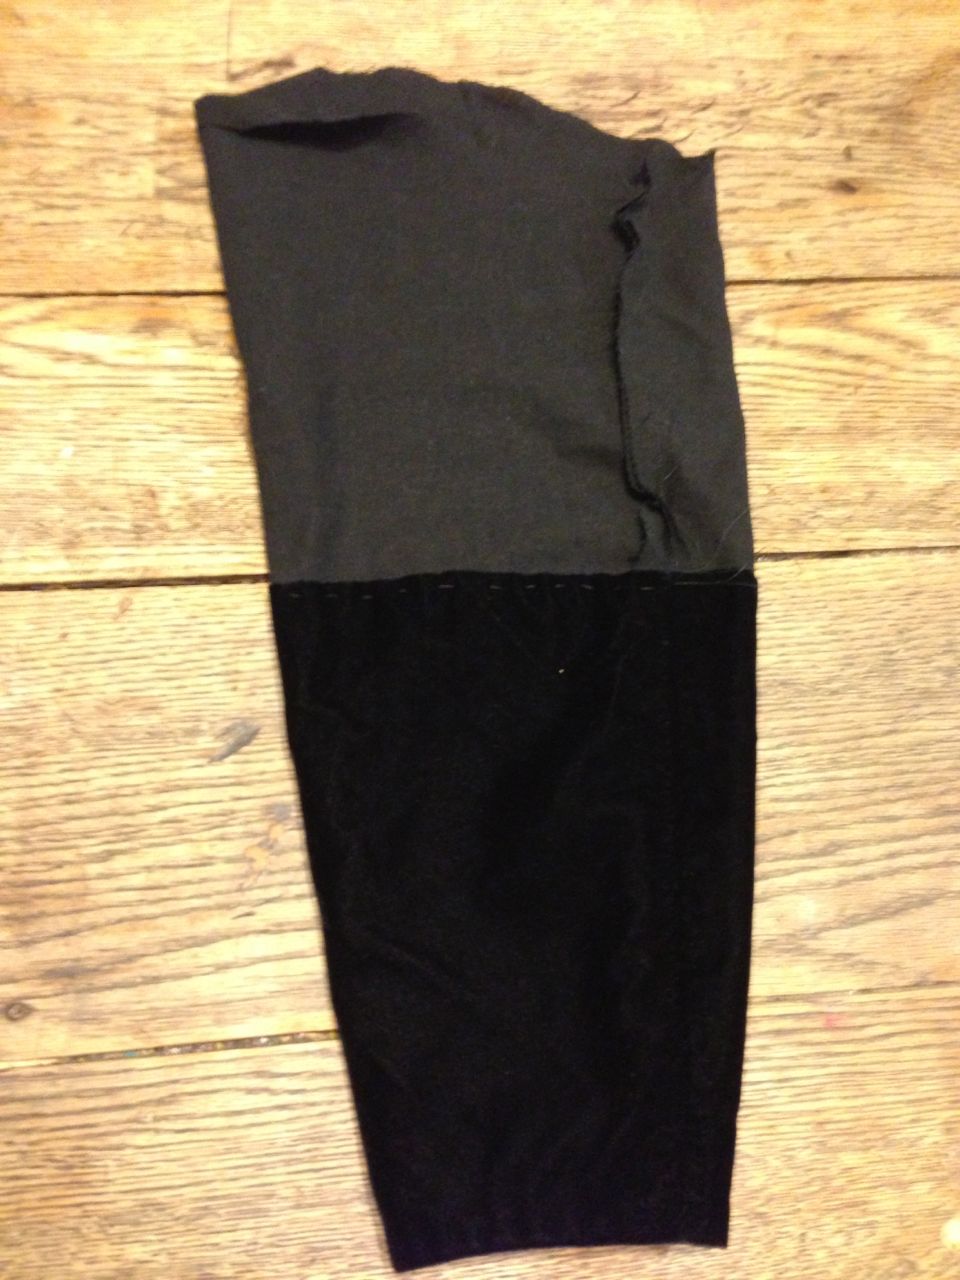
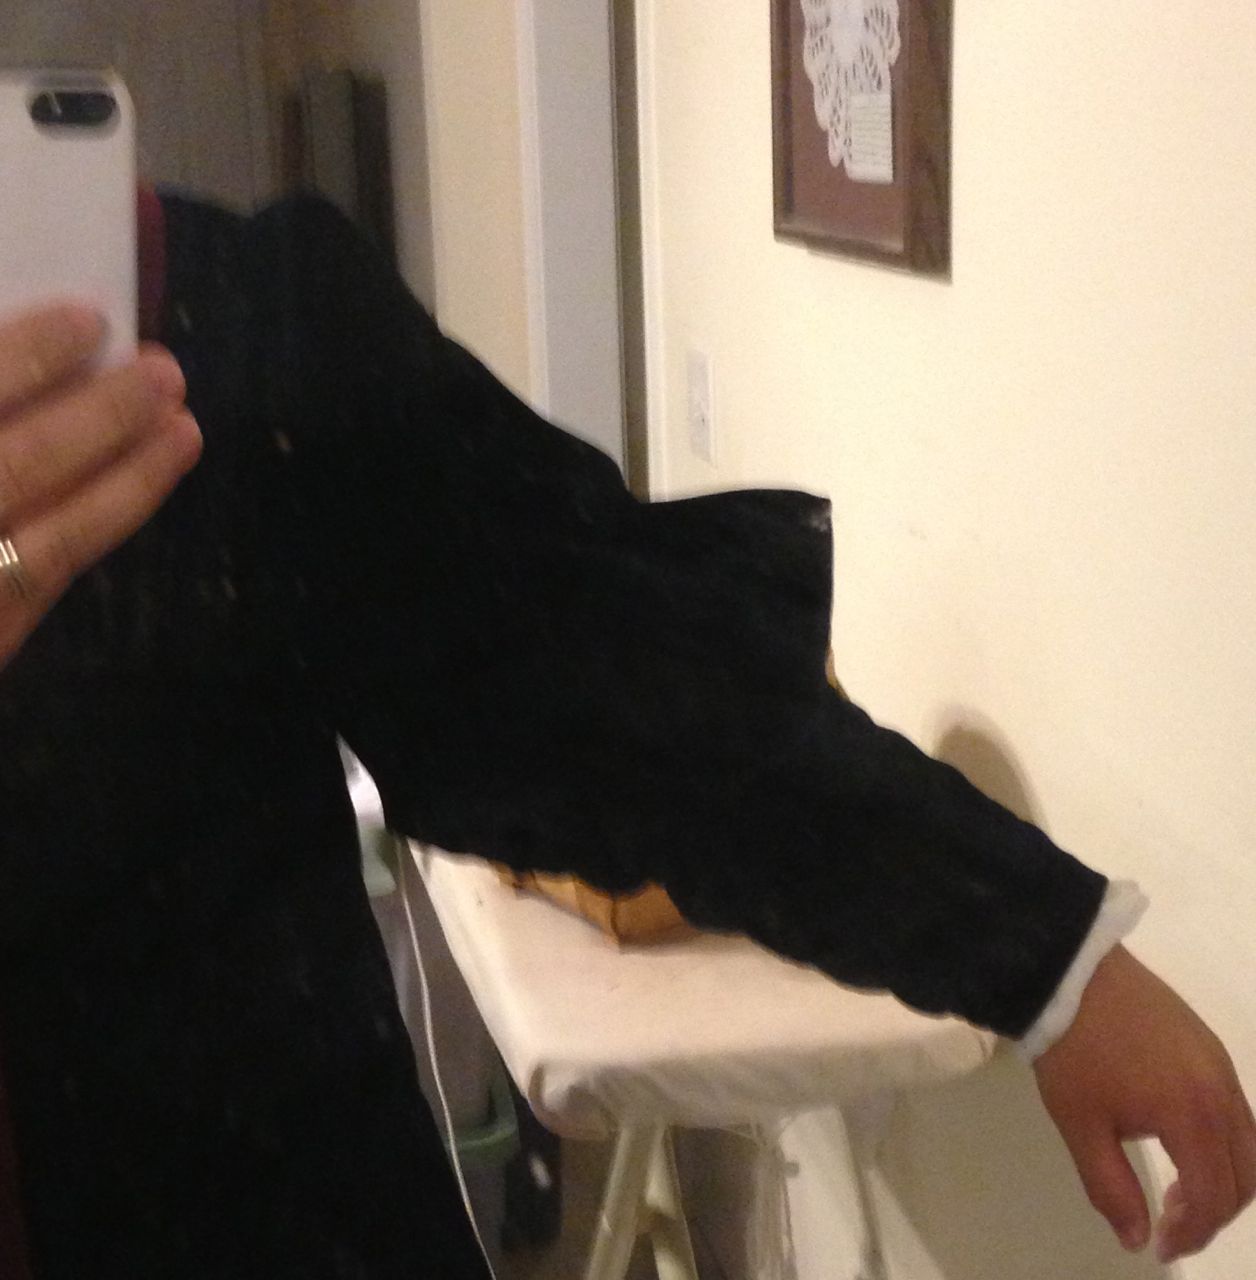
Romanino Doublet: Sleeves
I wanted to have big sleeves on this doublet, but didn’t want to have too many layers going on. Hopefully they’ll work out okay. I started with a black linen inner sleeve, with velvet on the lower half:
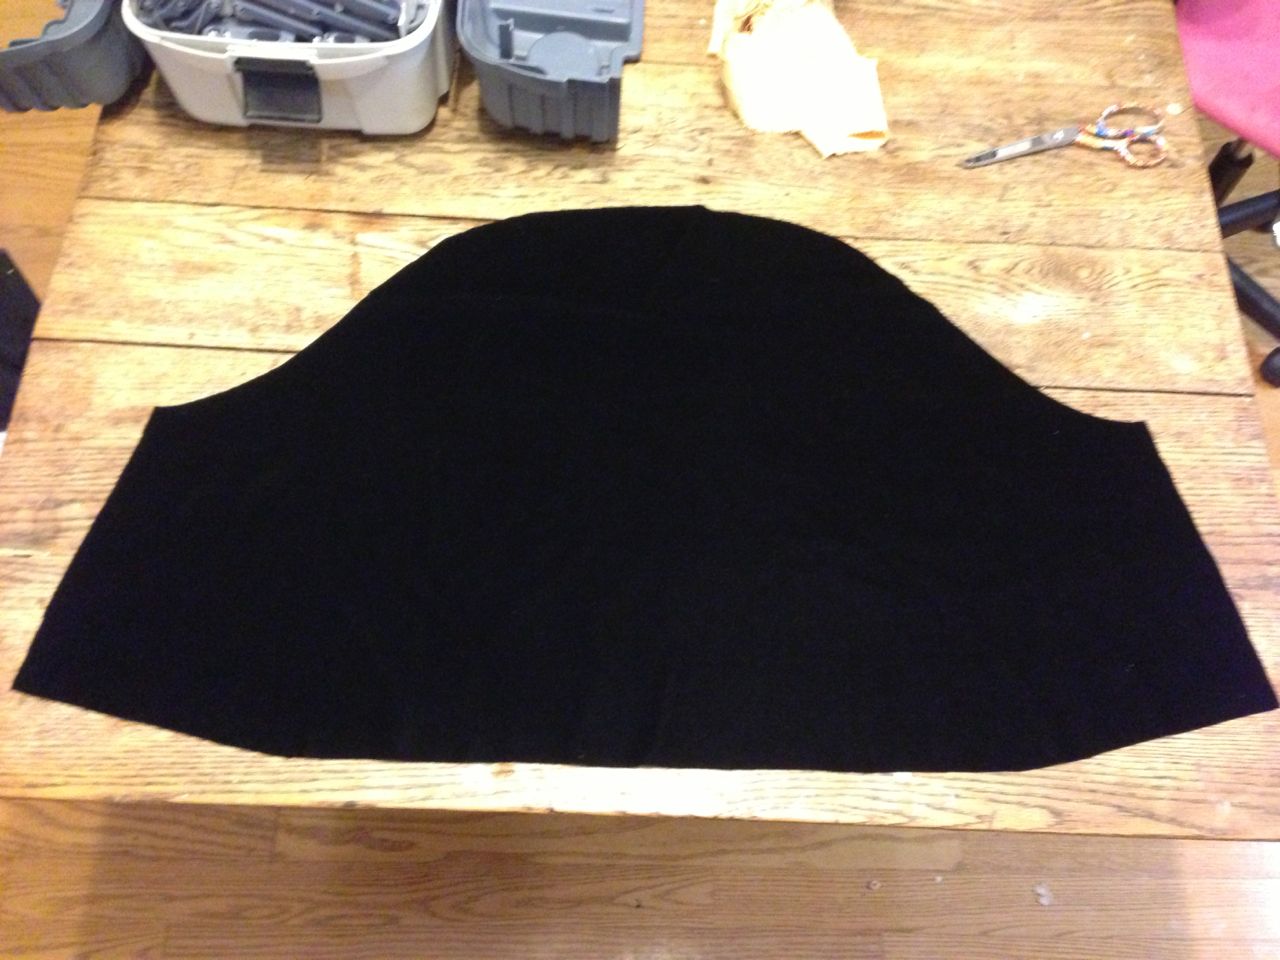
 Then I cut a nice big upper sleeve from the velvet. The plan was to have fullness at the shoulder and above the elbow, but not under the arm.
 I sewed a strip of the yellow cotton to the bottom edge of the upper sleeve, turned it, gathered up cartridge pleats (except under the arm) and sewed up the seam. Then I attached the inner and outer sleeves at the shoulder, pleating in the fullness with 8 knife pleats.
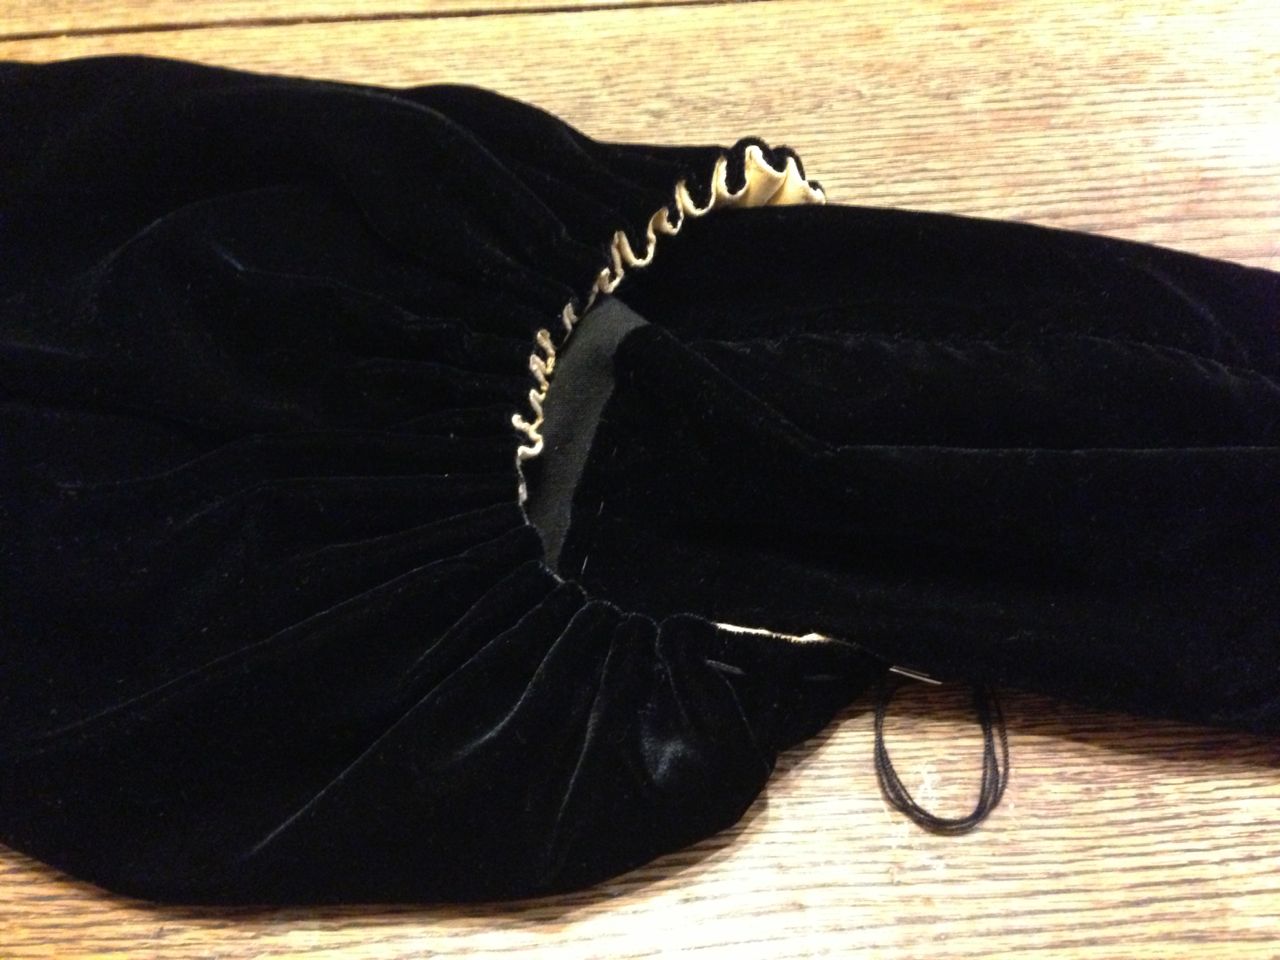 The cartridge pleats were then tacked down by hand around the elbow. I think the end result could use more fullness in the middle, but I’m not sure that extra layers in the upper sleeve would help that much. There’s certainly plenty of shape given by the cartridge pleating, so hopefully that will be enough.
Romanino Doublet: Body Construction
The body of the doublet went together without too much hassle. The main fabric is a black velvet that I was given by my Laurel on the occasion of my elevation. I’ve been sitting on it for years, waiting for the right project to come along. Hopefully I chose correctly. The body is interlined with one layer of a medium weight yellow cotton that no one in my family should ever wear on its own. The body is lined with lightweight red linen, and the skirt is lined with a medium weight black linen.
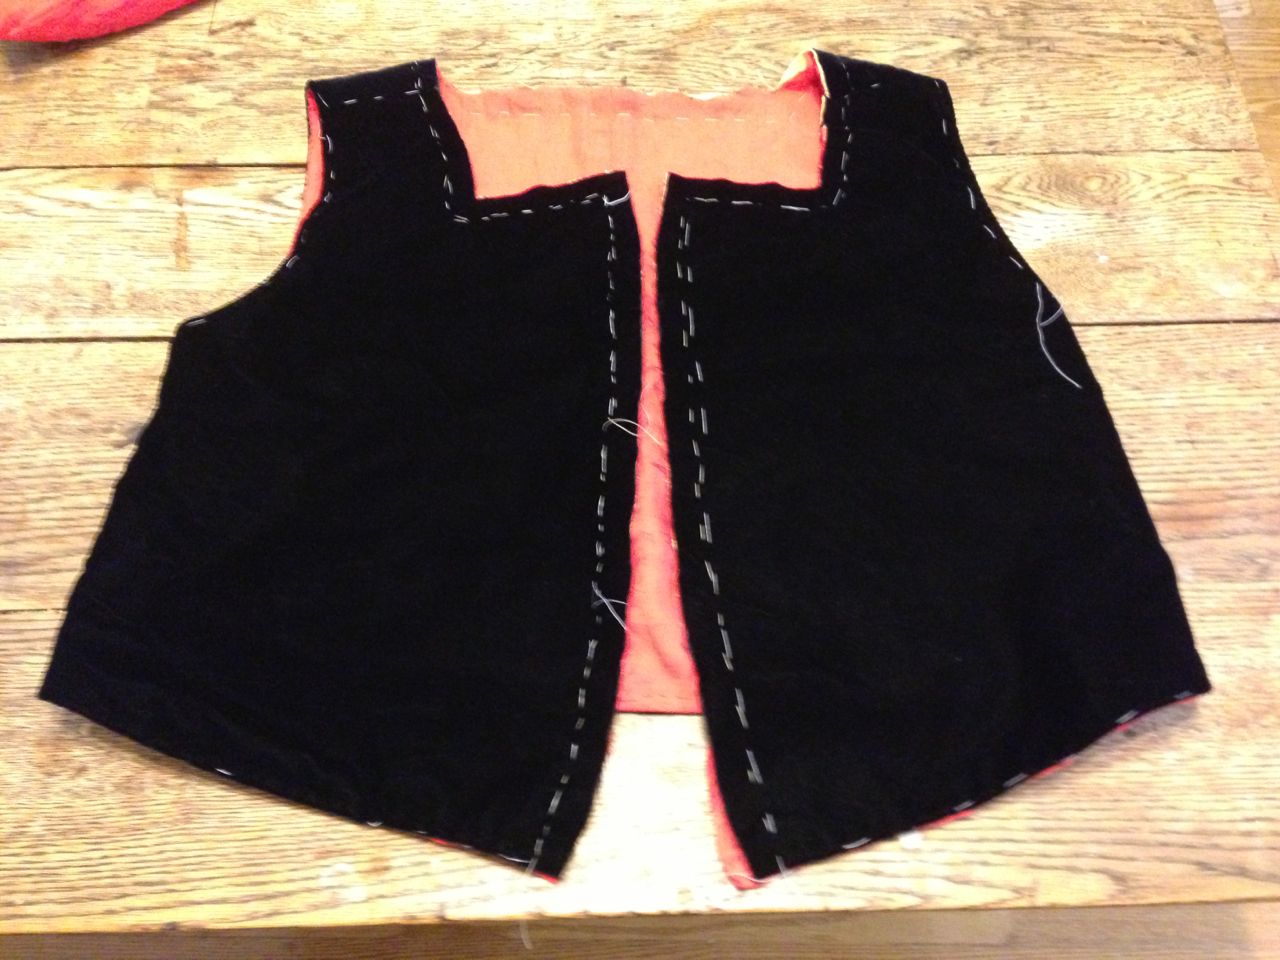 The velvet was basted to the interlining, then sewn together at the sides and shoulders. The lining was sewn up the same way and then machine sewn along the bottom edge, turned, and hand topstitched. Then the center front and neck opening were basted together and a wide black linen facing was attached by machine and finished by hand. Finally, the arm holes were turned under and hand finished.
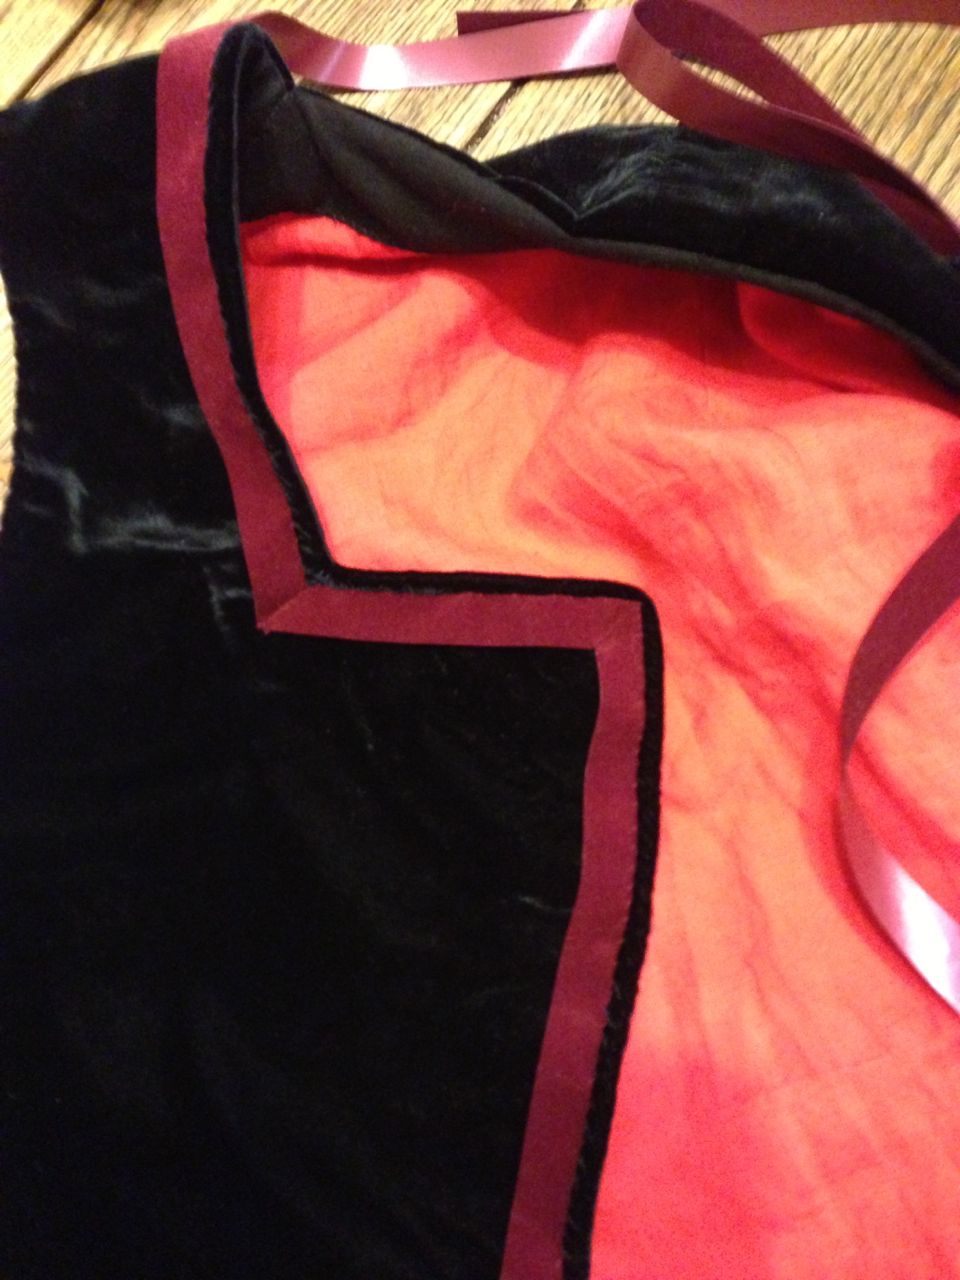
 The edges of the doublet are decorated with a stiff red velveteen ribbon that I got for next to nothing from a floral shop that was going out of business. It’s crinkly and has a tendency to shred at the ends, so I have some worries about its long term viability. In the worst case scenario, I’ll have to replace all the trim, but that’s not the end of the world.The center front is open at the top, and closes lower down with five sets of hooks and eyes. There’s some gapping there, but it will all be covered later so it’s not a big deal.
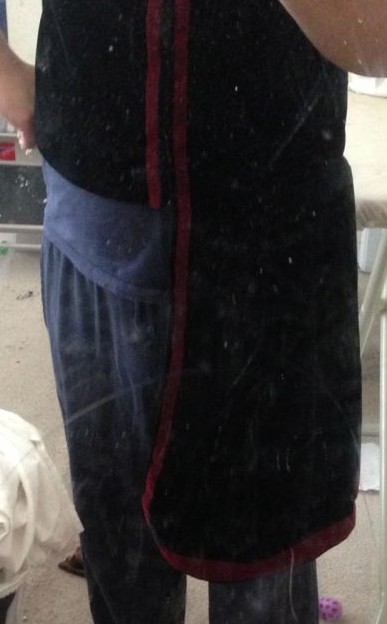
The skirt presented a bit of a problem at first. The corners curled under terribly, and it just didn’t look very good. By the time I realized the problem, I was way too far down the road to go back and rethink the construction. Instead, I ended up cutting small strips of flexible plastic cutting board and stuck them under the trim at the corners to serve as stays:
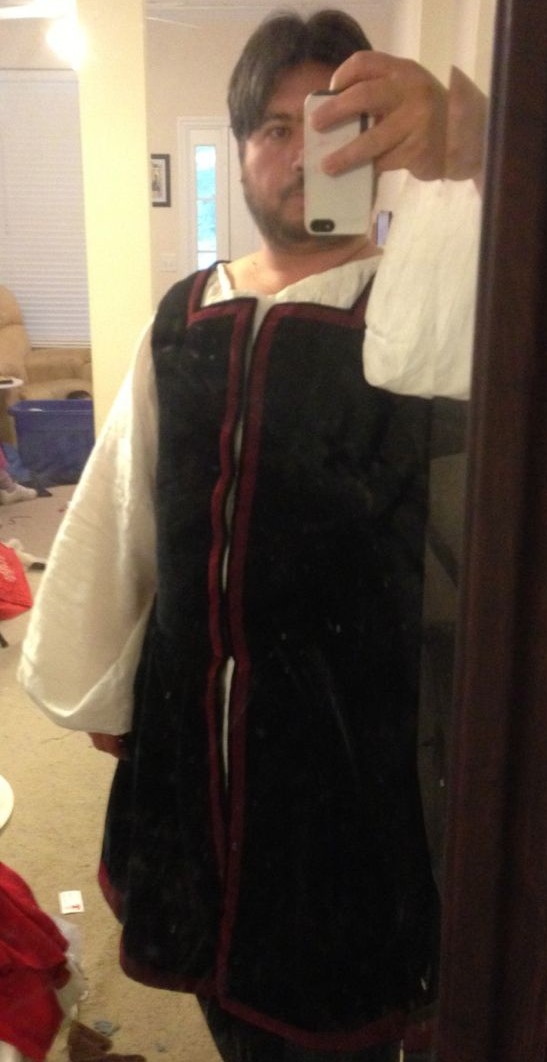
That seems to have more or less solved the problem. You can also see the shirt I made for this doublet (sans cuffs). It’s based essentially on Jen Thompson’s tried and true chemise technique. Next, sleeves!
Romanino Doublet: Planning
I have been wanting to make a doublet from the 1510-20ish range for a while now, but I hadn’t quite gotten started on it. I’ve been collecting images, and I built the hose I’ll need when I made my Veronese suit. I was still waffling on how to begin when Countess Gwen issued her Little Black Dress Challenge. Apparently that was the kick I needed to actually get serious about this thing.
First, as usual, I needed to find some reference images. I’ve been wanting to make the doublet in this 1516 Romanino portrait for ages:

Unfortunately, there’s some important information missing. How does it close, exactly? Is there a skirt? Does it come in black? Let’s look at some others. Here’s another Romanino portrait:

Okay, now we have black with gold trim, plus a pretty awesome hat. So far, so good. Still nothing below the waist, though. We also have the funny mid-chest bib thing over the open center front closure. Interesting, but still hard to work out the mechanics of it.
 Okay, Franciabigio (1522) gives us some more here. Basic black (dark blue? let’s call it black), no trim, fancy hat, so I can dress it down a bit if I want. The half-bib thing again, still no skirt.
 And here we have Bronzino (1527-28) for the win! It’s a touch later, but still with many of the same elements. Here we can see a skirt, pleated on somehow and open in the front. Again there’s the center front opening covered by a bib, except now we see that it’s held on at the corners with points, and it seems to be an entirely separate piece that goes down just below (and under) the belt. There’s a sash at the waist plus a (sword?) belt that hangs down across the skirt. The upper sleeves are a different color from the lower sleeves, but I think I can get away with the whole sleeve one color, based on the 1516 Romanino and the Franciabigio. I also think I’ll go with the more voluminous sleeves of the earlier portraits, as well as the enormous beret style hats. All of this in black velvet that I’ve been hoarding for several years now. Next, figuring out the pattern!
Veronese Suit: Completed
Since the last clothing update, I raised the waistline of the imbusto and doublet, and made the jerkin and hat.
The jerkin is made of tropical weight navy wool suiting. The body is lined with dark blue silk taffeta. The shoulder wings (this is their second incarnation) are interlined with two quilted layers of heavy cotton. The lapels are tacked down at the corners so they lay like I want them to. I didn’t have enough silk to line the skirt, but I love the way it drapes with just the wool, so that makes me happy.
The hat is made from the same silk taffeta. The brim is interlined with two quilted layers of some other mystery cotton. The crown (also the second incarnation) is lined with linen.


Veronese Suit: Pouch
The jerkin is just about done, but I took a little break to make myself a pouch. I’ve been wanting one of these ever since I saw Purses in Pieces. I didn’t want to carry around my big pilgrim’s scrip, and I didn’t really have a decent belt pouch. Everything here came from my stash. The outside is leather recycled from a friend’s couch reupholstering project, and the inside is pigskin left over from bookbinding. I have no idea where the buckle came from. The side seams were done on the machine, and the center seam was sewn with a strip of the pigskin. It took me a while to figure out how to get all the holes lined up through all the layers, but then I realized I could clamp it down with some scrap wood. It only took a few hours to put the whole thing together. Of course this is a relatively simple example with no pouchlets, but it should do.
Veronese Suit: Doublet
The doublet is finished! I may have been able to make it less heavily constructed, but I didn’t want to risk having it be super wrinkly.
Veronese Suit: Codpiece
I’ve finally got enough pictures to make this post, so here goes. This is pretty much the same codpiece pattern I used for my last pair of joined hose, aka the “birdnester” codpiece. It took a couple tries to get it in the place I wanted it, but I think it turned out pretty well.