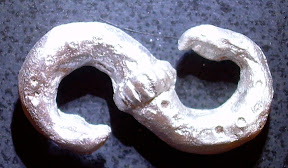
One of my pet peeves is seeing 16th century doublets with a lovely peascod waistline worn with a belt that sits in completely the wrong place (usually horizontally well above the point in front, and sometimes below the doublet waistline in back). This can be partially alleviated by having a narrow, flexible belt, a well padded peascod to hold the belt down in front, and enough volume at the top of the trunk hose (or venetians or what have you) to keep it from sliding down in back. Something else that helps greatly is a hinged clasp of the type often seen in 16th century portraits, that sits at the bottom of the doublet point ans allows it to follow the curve more easily. Back in 2007 I made one of these for myself:
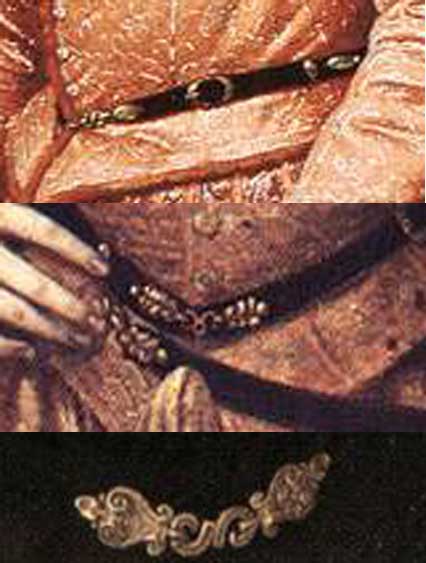
A lot of men’s belts in 16th century portraits are quite narrow, with a clasp at the front and a buckle off to one side. It’s often hard to see much detail, and I always guessed that it was a hook-and-eye type arrangement. For several years I’ve used something cobbled together out of sheet brass and upholstery tacks, but I decided that it’s time to upgrade to something better. I was looking for source images and found something new to try. Three images of note are Moroni’s Gentleman in Pink, Alonso Sanchez Coello’s portrait of Prince Don Carlos of Austria, and Pieter Pourbus’s portrait of Olivier van Nieulant. The pertinent bits can be seen here. The basic form, which can be seen especially well in the Pourbus portrait, is two strap ends with loop terminals, connected by a hook. The portrait of Don Carlos appears to have a different hook shape, while the Moroni portrait shows clearly the buckle and secured adjustment strap over to the side.
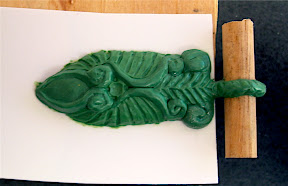
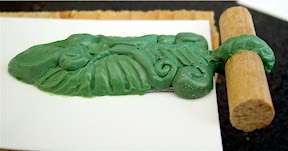
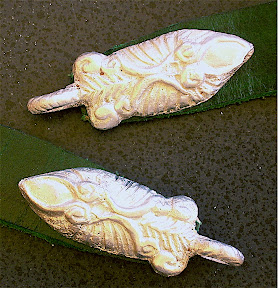
I had tried earlier casting some fairly massive strap ends with a hook on one and an eye on the other, with quite poor reults. After finding these images and having a discussion with my casting guru, I went back to the drawing board. The best part about this design is that, as long as the strap ends are symmetrical, only one model is needed for both. I started with a basic tapered rectangle cut out of 22ga steel, glued to a larger piece of styrene card to support the edges of the model. I drilled two holes through the steel, and glued in two cut down nails to serve as integral rivets. As the loop would be perpendicular to the parting line of the mold, I needed to build it around a dowel. I drilled a hole in the dowel and glued in a small nail, which I hammered flat to better secure it to the rest of the model. I stuck everything together with a rough first layer of epoxy putty, then came back and added surface details in the same material. The design was pretty much made up as I went along.
The pieces were sand cast, with another dowel set into the cavity after the model was removed to support the loop. After casting, the dowel was removed. As my casting sand isn’t the finest, some detail was lost, but at the same time the surface imperfections on the original model were smoothed over. The final pieces required some cleaning, but turned out fairly well. I still need to design and cast the S-hook, but that should be fairly simple in comparison.
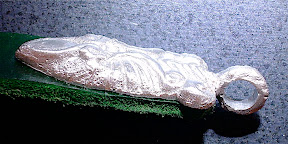
Yesterday I sculpted the hook for my belt clasp. I started with a piece of wire bent into the basic shape, then roughed out the main body of the hook with Milliput. I then added the collar and terminals in green stuff. The terminals are roughly shaped like bird heads, though not much detail survived the casting process.