
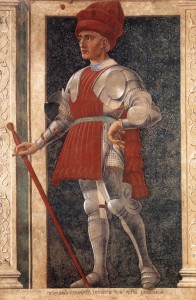
Andrea del Castagno, Famous Persons: Farinata degli Uberti (c. 1450)
One of the distinctive features of 15th century Italian men’s clothes is the tubular pleats seen on the giornea and cioppa. There are many theories as to how these are achieved, and this is the conjecture that has worked for me.
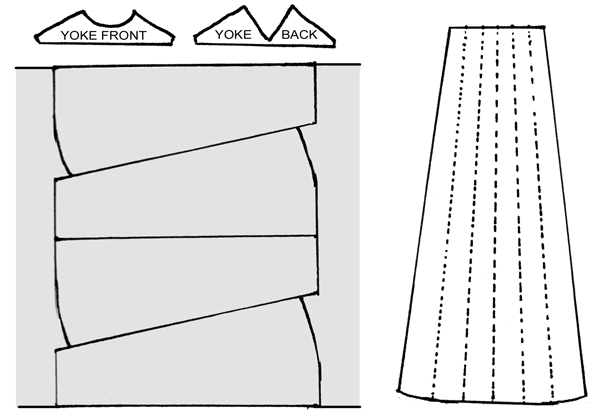
Cutting the Giornea and Cioppa
Cut the pleated sections as shown from outer fabric, lining, and a stiff interlining. The interlining is necessary to keep the pleats smooth and rounded. Each section should be twice as wide at the bottom as it is at the top, and four times as long as it is wide at the top. A giornea will require four sections each for the front and back. A cioppa will require two extra sections for the sides, which will be cut down at the top to form armscyes. If the fabric has a pattern, put the upside-down sections in the back. You will also need to cut two of each yoke section from the same fabrics. The yoke pattern can be derived from the top sections of the farsetto body pattern.
Pleating the Giornea and Cioppa
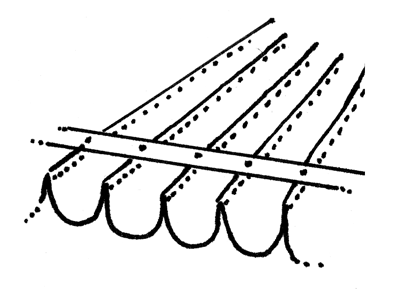 Divide each section into six parts, and mark them on the outer fabric. Baste the interlining and lining together, then sew the outer fabric on top along the marked lines. If you will be binding the lower edge with fabric, do so now. Sew a tuck along each marked line on the inside, turning the top edge over. Sew the sections together along the edges, right sides together. Construct the yoke and cartridge pleat the front and back sections to the bottom edge of the yoke. Bind the side edges and neck opening. If trimming with fur, the bottom edges can be bound now. Attach stay tapes to the tucks at regular intervals to keep pleats arranged neatly.

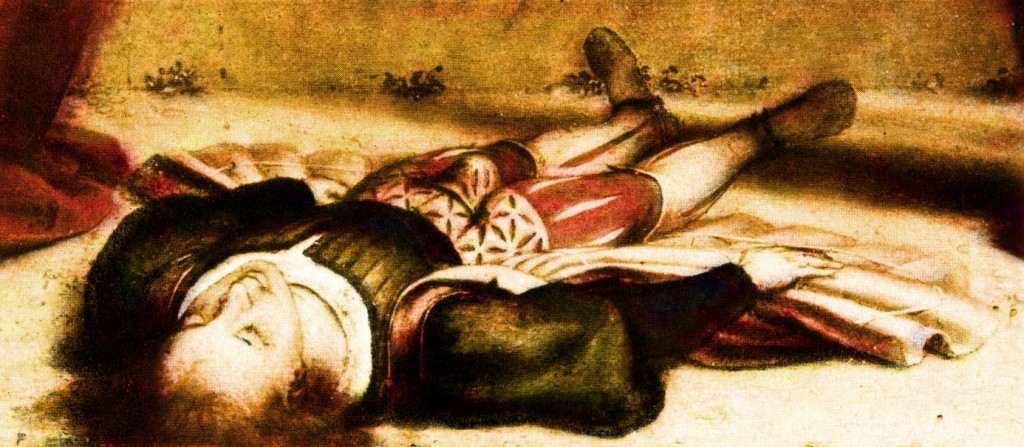
Martyrdom of Saint Christopher – After Andrea Mantegna (1431–1506) – This gives a pretty clear view of a stay tape on the inside of a discarded giornea.
Lorenzo Lotto, St Dominic Raises Napoleone Orsini [detail] (1513-16) – While this is far later than the style being discussed, it gives a rare view of stay tapes in use to arrange pleats.