Category: 16th century

Veronese Suit: Pouch

The jerkin is just about done, but I took a little break to make myself a pouch. I’ve been wanting one of these ever since I saw Purses in Pieces. I didn’t want to carry around my big pilgrim’s scrip, and I didn’t really have a decent belt pouch. Everything here came from my stash. The outside is leather recycled from a friend’s couch reupholstering project, and the inside is pigskin left over from bookbinding. I have no idea where the buckle came from. The side seams were done on the machine, and the center seam was sewn with a strip of the pigskin. It took me a while to figure out how to get all the holes lined up through all the layers, but then I realized I could clamp it down with some scrap wood. It only took a few hours to put the whole thing together. Of course this is a relatively simple example with no pouchlets, but it should do.

Veronese Suit: Doublet

The doublet is finished! I may have been able to make it less heavily constructed, but I didn’t want to risk having it be super wrinkly.

Veronese Suit: Codpiece

I’ve finally got enough pictures to make this post, so here goes. This is pretty much the same codpiece pattern I used for my last pair of joined hose, aka the “birdnester” codpiece. It took a couple tries to get it in the place I wanted it, but I think it turned out pretty well.

Veronese Suit: Hose and Imbusto

So obviously I decided to point the hose to an imbusto instead of to the doublet. I think this is going to be a good decision in the end, as I already have some other styles I want to make, and that means I can experiment without having to make a whole mess of eyelets for each one.

So, on to the hose:

The hose are made from some nice stretchy wool with a kind of weird but inoffensive weave that I got for cheap on the interwebs somewhere. I’ve made 15c hose with it before and it worked fine. As usual, the hardest part of this was actually cutting the legs of the hose, but one I started it was no big deal. I used the same pattern I’d worked out from the blue linen hose for my last iteration of the Flemish peasant suit, with a little extra all around to play with. I ended up cutting off the height I’d added to the waistband, but better to have it available than not, I suppose.

The waistband and center front were reinforced with three layers of medium weight linen, and the waist was bound with a strip of the wool. I went for 7 pairs of eyelets on each leg, and I think I can get by with two pairs to close the center front.

The imbusto was originally an experiment for a 15c Burgundian suit that I never finished, which is just as well because I was doing it wrong. I went through a bunch of song and dance trying to get it to fit right and put the waist at the right level. I put a gusset in the back, then took that out and put in a full height panel, took it in at the shoulders to raise the waist, took off the skirt and sacrificed the original eyelets, added length back at the shoulders, and put in a whole new set of eyelets at the bottom. It still needs some finishing work, but I wanted to make sure the darn thing actually fit:


Obviously, I haven’t installed the codpiece yet, but I swear this is the most comfortable pair of hose I’ve ever made. I really need to rework the pattern to move the back seams, but as far as comfort and movement, the combination of pattern and material make me very happy. I may put a little dart in the top of the imbusto to bring the shoulders in if it really bothers me.

Veronese Suit: Beginning

I always enjoy getting out to events in other kingdoms, so I decided to make a trip to Atlantian Twelfth Night to see some friends and do some dancing. The theme is very specific: 1543 at the court of Henry VIII. I figure there were some Italians at court, so I went looking for something to wear.

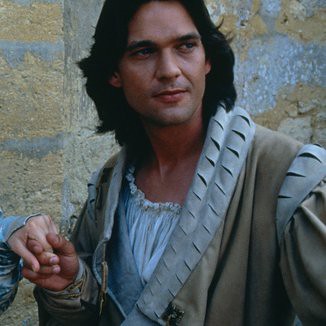
I have had a love for these funky slashy collars for ages. They only show up for a brief time, and there aren’t a lot of good images, but there they are. You can also see it on Prince Henry in Ever After (not the most accurate costume ever, but clearly inspired by the style). I poked around for a while and decided to use as my primary reference the guy in the back of the dance circle in Veronese’s Outdoors Entertainment with Dancers (you can see him in the upper left portion of the image at left). There’s not a lot of detail available in the image, so I’m trying to make my best guess as to construction from some other sources, including Beham’s somewhat earlier and more German Portrait of a Man. There’s also some references and images for similar side-closing crossover type garments in Moda a Firenze (Cosimo). Armed with these resources, I forged ahead.

I went to the stash for fabric, and decided to use a lovely grey cotton velvet that I scored from a friend’s stash purge. I dug out some heavy red cotton that had been cut out for a tunic a million years ago and manged to squeeze out enough bits for interlinings. The lining is a thin red linen that is a massive pain to work with, wrinkles like mad, and is just not good for anything but linings.

Starting from the body block I made fairly recently, I cut up an old bed sheet to try to work out the pattern for this thing. I knew I wanted it to fasten at the left side, but I wasn’t entirely sure how far over the under layer should extend. I’m still a little undecided on that, but we’ll get there later. After mocking it up and tinkering some more with just the interlining, I went ahead and started the real construction.

I sewed together the outer shell of velvet and interlining, and tacked the seam allowances down inside to keep everything laying flat. I didn’t want to attempt putting an iron on the velvet, though I imagine it wouldn’t be too disastrous if I were careful. I cut the velvet with some extra at the neck and armscyes so I could turn it over the edge of the interlining and attach the lining there by hand. The rest of the edges were basted and then bound with a strip of the velvet.

The main body of the doublet is pretty much together now, minus some of the fastenings. I’ve got a hook and eye to secure the inner flap the the right shoulder, and hooks and eyes at the left shoulder. The left side will be closed with three points which will require working some more eyelets.

I’m still undecided on what to do as far as attaching the hose. You can’t see what’s going on at the waist on my primary reference, though the seated musician on the right side of the painting looks like he may have some visible points at the waist. I’m trying to figure out exactly how the points would work at the front of the doublet, and have yet to come up with anything entirely satisfactory. I’m contemplating making (actually recycling) an imbusto to go underneath just to have something to point the hose to. I think I’ll finish up the points on the doublet, make the hose, and then see what the best way to attach things will be.

Don Carlos Belt: Finished

I made the mold back out of a piece of scrap wood, with nails for registration pins. I needed to drill out the back for rivets on the loop terminals, and I decided to carve out the back side of the hook a little bit to give it some more thickness. To make sure everything lined up, I put a little acrylic paint on the front side of the mold, then pressed the two halves together to transfer it. It gave me enough of an idea of where the edges would line up so that I could put things in more or less the right spot. I poured up a few sets, but I started getting some discoloration in the metal (probably from impurities from the wood) so I only ended up with two usable sets of loops. I cut the old hardware off the belt and installed the new bits. So far, it looks like a winner!

(more…)

Owl Face Belt Hook: Research Fail

After making the loops for my new belt clasp, I went looking for options for the S-hook that were not snakes or swans. In the process, I ran across this link that pretty much blows a hole in the idea that the lion head belt terminals I found are actually 16th century. They seem to be more of the 18th century military belt clasp type. I’m going back through 16th century portraits now, and so far all I’m finding are surface-mounted terminals like I used on my old belt. I’m also less sure now about the zoomorphic decoration on the hooks for 16th century belts, but I think that will stand up in the end.

Edited to add: I managed to find a few examples that were clear enough to see what’s going on with the clasp. Surface mounted loops, as I expected, but also no clear evidence of the zoomorphic S-hook. There was more variety than I expected, and less surface decoration on the hooks, so that may be a blessing in disguise, from a casting standpoint. There seem to be both S-shaped hooks and sort of curvy M-shaped hooks as well…

Owl Face Belt Hook: Casting the Loops

I needed to make a new belt to go with the Alborghetti suit, so I found a new type of belt hardware to play with. Serafina came down today to work on some of her casting, so I cranked out a quick mold that I thought might do the trick. The extant piece I’m emulating has a lion face, with a perpendicular loop on one side for the belt hook and a wide rectangular loop on the other for the belt. Rather than make two molds for the two different belt loops, I tried to make a single mold that could be turned into either one. The owl face is from the household badge.