
Then
It was a dark and stormy night (it really was). I was 7 months pregnant and therefore insane. That’s when I decided it was a great idea to recreate the undersleeves of Dorothea Sabina Von Neuberg . Armed only with Janet Arnold, fuzzy internet pictures, and inspiration I began.
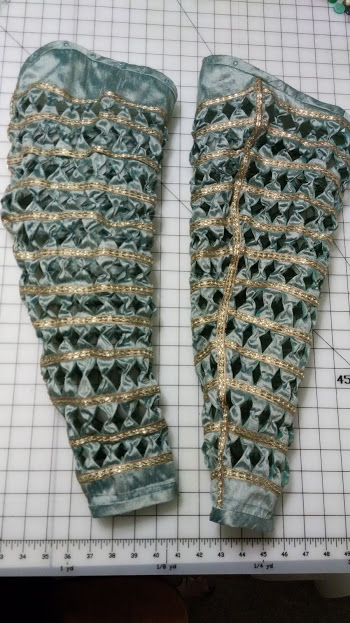
The original sleeves were made from golden yellow satin, trimmed in with metal bobbin lace. [1] Silk satin is a wonderful fabric. Beautiful, shiny and a weave that allows it to be cut, slashed, and generally abused; satin can still look marvelous hundreds of years later! So of course I decided to use silk dupioni from my stash that has nothing in common with silk satin other than fiber content. It frays like its goal is to escape, so right away some changes from the original were made.
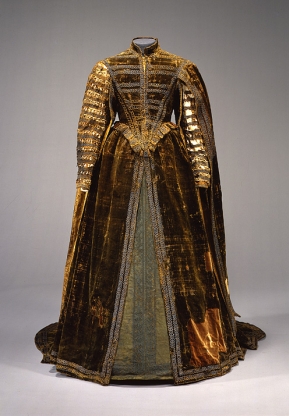
Sabine von Neuburg gown, 1598
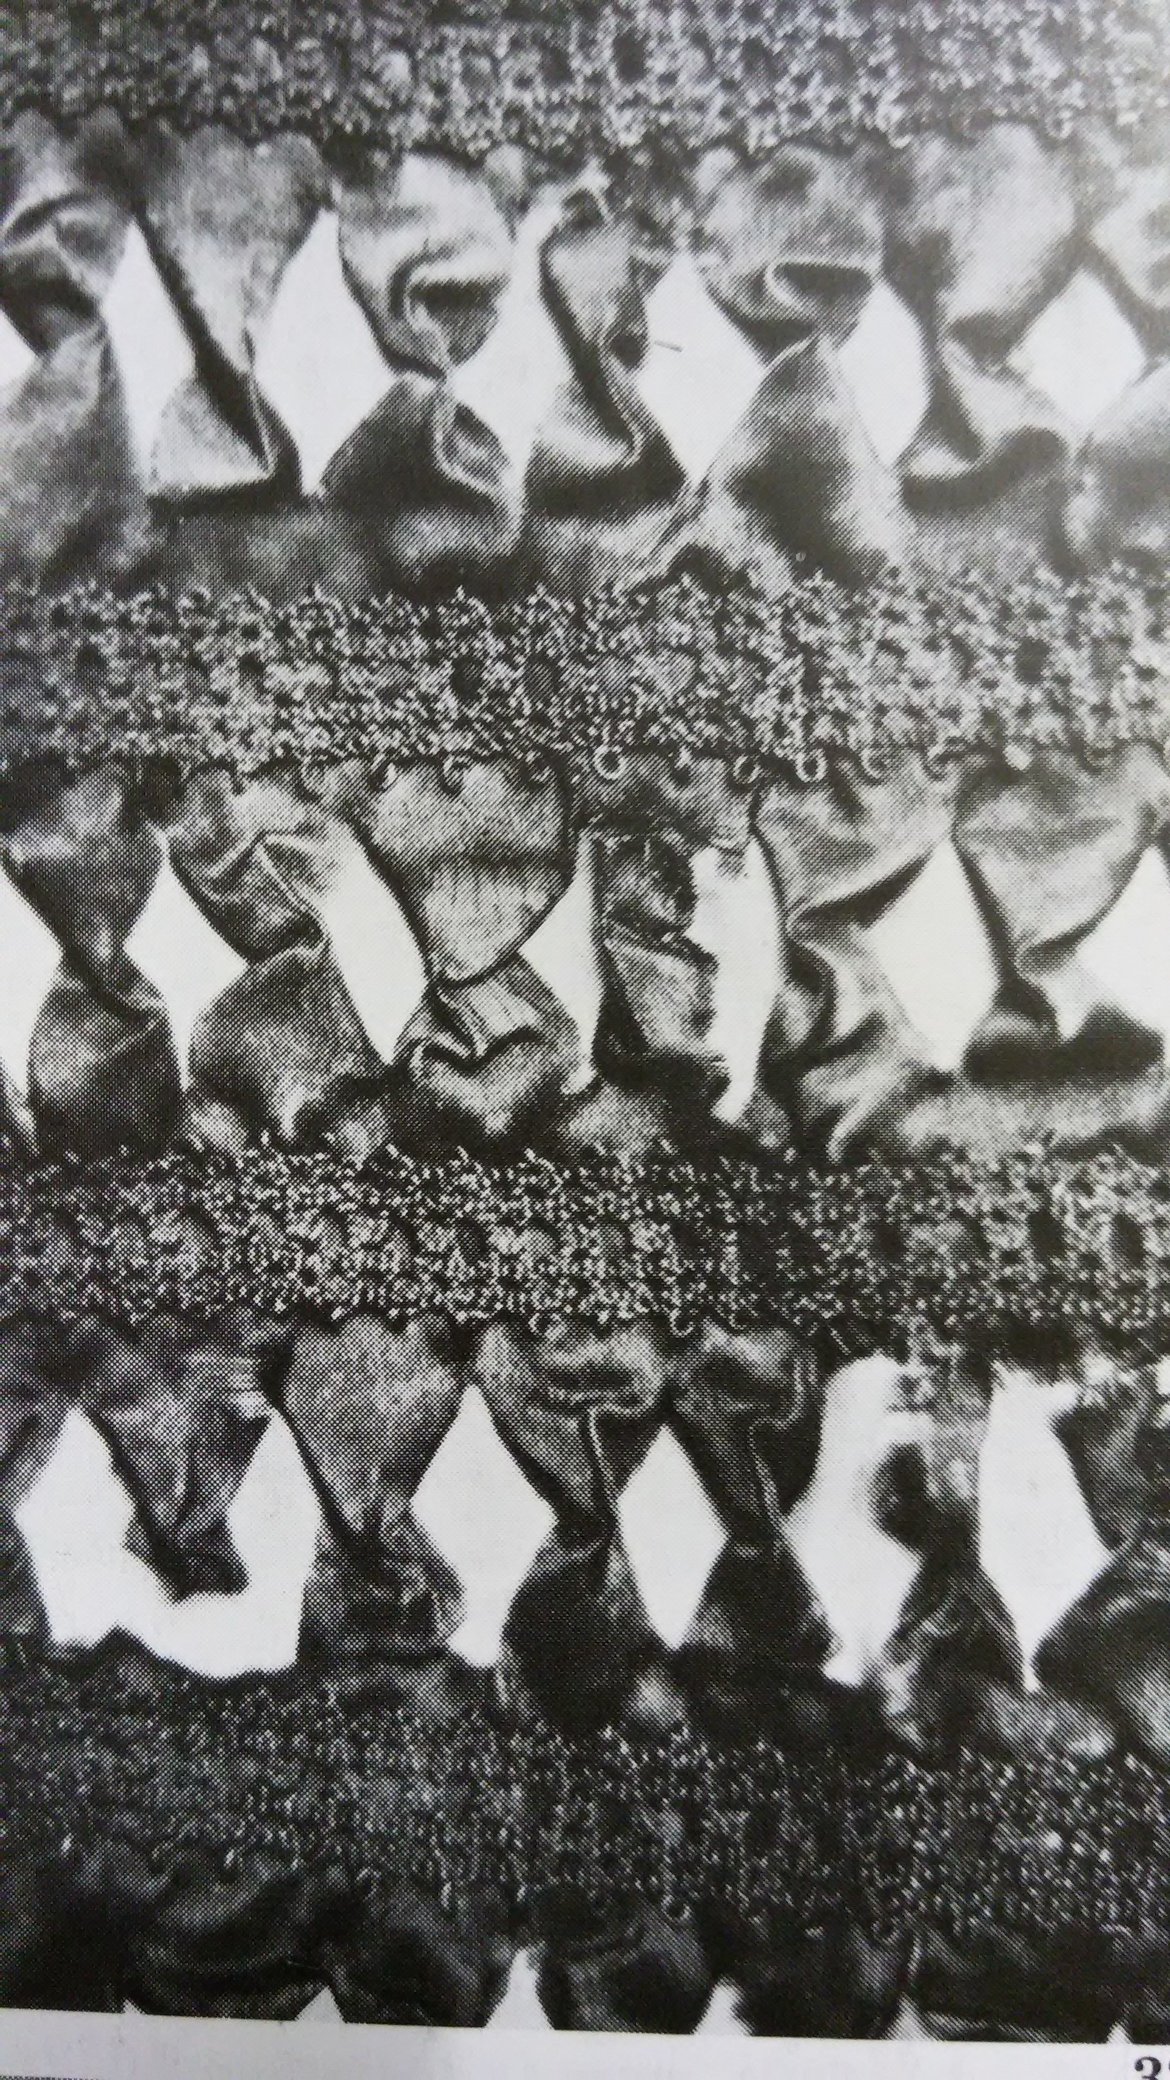
Detail Neuberg sleeve, Arnold 47
I drafted a sleeve to fit me similar in shape to the original and made it a bit wider to accommodate the shrinking that would occur with the gathered slashes. I traced this shape on to my dupioni, marked vertical lines for slashes, and horizontal lines for the trim placement. I then used fray check on the vertical lines that were to be slashed and let it dry.
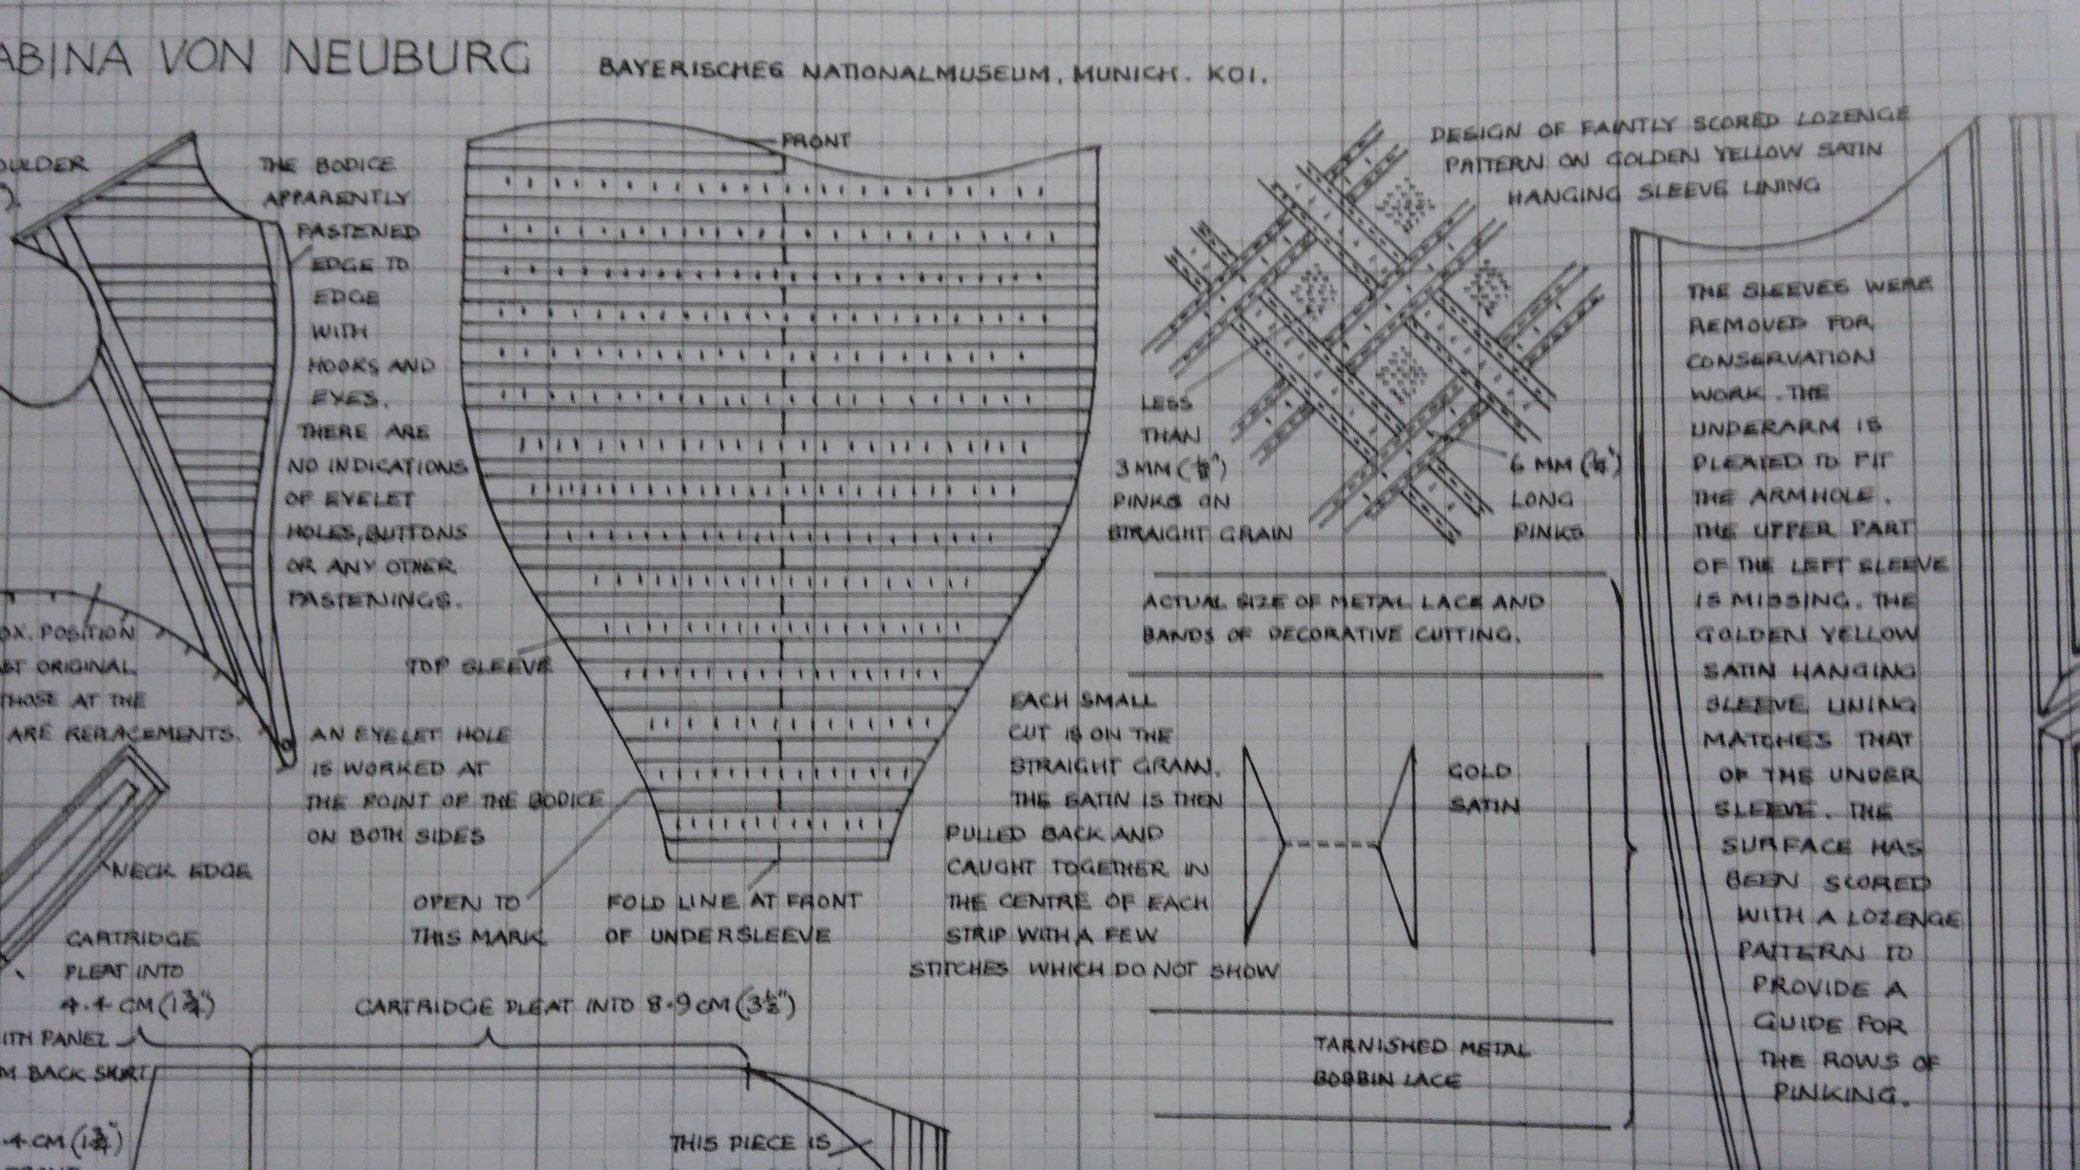
Diagram of Neurburg sleeve. Arnold 114
I planned to sew it all by hand, but quickly discovered that it was almost impossible to sew through my trim, so all the gold bands were sewn on by machine. Next came the slashes and gathering! I slashed each row as I did it to reduce the amount of fraying. Each slash was gathered together on the back side with small stiches. After a few rows of this the project was abandoned for 5 years.
Now
Two kids later I have another project started “Frozen Florence”, making a dress inspired by Anna’s in the Disney movie Frozen, but interpreted into 1560’s Florence. I found the started sleeves in my stash and am thrilled that they are the perfect aqua color to go along with this outfit. In the past 5 years I have gotten a bit faster with handwork, so they have been finished up a lot faster than I thought possible!
Unfortunately, I did not adequately account for the amount of shrinkage in length that would occur, 2.5 inches! This meant that I needed to do a binding instead of folding and hemming. Thankfully I had saved some of the silk scraps. To strengthen the top in order to place eyelets, I added a strip of 3.5 oz linen inside the binding. The bindings are slip stitched closed. The top of each sleeve currently has 7 eyelets sewn in silk twist. I used whip stitch and made two passes around each opening.
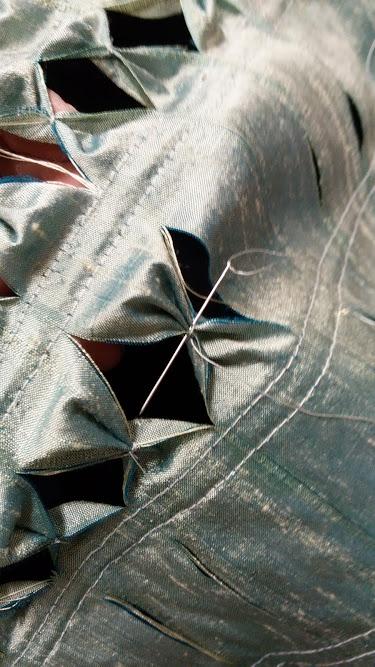
Gathering the backs of the slashes.
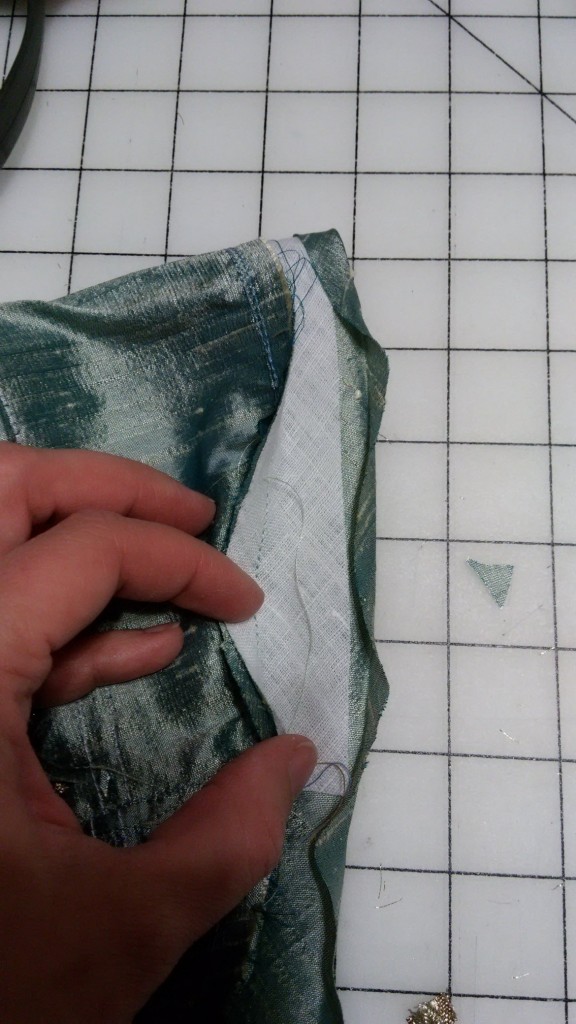
Bias binding and linen strip
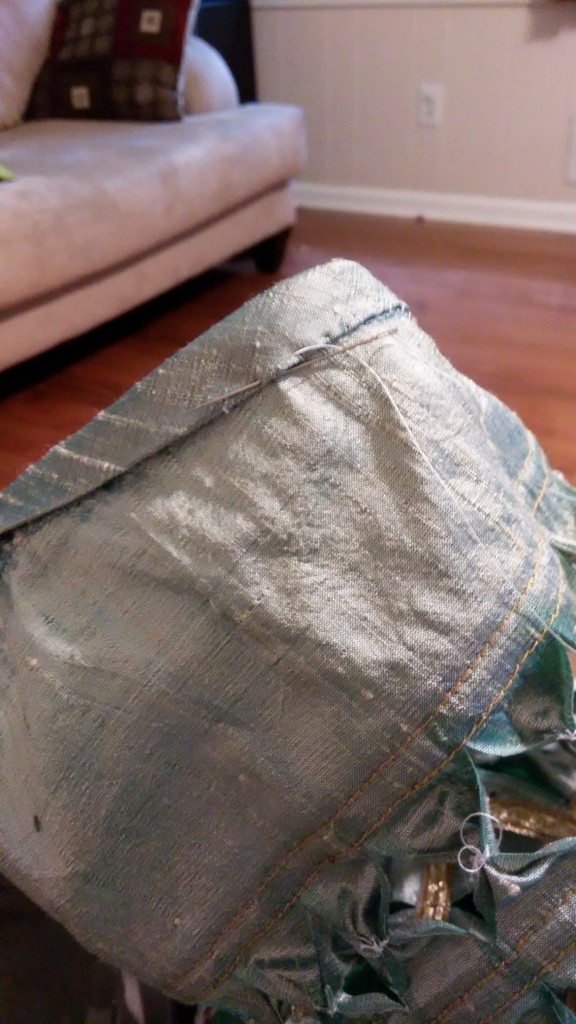
Slip stitch used to finish the bias tape.
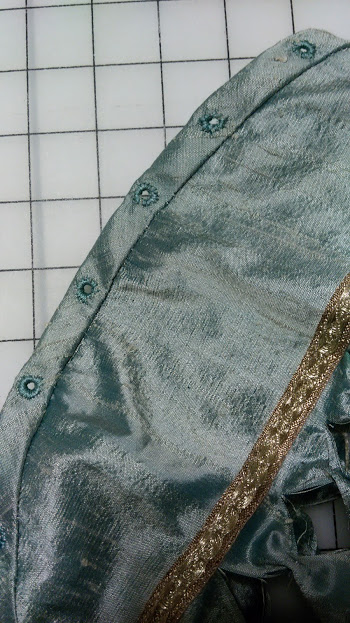
Eyelets using whip stitch
The same gold trim was used to cover the seam up the back. Finished! They have amazing body and are much sturdier than I thought they would be. Still, I do not recommend using dupioni for this if you want to enjoy making sleeves.
[1] Arnold, Janet. Patterns of Fashion” the cut and construction of clothes for men and women c1560-1620. Macmillan 1985. IBSN 0-89676-083-9. Pg. 339
Remarkable job! Really makes me want to start yet another project! LOL
I can’t wait to see the entire outfit!